
Related Manuals for Philips AZ1880/12


Summary of Contents for Philips AZ1880/12
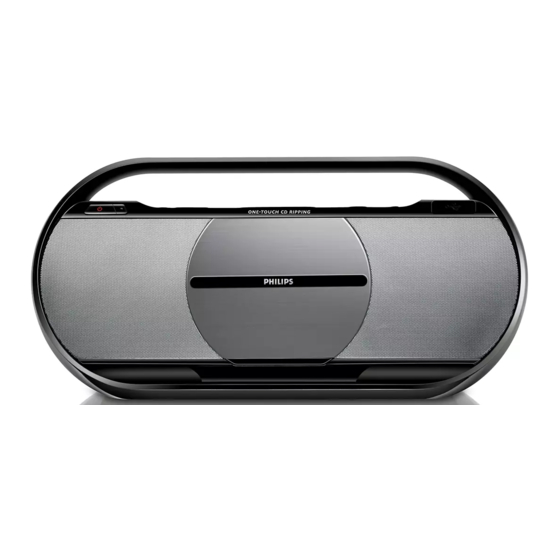
- Page 1 Register your product and get support at www.philips.com/welcome AZ1880 EN User manual...
-
Page 3: Table Of Contents
Contents 1 Important Safety Notice 2 Your CD Soundmachine Introduction What’s in the box Overview of the main unit Overview of the remote control 3 Get started Prepare the remote control Select power supply Turn on 4 Play Play disc Play from USB 5 Play options Repeat and random play Program tracks 6 Adjust sound Adjust volume Mute sound Enhance bass Listen through headphone 7 Listen to radio Tune to a radio station Program radio stations automatically Program radio stations manually Select a preset radio station... -
Page 4: Important
1 Important Safety a Read these instructions. b Keep these instructions. c Heed all warnings. d Follow all instructions. e Do not use this apparatus near water. f Clean only with dry cloth. g Do not block any ventilation openings. Install in accordance with the manufacturer’s instructions. -
Page 5: Notice
• Do not turn up the volume so high that you can’t hear what’s around you. • You should use caution or temporarily discontinue use in potentially hazardous situations. Do not use headphones while operating a motorized vehicle, cycling, skateboarding, etc.; it may create a traffic hazard and is illegal in many areas. Notice This product complies with the radio interference requirements of the European Community. This product complies with the requirements of the following directives and guidelines: 2004/108/EC + 2006/95/EC Any changes or modifications made to this device that are not expressly approved by Philips Consumer Lifestyle may void the user’s authority to operate the equipment. The making of unauthorized copies of copy-protected material, including computer programs, files, broadcasts and sound recordings, may be an infringement of copyrights and constitute a criminal offence. This equipment should not be used for such purposes. Recycling Your product is designed and manufactured with high quality materials and components, which can be recycled and reused. When you see the crossed-out wheel bin symbol attached to a product, it means the product... -
Page 6: Your Cd Soundmachine
Typeskilt finnes på apparatens underside. Observer: Nettbryteren er sekundert innkoplet. Den innebygde netdelen er derfor ikke frakoplet nettet så lenge apparatet er tilsluttet nettkontakten. For å redusere faren for brann eller elektrisk støt, skal apparatet ikke utsettes for regn eller fuktighet. 2 Your CD Soundmachine Congratulations on your purchase, and welcome to Philips! To fully benefit from the support that Philips offers, register your product at www.Philips.com/welcome. Introduction With this unit, you can enjoy audio from discs, USB devices, external devices, or radio stations. The unit offers you Dynamic Bass Boost (DBB) to enrich sound. The unit supports the following media formats: What’s in the box Check and identify the contents of your package: • Main unit •... -
Page 7: Overview Of The Main Unit
Overview of the main unit a TUNING +/- • Skip to the previous/next track. • Search within a track/ disc/USB. • Tune to a radio station. • Stop play or erase a program. c SOURCE • Select a source. • Turn on or off the unit. e iR • Remote sensor. f ALB/PRESET/ / • Skip to the previous/next album. • Select a preset radio station. • Start or pause play. h Disc compartment door • Open the disc compartment. - Page 8 q FM antenna • Improve FM reception. r DC IN • Jack for the supplied AC adaptor. s Battery compartment door • Jack for the headphone. u MP3 LINK • Audio input jack (3.5mm ) for an external audio device.
-
Page 9: Overview Of The Remote Control
MUTE • Mute volume. 3 Get started Caution • Use of controls or adjustments or performance of procedures other than herein may result in hazardous radiation exposure or other unsafe operation. Always follow the instructions in this chapter in sequence. If you contact Philips, you will be asked for the model and serial number of this apparatus. The model number and serial number are on the bottom of the apparatus. Write the numbers here: Model No. __________________________ Serial No. ___________________________ Prepare the remote control Caution • Risk of explosion! Keep batteries away from heat, sunshine or fire. Never discard batteries in fire. -
Page 10: Select Power Supply
Close the battery compartment. Note • If you are not going to use the remote control for a long time, remove the battery. • Battery contains chemical substances, so it should be disposed of properly. Select power supply The unit can be operated by AC power or batteries. AC power Caution • Risk of product damage! Ensure that the power supply voltage corresponds to the voltage printed on the bottom of the unit. • Risk of electric shock! When you unplug the AC adaptor, always pull the plug from the socket. Never pull the cord. • Before connecting the AC adaptor, ensure you have completed all other connections. Note • The type plate is located on the bottom of the main unit. Connect one end of the AC adaptor to the DC IN socket on the main unit. Connect the other end of the AC adaptor to the wall outlet. Battery power Open the battery compartment on the bottom of the unit. Insert 6 R14/UM2/C Cell batteries (not included) with correct polarity (+/-) as indicated, then close the battery... -
Page 11: Turn On
Note • Batteries contain chemical substances, so they should be disposed of properly. Turn on Press . The backlight on the display panel » turns on. Turn off Press again to turn off the unit. The backlight on the display panel » turns off. 4 Play Play disc Press SOURCE repeatedly to select the disc source. Slide to open the disc compartment. Insert a disc with the printed side facing outward, and close the disc compartment. Press to start play. • To pause/resume play, press • To stop play, press • To select another track, press • To select an album, press PRESET / . •... -
Page 12: Program Tracks
• : the current track is played repeatedly. • : all tracks are played repeatedly. • : all tracks are played randomly. To return to normal play, press MODE repeatedly until play mode is no longer displayed. • Shuffle play cannot be selected when you play programmed tracks. Program tracks You can program a maximum of 40 tracks. At CD/USB mode, in the stop position, press PROG to activate the program mode. [PROG] (program) is displayed. » For MP3/WMA tracks, press ALB/ PRESET/ / to select an album. Press to select a track number, then press PROG to confirm. Repeat steps 2 to 3 to select and store all tracks to program. Press to play the programmed tracks. During play, [PROG] (program) is » displayed. • To erase the program, in the stop position, press . 6 Adjust sound Adjust volume During play, press VOLUME + / - to... -
Page 13: Program Radio Stations Manually
You can record the audio files on a disc into a USB device. Audio CD tracks and MP3 files are recorded in .mp3 format, and WMA files are recorded in .wma format. The first time you record to USB, a folder called ‘PHILIPS’ is automatically created in the USB device. Each time you record to USB, the recorded files are stored in a sub-folder in the ‘PHILIPS’ folder. Files and sub-folders are named numerically in the order in which they are created. Record from CD to USB Prepare for recording Plug the USB device into the socket of the unit. Press SOURCE repeatedly to select the disc source. Load a disc. -
Page 14: Delete Files In The Usb Device
FM: 87.5 - 108MHz; MW: 531 - 1602kHz Tuning grid 50KHz (FM); 9KHz (MW) Number of 40 (FM + MW) presets USB version V2.0/1.1 Playability MSC/MTP devices Recordability MSC devices Output power 2 x 2.5W RMS AC power Input: 100-240V~, 50/60Hz, 800mA MAX (0.7A); Output: 9V 1.6A (1.56A); Brand name: Philips; Model: OH-1028A0901600U-VDE (AS140-090-DF) Operation power consumption Dimensions Main Unit 451 x 214.4 x 132.3 mm (W x H x D) Weight 2.15kg USB flash memory (USB 2.0 or USB 1.1) USB flash players (USB 2.0 or USB 1.1) memory cards (requires an additional card reader to work with this unit) USB or memory file format FAT12, FAT16, FAT32 (sector size: 512 bytes) MP3 bit rate (data rate): 32-320 Kbps and variable bit rate... -
Page 15: Supported Mp3 Disc Formats
11 Troubleshooting Warning • Never remove the casing of this apparatus. To keep the warranty valid, never try to repair the system yourself. If you encounter problems when using this apparatus, check the following points before requesting service. If the problem remains unsolved, go to the Philips web site www. philips.com/welcome. When you contact Philips, ensure that the apparatus is nearby and the model number and serial number are available. No power/No sound • Ensure that the AC power plug of the unit is connected properly. • Ensure that there is power at the AC outlet. • Ensure that the batteries are installed correctly. •... - Page 16 • Wait until the moisture condensation at the lens has cleared. • Replace or clean the disc. • Use a finalized CD or correct format disc. Remote control does not work • Before pressing any function button, first select the correct source with the remote control instead of the main unit. • Reduce the distance between the remote control and the unit. • Insert the battery with its polarities (+/– signs) aligned as indicated. • Replace the battery. • Aim the remote control directly at the sensor on the front of the unit. Poor radio reception • Increase the distance between the unit and your TV or VCR. • Fully extend and adjust the FM antenna. Cannot display some files in USB device •...
- Page 18 © 2009 Koninklijke Philips Electronics N.V. All rights reserved. AZ1880_12_UM_V3.0...
Need help?
Do you have a question about the AZ1880/12 and is the answer not in the manual?
Questions and answers