Table of Contents

Summary of Contents for Spectral Products AD111
- Page 1 AD111 Photomultiplier Amplifier USB 2.0 User Manual Ver.1.2 SPECTRAL PRODUCTS 2659 Pan American Fwy, Suite A, NE Albuquerque, NM 87107 Ph. (505) 343-9700 Fax (505) 343-9705 email: sales@spectralproducts.com www.spectralproducts.com...
- Page 2 The staff at Spectral Products will be happy to answer any questions about our products and our services. For immediate assistance, please contact the Spectral Products Group directly at (505) 343-9700, by fax (505) 343-9705, or by e-mail at sales@spectralproducts.com...
-
Page 3: Table Of Contents
Data Collection Parameters..................17 TROUBLESHOOTING ................19 APPENDICES ..................... 20 5.1. Appendix A: USB 2.0 Port .....................20 5.2. Appendix B: AD111 Reference Drawings ..............21 Spectral Products 2659 Pan American Fwy, Suite A, NE Albuquerque, NM 87107 Ph. (505) 343-9700 Fax (505) 343-9705... -
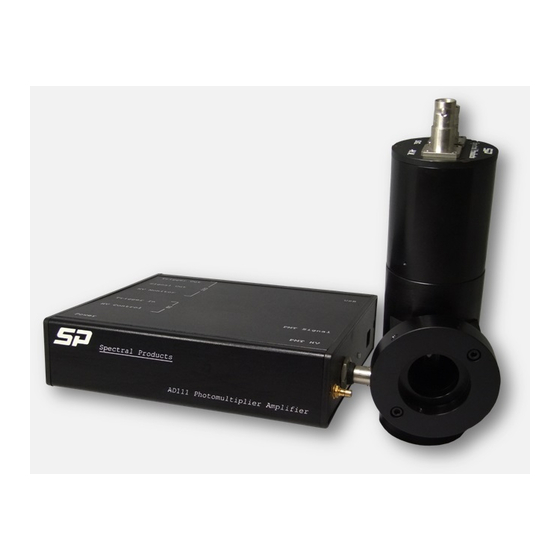
Page 4: Product Overview And Specifications
PC. (The Digikrom monochromator uses one serial port and the AD111 uses one USB port.) An easy to use program is also included that allows full control of both PMT and monochromator. It graphically displays wavelength versus intensity, intensity versus time, and allows ASCII data storage for importing to other user interfaces as desired. -
Page 5: Installation
To install the LabView 6i Runtime Engine select the tab “LABVIEW RUNTIME” and select version 6, then “Exit”. Follow the Installation Wizard. To install the program to run the AD111 as stand alone or in conjunction with a Digikrom monochromator, select the tab “DETECTORS” and select “AD111 CM/DK LabView Exe”, then “Exit”. Follow the Installation Wizard. -
Page 6: Hardware Setup
Spectral Products 2.4. HardWare SetUp The AD111 internal power supply can handle voltages from 100VAC to 240VAC. Make sure you have the appropriate AC cord. Insert the photo tube inside the PMT tube. Extreme care must be taken when handling the photomultiplier tube as fingerprints may cause serious degradation in the tube performance. -
Page 7: Usb Installation Pop-Up Windows
Installation Spectral Products 2.4.2. USB Installation Pop-up Windows After connecting the USB AD111 controller to a computer for the first time the following windows will be displayed if using Windows XP. 1. Welcome to the Found New Hardware Wizard 2. Found New Hardware Wizard Click ‘Next’... -
Page 8: Getting Started
Getting Started 3.1. Main Screen The default screen of the AD111/CM/DK Executable program (SPAD111.vi) consists of a display area with active buttons and a menu bar across the top. This and other LabVIEW programs are referred to as Virtual Instruments (VIs) and the control display screen is called the “front panel”. -
Page 9: Setup Screen
• Trigger Source: Ext. Trigger allows AD111 to operate using an external triggering from the Trigger In port on the controller Level Trigger causes the AD111 to ignore external voltages below a certain value (as set by Trigger... -
Page 10: Menus
Getting Started Spectral Products 3.3. Menus 3.3.1. File Menu • Open displays data from a x, y data file to the graph • Save saves the current x, y data on the screen into 'x tab y' format file. • Close closes the active window and does not save any changes you have made. -
Page 11: Ad111 Menu
Spectral Products 3.3.4. AD111 Menu • ADstatus reads the data saved in the Eeprom of the AD111. Eeprom values are high voltage, RC constant, gain, trigger value, trigger source, HV source, HV control source, firmware version, DC power, and sample average. - Page 12 Getting Started Spectral Products • Calibrate allows recalibration of the monochromator positioning scale factor. A source of known wavelength is needed for recalibration. The user must first execute a scan and note the displayed peak value. Calibrate should always be used immediately after using the ZERO command.
- Page 13 Getting Started Spectral Products • Zero allows the recalibration of the position of the zero order transmission of the monochromator. The user must first execute a Zero Scan and note the value (in steps) of the zero order transmission peak.
-
Page 14: Help Menu
Getting Started Spectral Products 3.3.7. Help Menu • Show Context Help: A Context-sensitive Help window that displays the VI’s parameters, parameter type definitions, and the description for the object. • About - Information on LabVIEW software version number and serial number. -
Page 15: Front Panel Control And Indicators
Getting Started Spectral Products 3.5. Front Panel Control and Indicators. The front panel of the SP AD111.vi displays the graph, graph controls, and collection parameters. SP AD111.vi Figure 5. Program Main Screen 3.5.1. Graph Control Autoscale Dropdown Box may be used to select autoscaling for the Y axis. - Page 16 Getting Started Spectral Products AutoScale (X or Y) turns autoscaling on or off of the appropriate axis. With autoscale off graph scale may be adjusted by highlighting a value along an axis and typing in a new value. Lock Scale - Clicking the lock switch causes the graph to continuously autoscale (when slider appears to the right).
-
Page 17: Data Collection Parameters
Getting Started Spectral Products 3.5.2. Data Collection Parameters Actual HV displays the voltage supply to the PMT. Current λ displays the current wavelength of the monochromator UNIT displays the current units used in the graph and the scan setup screens. (Selectable for CM only under menu item CmDk:Units.) - Page 18 Getting Started Spectral Products Scan Start: Enter the start wavelength of the scan End: Enter the end wavelength of the scan Step: Enter the step size for the scan. Detector Setup: Opens the Detector Setup Screen (see , pg. 9) Figure 4 Slitwidth: (DK models only) Used to adjust the width of entrance and exit slit.
-
Page 19: Troubleshooting
Manager. Expand the ‘Universal Serial Bus controllers’ folder by clicking the plus sign and look for the AD111 driver with the name "AD111 PMT, SPECTRAL PRODUCTS, USB-2.0". If you do not see the name, unplug the USB & power cables then plug them back in. If you still cannot find the name, reinstall the AD111 driver. -
Page 20: Appendices
The USB connection requires a cable with a USB type B connector at the Spectrometer and a computer USB port type A. Spectral Products supplies a USB 2.0 plug type A to plug type B cable for connecting to AT, PS2, and MAC style computers. -
Page 21: Appendix B: Ad111 Reference Drawings
Appendix B Spectral Products 5.2. Appendix B: AD111 Reference Drawings Figure 7. PC Board Layout Spectral Products 2659 Pan American Fwy, Suite A, NE Albuquerque, NM 87107 Ph. (505) 343-9700 Fax (505) 343-9705... - Page 22 Appendix B Spectral Products RC Constant Figure 8. Block Diagram Spectral Products 2659 Pan American Fwy, Suite A, NE Albuquerque, NM 87107 Ph. (505) 343-9700 Fax (505) 343-9705...
- Page 23 Function spTestBoard() should be called first to get and set the appropriate information of the board. Then spSetHv(), spSetRC(),spSetGain(), spSetTrigLevel(), spSetTrigSource(), spHvSource(), spSetAvg(). For AD111 status call spReadInfo(), and for data call spReadDataEx(). Call spCloseEx() as the last function before exiting the AD111 software. RETURN RETURN...
- Page 24 Appendix C Spectral Products RETURN RETURN Function Name Description when when successful unsuccessful spHvSource Sets the source of high voltage. Zero A non-zero short spHvSource sHvSource can be 0 for External high voltage number control, or 1 for Software control...
- Page 25 Long *1Array function. Note: This function uses together with spPulseData, and for ‘External trigger’ only. This function reads data from the AD111 and Zero A non-zero spPulseData is called right after the spPulseCmd function.
Need help?
Do you have a question about the AD111 and is the answer not in the manual?
Questions and answers