Table of Contents
Advertisement
Quick Links
INfaa029V01_UK
370-103V70
CHI L DREN ELECTRI C MOTORCYCLE MANUAL
●Suitable age 37-95 months.
●This product should be assembled by adult.
●This instruction contains important safety information
content,please keep it as a reference.
● Music,light
● Forward and backward
IMPORTANT, RETAIN FOR FUTURE REFERENCE: READ CAREFULLY
ASSEMBLY INSTRUCTION
Advertisement
Table of Contents

Related Manuals for HOMCOM 370-103V70


Summary of Contents for HOMCOM 370-103V70
- Page 1 INfaa029V01_UK 370-103V70 CHI L DREN ELECTRI C MOTORCYCLE MANUAL ●Suitable age 37-95 months. ●This product should be assembled by adult. ●This instruction contains important safety information content,please keep it as a reference. ● Music,light ● Forward and backward IMPORTANT, RETAIN FOR FUTURE REFERENCE: READ CAREFULLY...
-
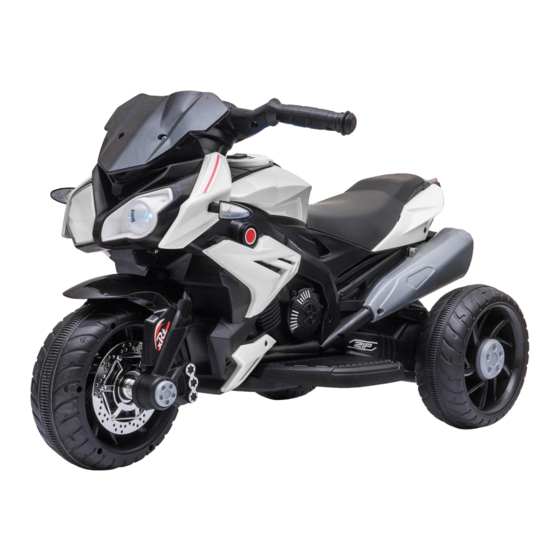
Page 2: About The Products
About the products Thank you for choosing our children electric motorcycle.We always keep pursuing being outstanding and designing comfortable and safe ride on car for children. Please read this instruction carefully before use,it will tell you the right way of assembling and operating.To avoid incorrect operations damaging the product or injuring your children. - Page 3 Q'ty Q'ty Part Part Part Part Part Picture Picture (pcs) (pcs) Number Number Name Name Name Front Foot wheel board Right Left rear rear wheel wheel (Plum) Rear Rear axle Front Front fork axle Wrench Charger License Front plate Gasket Screw Steering lamp...
- Page 4 Explosion map Main body Head stock Front fender Handlebar Front wheel Foot board Right rear wheel Left rear wheel Rear axle Rear cap Front fork Front axle License plate Front cap Gasket Steering lamp Windshield...
-
Page 5: Front Wheel Installation
Assembling The vehicle should be assembled by adult before use.It will take 30minutes to complete. The small parts might cause choke,please keep away from the children. Please check the number of the parts before assembling,and keep the packaging bags away from the children in in case of choke. 1.Front wheel installation Figure take off the front axle, the fender set in the front fork pipe.Turn the front axle from left to right through the gasket, front fork tube, gasket, front... -
Page 6: Handlebar Installation
2.Handlebar installation Place the front wheel assembly in the corresponding position of the car body , fit the handlebar and screw it. 3.Installation of head First, install the windshield on the front of the head stock, and install the steering lamp to the front hole.Connect the wire terminal with the body, then clip the two feet of the head into the corresponding position of the body, finally fix with two screws. -
Page 7: Pedal Installation
4.Installation of rear wheel Insert the rear axle through the gearbox axle hole from the side of the body into the axle hole of the body, place the wheels on the left and right side respectively, install the motor, gasket and wheels as shown in the picture, then lock them with nuts and put the rear wheel cap on the outside. -
Page 8: Connection Power Supply
6.Installation of license plate As shown in the picture, the license plate is inserted into the corresponding hole of the body , and the license plate is fixed in the body with two screws. 7.Connection power supply Open the seat cushion,connect the red power cord with the red end ... - Page 9 Warnings For children' s safety, please read these carefully. Assembly and adjustment must be done by adults, keep children away. Keep children under 36 months away from small parts. Do not be closeto fire. Adult must teach how to play it and never leave children alone for playing. Do not stand up or play when children are stepping on foot pedal.
- Page 10 Function ① ② Button function ① Charging hole ② Forward stop backward button ③ Horn button ④ Music button ⑤ ⑤ Power button ③ ④ Charging steps are as follows: Step 1 : The charging hole is under the handlebar. Step 2 : Put the charger plug into the plug hole.
-
Page 11: Maintenance And Service
Maintenance and Service • Check battery, charger and other spare parts regularly. If any problem, please fix it before playing. • Use lubricating oil to care iron parts. Keep car away from fire and sunshine. • Park it on the even place, not reversal orgradient. •...
Need help?
Do you have a question about the 370-103V70 and is the answer not in the manual?
Questions and answers