Table of Contents
Advertisement
Advertisement
Table of Contents

Subscribe to Our Youtube Channel
Related Manuals for centauro SP Series

Summary of Contents for centauro SP Series
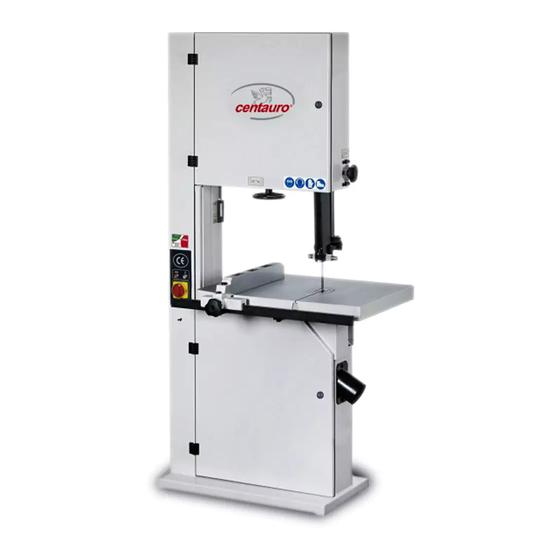
- Page 1 BAND SAW SP SERIES USE AND MAINTENANCE MANUAL I I I I I F F F F F D D D D D 2 2 2 2 2 NOTICE: read the instructions booklet carefully and keep it for future reference...
-
Page 2: Table Of Contents
TABLE OF CONTENTS WARRANTY ..............................4 TECHNICAL PARTICULARS ......................... 4 STANDARD EQUIPMENT OF THE MACHINE ....................4 ACCESSORIES ON REQUEST ........................5 MACHINE SPECIFICATION LABEL ......................5 NOISE EMISSION ............................5 DUST EMISSION ............................5 INDIVIDUAL PROTECTION FACILITIES......................5 FORESEEN USE OF THE MACHINE AND CONTRA-INDICATIONS OF USE ..........6 10. - Page 3 14. USING THE MACHINE ..........................13 14.1. Fitting and adjusting the blade ......................13 14.2. Blade guide adjustment ........................14 14.3. Table block insert ..........................14 14.4. Extraction boards ..........................14 14.5. Cutting with guide ..........................14 14.6. Angled cuts device (when fitted) ....................... 15 14.7.
-
Page 4: Warranty
WARRANTY Warranty consists of the replacement free of charge of defective mechanical parts, which will be shipped to you free at our plant. It is valid for one year as of the date of our invoice and does not include the motors and electric and electronic components. -
Page 5: Accessories On Request
ACCESSORIES ON REQUEST • Motor with uprated power: • Single-phase version (SP400 - SP500 - SP600) • Bottom precision guide blade • Ground table • Grooved table with light fence for angular cuts • Grooved table with hard fence for angular cuts •... -
Page 6: Foreseen Use Of The Machine And Contra-Indications Of Use
FORESEEN USE OF THE MACHINE AND CONTRA-INDICATIONS OF USE The machine has been designed and made to cut pieces of wood or similar materials (cork, cardboard, plastic materials, chipboard panels), in the dimensional limits indicated in the technical data and in compliance with the safety, use and maintenance instructions given in this manual. -
Page 7: Insufficient Or No Power Supply To The Power And Control Circuits
11.2. Insufficient or no power supply to the power and control circuits Cutting off, resetting or changing the electrical power supply in any sense creates no situation of danger. In particular, they do not produce: • untimely starting • an obstacle to stopping if the order has already been given •... -
Page 8: Emission Of Shavings And Dust
11.4.3. Emission of shavings and dust See paragraph 7. 11.4.4. Electricity The electric system is in conformity with the EN60204-1 standards. 11.4.5. Ergonomics and positioning All the controls have been positioned in relation to the ergonomic and anthropometric data, they are therefore fully visible and easily operated from the work position. -
Page 9: During Work
12.4. During work • Always start up extraction even if cutting just a single piece. • Do not use blades that are not sharp enough as they can produce abnormal vibration. • In the event of trouble, never act on the machine in movement: operate the stop control and wait for it to stop completely. -
Page 10: Installation
INSTALLATION 13.1. Overall dimensions Fig. 13-1 Overall dimensions 13.2. Workplace Length required for the machine Length required for work and maintenance Auxiliary length required Width required for the machine Width required for work and maintenance Auxiliary width required The working area must be sufficiently lighted (with 300 lux at least). -
Page 11: Lifting
13.3. Lifting Lifting is done by passing a rope through the holes in the top of the machine. Weights: SP 400 Kg 120 SP 500 Kg 125 SP 600 Kg 240 SP 700 Kg 300 SP 800 Kg 490 Do not lift or move the machine by acting directly on the work table block. -
Page 12: Starting
Fig. 13-6 Starting Fig. 13-4 Starting Fig. 13-5 Starting 13.7. Starting Check beforehand that the doors are properly closed, the emergency stop button is not in the auto-detent position and that the telescopic protection of the blade is fully lowered onto the table block. In the models equipped with a switch having an electric brake, once the lockable cover has been raised, press the green start button O (fig. -
Page 13: Using The Machine
USING THE MACHINE 14.1. Fitting and adjusting the blade Open the doors with the machine at a standstill. With the machine stationary, open the doors, the protection door under the table block, and the transparent protection E (fig. 14-1) of the top blade guide (pull, then turn, revealing the slot through which the blade passes). -
Page 14: Blade Guide Adjustment
14.2. Blade guide adjustment The blade guide thrust wheel must never be adjusted in contact with the back of the blade, but at a distance of 3÷4 mm. If the blade is sharp and the feed force regular, it must not trip. On the contrary, the side wheels must skim over the blade, though without locking it, since they have the specific task of eliminating its vibrations, due to sawing. -
Page 15: Angled Cuts Device (When Fitted)
14.6. Angled cuts device (when fitted) To make angled cuts to use the mitre fence supplied with the machine. It is equipped with a guide that has to be inserted in the groove on the table block and a goniometer to adjust the cutting angle. On unloosing the screws Z (fig. - Page 16 2) Appropriate toothing for the work to be carried out The shape of the tooth should be chosen in relation to the type of wood to be cut: Ordinary toothing is suitable for dry and seasoned woods, spaced toothing is suitable for soft, green or fibrous and even resinous woods, the gullet tooth is better if you have a sharpener suitable for sharpening this type of tooth.
-
Page 17: Maintenance
5) Rational welding, well flattened and straight The welding may be done in two ways: with the brazing system by overlapping, or by electric melting by means of automatic machines. In the first case (brazing), the ends of the blade are cut square and bevelled so that they can overlap for a section of ten times the thickness of the blade (fig. -
Page 18: Flywheel Ring Seal Replacement
16.1.3. Flywheel ring seal replacement On some types of machine the seal covering the outer face of the flywheels (at the part in contact with the blade) is composed of a closed ring in a special material that requires no gluing. If the machine is always kept correctly registered, the wear on this seal is virtually null, so its service-life is virtually unlimited. -
Page 19: Maintenance Of The Electromagnetic Brake
16.2. Maintenance of the electromagnetic brake AIR GAP (r) As explained above, when the stop control is operated, the flywheels stop in a time of under 10 seconds. If on models equipped with a self-braking motor, with use, you notice this time getting longer, it is necessary to adjust the brake on the motor. -
Page 20: Main Trouble And Relative Remedies
MAIN TROUBLE AND RELATIVE REMEDIES l l i l l i l l i l l i l l i f i l f i l f i d o l l n i l s t i , c i i h t i h t y l f... -
Page 21: Safe Work Procedures (Tc142 Wg3)
SAFE WORK PROCEDURES GENERALLY For the safe work procedures the provisions of Appendix A of EN 1807. ADJUSTING THE MACHINE A.2.1 To ensure that a band saw works precisely and efficiently, it is essential for: the type of blade to be suited to the material to be cut; the machine to be equipped with a blade of the correct width required by the operation carried out;... - Page 22 OPERATION OF THE MACHINE A.3.1 The above described adjustable guard must be positioned as close as possible to the piece. A.3.2 The blade or pulley of a band saw must never be cleaned manually with a brush or scraper while the blade is moving.
- Page 23 A.3.7 BEVELLED CUT The bevelled cut is generally made by tilting the guide. With machines with a fixed table, however, there must always be a support held firm by a jig. At the end of the cut it is expedient to use a rod to push the piece.
- Page 24 A.3.13 CIRCULAR CUT The jig for circular cutting is shown in figure A-7. RECOMMENDATIONS CONCERNING THE PIECE A.4.1 If a table band saw or a feeder is used to cut round wood, a special locking system must be provided and used to prevent rolling or slipping, for example with hooks, wedges, or V-blocks.
- Page 25 A.6.3 The noise in loadless operation is caused by the vibration of the blade. It is possible to resort to some simple maintenance procedures to significantly reduce this phenomenon. For example, a band saw with a bad adjustment of the wheel scrapers causes a slow worsening from the maximum level of cutting noise to the minimum level of loadless noise.
- Page 26 A.9.3 The blades must be set or prepared and sharpened carefully; setting must always be done before sharpening. Setting allows obtaining teeth of a greater width than the thickness of the belt and prevents the belt rubbing against the piece and overheating. Excessive setting easily causes the blade to break. A.9.4 The information and advice given by the manufacturer for setting/sharpening, tensioning, aligning, and checking the blades must be incorporated in the users’...
-
Page 27: Spare Parts
SPARE PARTS Notice In order to ensure prompt despatch of the necessary spare parts, it is absolutely essential to keep meticulously to the following procedures: 1) Indicate the model and part number of the machine. 2) Indicate the table, code and reference number of the parts required. 3) Indicate the quantity required. - Page 28 Tab. 1 SP 400 Rif. Ref. Nr. CODICE - CODE Rif. Ref. Nr. CODICE - CODE Rif. Ref. Nr. CODICE - CODE 43042082 48200700 02230101 43042128 43042107 10160000 27111708 10140016 43042099 30020200 10170000 43042122 43042106 43042116 43042103 10010513 43042127 43040090 43042108 43042133 13101141...
- Page 29 Tab. 1 SP 400 B-29...
- Page 30 Tab. 2 SP 500 - SP 600 - SP 700 - 800 SP SP 500 SP 600 SP 700 SP 800 Rif. Ref. Nr. CODICE - CODE CODICE - CODE CODICE - CODE CODICE - CODE 43052080 43062043 43072118 43082001 27510200 27510200 27510200...
- Page 31 Tab. 2 SP 500 - SP 600 - SP 700 - 800 SP B-31...
- Page 32 Tab. 3 SP 500 - SP 600 Rif. Ref. Nr. CODICE - CODE SP 500 CODICE - CODE SP 600 CODICE - CODE 12010105 12010105 01020102 01020102 48011800 48011800 48012800 48023300 48149200 43060097 48149300 43060098 48022300 48022300 48141000 48141000 43060032 43060032 48095400 48095400...
- Page 33 Tab. 3 SP 500 - SP 600 B-33...
- Page 34 Tab. 4 SP 700 Rif. Ref. Nr. CODICE - CODE CODICE - CODE CODICE - CODE SP 700 43070221 48022300 12010206 01030102 48033200 48207500 48033700 48146900 48145300 10160000 48011900 01220405 48140900 30030300 48097100 10045052 43070222 03200303 48032600 43070042 43070148 48033700 10140027 48105400 B-34...
- Page 35 Tab. 4 SP 700 B-35...
- Page 36 Tab. 5 SP 800 Rif. Ref. Nr. CODICE - CODE Rif. Ref. Nr. CODICE - CODE 28040400 12010106 01030102 48033200 43082036 48022300 43082035 43070042 43070148 48022300 48105400 48105800 48150500 48031300 10160000 10140027 43070133 01220405 30040400 48097100 10140027 13119178 03210303 48109400 B-36...
- Page 37 Tab. 5 SP 800 B-37...
- Page 38 Tab. 6 SP 500 - SP 600 - SP 700 Rif. Ref. Nr. CODICE - CODE SP 500 CODICE - CODE SP 600 CODICE - CODE SP 700 10066763 10140026 10140026 43040066- 48096700 48096700 43040059 48097300 48106300 48207800 43070129 43070129 43070129 43052048 43060049...
- Page 39 Tab. 6 SP 500 - SP 600 - SP 700 B-39...
- Page 40 Tab. 7 SP 800 Rif. Ref. Nr. CODICE - CODE Rif. Ref. Nr. CODICE - CODE 43070153 43070129 48106300 43082031 43082032 48096900 43070177 43082030 43082034 43082033 43070182 43070172 43070145 43070165 10140026 48096700 43060030 13101181 43070158 43070157 27202900 B-40...
- Page 41 Tab. 7 SP 800 B-41...
- Page 42 Tab. 8 SP 500 - SP 600 Rif. Ref. Nr. CODICE - CODE 500 SP CODICE - CODE 600 SP CODICE - CODE - 43082028 43082028 43052089 43052089 27550109 27550109 43042113 43042113 27550108 27550108 10250001 10250001 27550107 27550107 27550106 27550106 27550105 27550105 65200005...
- Page 43 Tab.8 SP 500 - SP 600 B-43...
- Page 44 Tab.9 SP 700 - SP 800 Rif. Ref. Nr. CODICE - CODE SP 700 Rif. Ref. Nr. CODICE - CODE SP 800 43082027 43072169 43082028 43082028 43070233 43070233 43070240 43070240 10066602 10066602 12050001 12050101 12050002 12050102 12050000 12050100 12050004 12050104 12050005 12050105 12050002...
- Page 45 Tab.9 SP 700 - SP 800 B-45...
- Page 46 Tab. 10 SP 500 - SP 600 - SP 700 - SP 800 SP 500 SP 600 SP 700 SP 800 Rif. Ref. Nr. CODICE - CODE CODICE - CODE CODICE - CODE CODICE - CODE 48098801 48098801 48098801 48098801 27090000 27090000 27090000...
- Page 47 Tab. 10 SP 500 - SP 600 - SP 700 - SP 800 B-47...
- Page 48 Tab.11 SP 500 - SP 600 - SP 700 - SP 800 SP 500 SP 600 SP 700 SP 800 Rif. Ref. Nr. CODICE - CODE CODICE - CODE CODICE - CODE CODICE - CODE 12040002 12040002 12040002 12040002 43060027 43060027 43060027 43070013...
- Page 49 Tab.11 SP 500 - SP 600 - SP 700 - SP 800 B-49...
- Page 50 MACCHINE PER LA LAVORAZIONE DEL LEGNO CENTAURO S.p.a. • 41010 Limidi (Modena) Italy • Via Carpi-Ravarino, 87 • Tel 059-855411 • Fax 059-561109 e-mail: centauro@centaurospa.it • http:\\www.centaurospa.it...
Need help?
Do you have a question about the SP Series and is the answer not in the manual?
Questions and answers