Table of Contents
Advertisement
Quick Links
Advertisement
Table of Contents

Summary of Contents for Charge COMFORT 2
- Page 1 Quick start guide COMFORT 2...
- Page 2 This risk cannot be eliminated. You can minimize the risk in many ways. Begin by reading the complete Charge Bicycle Owner’s manual accompanying this bike and available online at www.chargebikes.com,...
- Page 3 The 4 Major Steps to Gett ing Your Bike Ready to Ride: 1. Install Handlebars 2. Install Front Wheel 3. Flip Down Pedals 4. Adjust Seat Height...
- Page 4 Getting Your Bike Ready for Assembly ❶ ❷ Important: Some parts of the ❸ bike packaging function as a bike stand and facilitate the assembly process. In order to ensure an easy assembly, only remove packaging when told to do so in the following instructions.
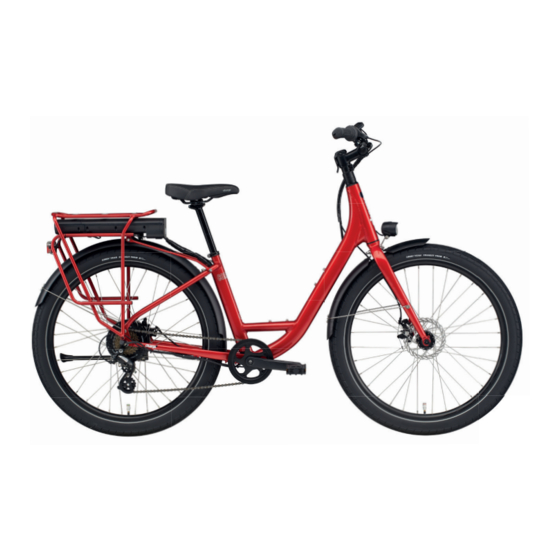
- Page 5 Key Part s of the Bike Referenced in This Guide Handlebars Seat Rear Rack Stem Front Light Battery Front Fork Seatpost Seatpost Binder Pedal Kickstand Brake Disc Rotor Front Axle Display Gear Shift Pedal Assist Selectors Horn Throttle...
-
Page 6: Step 1: Install The Handlebars
Please see the assembly video at help.chargebikes.com as well as ADJUSTMENT INSTRUCTIONS: Adjustable Stem Instructions, in your Charge Bicycle Owner’s Manual. 1. The handlebars are located in a cardboard sleeve on the right side of the bike. Slide the... - Page 7 4. Slide the handlebars so they are tight against the bike stem. 5. While holding the bars against the stem, place the faceplate on the opposite side of the handlebars and loosely thread the four, 4mm bolts into the four holes on the stem (two above the handlebars and two below).
- Page 8 Step 1: Continued 8. Grab the torque wrench from the parts box. 9. Use the positioning guide sticker to center the handlebars. When looking at the bike from the front, the sticker should be just to the left of the stem and the “Center” mark should be in-line with the gap between the stem and faceplate.
- Page 9 12. Use the torque wrench, turn the two bottom stem faceplate bolts clockwise, tightening them until you hear and feel the torque wrench click indicating the bolts have reached the required torque. 13. Ensure all faceplate bolts have reached required torque by using the torque wrench to turn the bolts clockwise, tightening them until you hear and feel the torque...
-
Page 10: Step 2: Install The Front Wheel
Step 2: Install the Front Wheel This step is particularly important to your safety. Please see the assembly video at help.chargebikes.com as well as this Quick Start Guide. 1. Use the cardboard block that says, “Save this block” and lay it flat on the ground with the side that says, “This side down”... - Page 11 6. Lift the bike over to the front wheel. 7. Lower the fork onto the front wheel until the axle is fully-engaged in the fork end. NOTE: While the wheel axle does not extend past the fork end, it is enough for the fork to rest securely, as pictured.
- Page 12 Step 2: Continued bike (looking at the headlight), use your right hand to insert the metal rod through the axle from brake disc side. 10. With your left hand, screw the axle nut onto the axle rod, making sure the large end of the nut goes onto the rod first.
- Page 13 12. Locate the torque wrench. Remove the 4mm bit and install the 5mm bit. 13. With your left hand, hold the bike upright and centered (perpendicular to the floor). 14. Push the frame down to ensure the fork ends are fully seated on the axle.
- Page 14 Step 3: Flip Down the Pedals 1. Flip each pedal down (or up) until it clicks. 2. Pull lever to reverse this process when folding the pedals flat for easy storage. NOTE: You can always flip up the CLICK! pedals by pulling on the lever with your fingers as you move the pedal to the upright position.
-
Page 15: Step 4: Adjust Seat Height
Step 4: Adjust Seat Height Using the torque wrench, loosen the seat post clamp bolt (turning counterclockwise) until the seat post can move. NOTE: You do not need to remove the bolt from the clamp. 2. Slide the seat to your desired Diagram B position. - Page 16 CLICK! The fi nishing touch Charge Bikes feature a valve cap sensor, so you always know when it’s time to add air. The sensors are included in your parts box. Simply...
- Page 17 The LCD display will come to life. • Verify battery charge – The Charge display will not only tell you how much battery power is left as a percentage, but will also estimate range in miles/km, so you can always be sure you have enough power to get...
-
Page 18: Shifting Gears
Turning the Bike ON/OFF Turn Battery Power on: Press the switch located on the battery to the ON (-) position. NOTE: This switch can be left in the ON position at all times, except when removing the battery from the bike. Leaving the battery switch ON allows you to control the bike’s on / off status from the display on the... - Page 19 Controlling Electric Assist The Charge Comfort 2 is Pedal Assist Selectors equipped with Electric Assist, Throttle and Walk Assistance Mode. Choose your level of electric assist from the display by pressing the +/- buttons: + moves you to a higher level of assist;...
-
Page 20: Removing The Battery
Removing the Battery The Charge Comfort comes with an easy-to-remove external battery, which offers the freedom to charge at home, in the office, or wherever you have power. To remove the battery: 1. Power off the battery pack by flipping the switch located at the back of the battery to the Off (O) position. -
Page 21: Charging The Battery
Charging the Battery You can charge your battery on or off the bike. 1. Charge the battery with the battery charger placed on the floor or some other stable surface. 2. Connect the battery charger’s power plug to the electrical outlet. - Page 22 Using the Folding Stem The handlebars on your Charge bike can twist 90 degrees, so your bike takes up less space when storing or loading it onto a car bike rack. It’s particularly important to your safety that when returning the handlebars...
- Page 23 Eco-Friendly Packaging At Charge we care about the environment. It’s one of the reasons we’re in the bike business. Most bike boxes come loaded with protective foam and plastic ties, but we’ve chosen use only cardboard and biodegradable film.
- Page 24 Thank You for Choosing Charge. Don’t Forget to Register Your New E-Bike Visit Chargebikes.com to register your bike and activate your warranty. Scan me with your phone to register online...
Need help?
Do you have a question about the COMFORT 2 and is the answer not in the manual?
Questions and answers