Table of Contents
Advertisement
Advertisement
Table of Contents

Summary of Contents for Cateye EC-T220
-
Page 1: Start Card
® Cateye Treadmill MODEL EC-T220 Instruction Manual... -
Page 2: Table Of Contents
OW TO USE THIS MANUAL After first reading the "Start Guide," assemble the machine and give the Model EC-T220 Treadmill type Cat eye Fitness a try. Once you've become accustomed to the machine, read the "Operation Guide" and experi- ment with the EC-T220's wealth of functions. -
Page 3: For Safe Operation
For safe use, always observe the following rules. WARNING • Before using the EC-T220, it is important to consult a medical specialist if you are suffering from any of the following: heart disease (angina pectoris, myocardial infarction), hypertension, diabetes, respiratory disease (asthma, chronic bronchitis, pulmonary emphysema, etc.), articular metamorphosis, rheumatism, gout, or other diseases and physical complaints. -
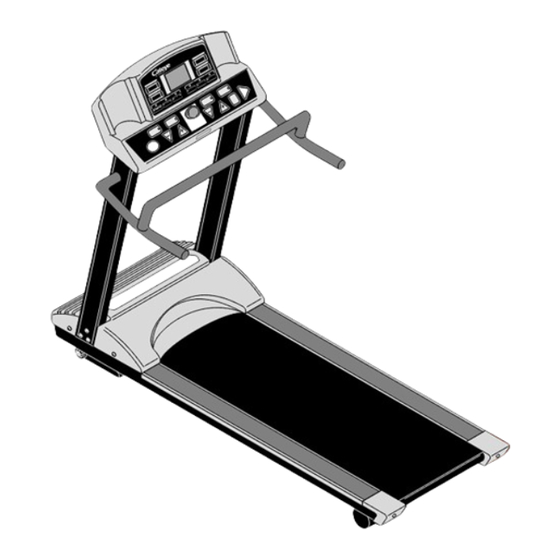
Page 4: Part Names
ART NAMES Main body Drink holder Breaker Power cable Power switch Running belt Side rails These rails may be stood on when setting a training program or for emergencies. Side cap End cap Control unit Handle Handle mast Motor cover... -
Page 5: Control Unit
INTERVAL ... Interval training is selected. QUICK ... Quick start (manual training) is selected. 8 8 8 8 8 EMERGENCY STOP button If pressed during training, speed is quickly dropped to zero. EC-T220 INCLINE INCLINE T I M E T I M E... -
Page 6: Start Guide
2 Preparation and warnings before getting on the treadmill ... 11 3 Putting on the chest-belt heart rate sensor... 12 4 Trying out the treadmill for the first time ... 13 5 The 4 kinds of programs ... 16 6 Using the EC-T220 without a data card ... 18... -
Page 7: Starting With Assembly
TARTING WITH ASSEMBLY Read this warning before assembling the unit: Caution: Do not remove the wires which are wrapped around the handle masts before assembly. Follow the steps starting from the next page and assemble the unit as shown in the figure below. - Page 8 Remove the motor cover. • The motor cover must be removed for assembly. Attach the handle masts and handle. • Insert the handle into the sides of the handle masts. Fix in place by screwing in the 2 bolts (B) from above. Caution: •Be sure which handle mast is the left one and which is the right one before inserting the handle.
- Page 9 Attach the control unit base to the handle masts. • Position the control unit cross to the handle masts, and then pre- pare to pass the cords through the handle mast inside. Caution: Be careful that the control unit does not fall down. •...
-
Page 10: Adjust The Running Belt
Adjust the running belt. Caution: •Do not operate the buttons while standing on the belt. •When adjusting the belt, take care not to get your hands trapped or pinched. • Turn the power switch on. Caution: Connect the power plug directly to a power socket, for example one on the wall. -
Page 11: Preparation And Warnings Before Getting On The Treadmill
The card slot of this machine functions as a safety key when you change the setting of dip switch in the control unit. Removing the safety key from the card slot will stop the treadmill as will pushing the emergency stop button. -
Page 12: Putting On The Chest-Belt Heart Rate Sensor
Your heart rate can be measured by the chest-belt heart rate sensor. The EC-T220 treadmill receives and calculates the number of heartbeats which are transmit- ted from the wireless chest-belt. It is therefore possible to control your heart rate during exercise. -
Page 13: Trying Out The Treadmill For The First Time
• Turn on the power switch. • The control unit will display "Cateye EC-T220" and prompt you to insert a data card or select a training mode. Insert the start card (the blue card provided). -
Page 14: Start Your Exercise
INTERVAL EMERGENCY STOP SPEED Increase or decrease of speed INTERVAL EMERGENCY STOP SPEED Numeric Display EC-T220 INCLINE T I M E H I L L HR control H I L L EMERGENCY STOP STOP INCLINE Current incline is displayed by %. You can ad- just it by pressing the INCLINE +/- buttons dur- ing exercise. - Page 15 Finishing training HR control STOP INCLINE So far we have covered only the beginning of the Model EC-T220 Cateye Treadmill functions. Let us move on to an explanation of other functions. QUICK START MODE...
-
Page 16: The 4 Kinds Of Programs
KINDS OF PROGRAMS HR control training (Training at a set pulse rate) • You set a target pulse rate at which you want to exercise and the Model EC-T220 automatically adjusts the incline to maintain your pulse rate close to the desired level. - Page 17 Upper pulse limit alarm • For your safety, the upper pulse limit alarm is provided in all programs of the EC-T220. If your pulse rate exceeds this limit, the alarm buzzer sounds and the belt speed automatically drops to the minimum. This function urges the user to stop the exercise.
-
Page 18: Using The Ec-T220 Without
EC-T220 SING THE The blue card you used for your first session serves to input the type and conditions of training. But it is also possible to do the same thing without the card, by using the buttons on the control unit. - Page 19 Start your exercise. • After inputting the training condition, get on the running belt and press the START button. The message "Start warming-up" is dis- played to announce that the HR control training program has started. Start walking slowly. Caution: Begin running when the belt speed becomes too fast for walking.
-
Page 20: Operation
PERATION UIDE 1 Training goals ... 22 2 Training program characteristics ... 24 3 HR control training ... 26 4 Interval training ... 28 5 Hill profile training ... 30 6 Quick start (manual training) ... 32 7 Making a Data Card ... 34... -
Page 22: Training Goals
The purpose of exercise with the EC-T220 is to improve both your physical condition and the function of the circu- latory system - to improve your aerobic power. - Page 23 For the standard maximum heart rate, "220 - Age", "204 - 0.69 x Age", and other formulas are used. In the EC-T220, however, "200 - Age" is used, taking into account a certain safety margin, and is incorporated in the computer setting.
-
Page 24: Training Program Characteristics
RAINING PROGRAM CHARACTERISTICS HR control training • This training program is for exercising while maintaining a set pulse rate. The incline of the running belt will change automatically so that the set pulse rate is maintained. The speed can be adjusted however you like. -
Page 25: Quick Start (Manual Training)
The change of the speed should be kept small. Quick start (manual training) • This program is for basic treadmill training. By pressing the QUICK but- ton, exercise begins at the lowest speed. • This program is different from other training programs. In this program, the speed and incline are not pre-programmed;... -
Page 26: Hr Control Training
CONTROL TRAINING Select the HR control training program. • Put the chest-belt heart rate sensor around your chest. Press the HR control button to select the HR control training program. Caution: If you do not put the chest-belt heart rate sensor around your chest, the HR control training cannot be performed. - Page 27 Perform training while maintaining the target heart rate. • When the warm-up is completed and your pulse rate has reached the target pulse rate, the incline will be adjusted automatically according to your pulse rate, so you can train at your target pulse rate. •...
-
Page 28: Interval Training
NTERVAL TRAINING Select the Interval training program. • Put the chest-belt sensor around your chest. Press the INTERVAL button to select the program. Caution: Interval training can be done without the chest-belt heart rate sensor. However it can be dangerous. There- fore it is recommended that you put it on in order to monitor your pulse rate while exercising. - Page 29 Continue the training by repeating "exercise" and "rest." • The belt speed will change in cycles according to the training pattern. The incline is not changed automatically. • The belt speed will be fast during "exercise (maximum speed)" and slow during "rest (minimum speed)." •...
-
Page 30: Hill Profile Training
ILL PROFILE TRAINING Select the Hill profile training program. • Put on the chest-belt heart rate sensor and press the HILL button to select the program. Caution: Hill profile training can be done without the chest-belt heart rate sensor. However it can be dangerous. Therefore it is recommended that you put it on in or- der to monitor your pulse rate while exercising. - Page 31 Continue the training. • The incline will change automatically according to the training pat- tern. The speed is not changed automatically. • The incline will become steeper as you come close to the top of a hill, and it will be gentler in the lower areas. •...
-
Page 32: Quick Start (Manual Training)
UICK START • Quick start can be done without the chest-belt heart rate sensor. However it can be dangerous. Therefore it is recommended that you put it on in order to monitor your pulse rate while exercising. Caution • When the QUICK on the training selection button is pressed, the belt will begin to move immedi- ately. - Page 33 Finish your training. • Press the STOP button when you want to finish. Your training will be stopped, and cool-down will begin. The speed and incline will be reduced to the minimums. Reference: •Alarm (buzzer) function is not available for quick start.
-
Page 34: Making A Data Card
AKING A If you record your training conditions on this data card, you can set your training conditions by simply inserting the card into the card slot of the con- trol unit. You can start a program just by inserting the card, confirming your data, and pressing the START button. - Page 35 Indicate your target pulse rate. (For HR control training only) Specify the training target in columns G, H and I. G is for the first digit of the value (hundreds' column), H for the sec- ond digit (tens' column), and I for the third digit (ones' column). Sample data cards HR control training Age:...
-
Page 36: Reference Guide
EFERENCE UIDE 1 Maintenance of the chest-belt heart rate sensor ... 38 2 Other useful functions ... 39 3 Troubleshooting... 40 4 Handling warnings ... 41 5 Repair service warranty/additional parts ... 42 6 Product specifications ... 43... -
Page 38: Maintenance Of The Chest-Belt Heart Rate Sensor
AINTENANCE OF THE CHEST After removing the battery from the sensor, dispose of it properly. Be sure to keep it out of the reach Warning of small children. If through some accident it is swallowed, contact a physician immediately. Replacing the battery Battery life: approx. -
Page 39: Other Useful Functions
THER USEFUL FUNCTIONS Checking the total distances The total distances which can be used as a guide for when to change the running belt can be checked. • Press and hold the SPEED + button and the INCLINE + but- ton together for 3 seconds to change to the total distance check display. -
Page 40: Troubleshooting
ROUBLESHOOTING Troubleshooting In the following cases, the machine is not broken. Be sure to check the following before asking for the machine to be serviced. Trouble The LCD screen is completely blank. The data card is inserted, but nothing ap- pears except "CARD ERROR"... -
Page 41: Handling Warnings
Handling warnings Please observe the following to ensure that you will have many years of good use from your EC-T220 treadmill. • Do not disassemble the control unit or main body. If there is a problem, contact your dealer where Caution the unit was purchased. -
Page 42: Repair Service Warranty/ Additional Parts
EPAIR SERVICE WARRANTY About the repair service warranty • If trouble with this EC-T220 treadmill due to material of manufacturing defect should occur, under normal usage conditions, within one year from the date of pur- chase, Cat Eye Co., Ltd. will repair or replace the product/part, subject to the con- tents of the included warranty card. -
Page 43: Product Specifications
Cateye Co., Ltd. * The specifications and design are subject to alteration without notice for improvement purpose. Printed in Japan ** "CATEYE" is registered trademarks of CAT EYE CO., LTD. ECMET22-010226-2 230 volta 10 amps (for the 220V-240V area) 320 x 240 Full Dot Type Backlight LCD... - Page 44 ® CO.,LTD. 2-8-25, Kuwazu, Higashi Sumiyoshi-ku, OSAKA, 546-0041 JAPAN PHONE: 81-6-6719-7781 FAX: 81-6-6719-2362 066660011 (E)
Need help?
Do you have a question about the EC-T220 and is the answer not in the manual?
Questions and answers
Hello, need cateye ec-t220 treadmill side caps
Side caps for the Cateye EC-T220 treadmill are listed under the contents of the instruction manual, which likely means they are included as part of the original parts or assembly. If replacements are needed, they may be available through the repair service or as additional parts mentioned under "Repair service warranty/ additional parts" on page 42 of the manual.
This answer is automatically generated
Is there any Representative in Greece