
Summary of Contents for Jegs 555-81445
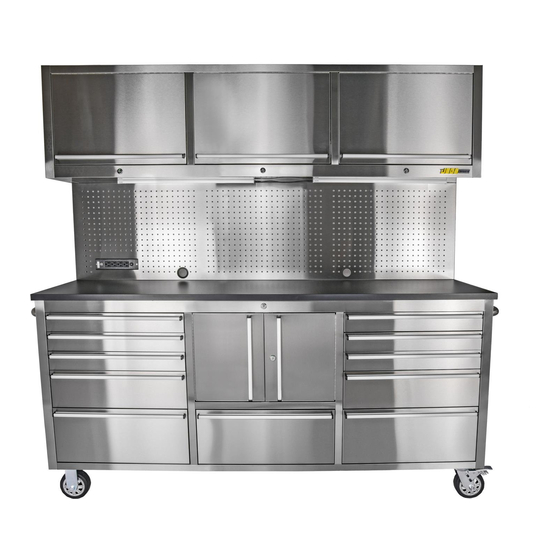
- Page 1 Tool Box with Cabinets Assembly Guide 555-81445 Stainless Steel | 11-Drawer | 72 in.
-
Page 2: Parts List
Parts List DESCRIPTION DESCRIPTION DESCRIPTION Counter Top Cabinet Door (LH) Cabinet Body Handle Drawer (Center Bottom) Bolts Bolts ( in.) Cabinet Door (RH) Wall Mount Hooks LED Light Kit Drawer Liner (Narrow) Cabinet Shelves Casters (6 in. Swivel) Drawer Liner (Wide) Power Strip Bolts (3/8) Casters (6 in. - Page 3 Safety We would like to take this opportunity to thank you • Locate in a suitable work area. for purchasing this JEGS 72 in. 11-Drawer Stainless Steel Tool Box with Cabinets. We welcome any • Monitor children near the cabinet.
-
Page 4: Installation
Installation HANDLE (Fig.01) Figure 02 1. Attach with in. x in. bolts, lock washer and flat washers. Figure 01 UPPER CABINET RAILS (Fig. 03) 1. With the cabinet in the upright position attach the four rails to the back using four in. - Page 5 Installation UPPER CABINET PEGBOARD (Fig. 04) SHELF ASSEMBLY (Fig. 06) 1. Attach the pegboard to the rails with three 1. Insert four hooks, per shelf, inside the upper in. x in. bolts per rail. cabinet at the desired height. Place the shelf on the shelf supports.
- Page 6 Electrical POWER STRIP (Fig.07) Figure 08 1. Insert the power strip into the square hole from the back side of the pegboard. Use screws, inserted from the front side to secure to the pegboard. Figure 07 Secure using screws inserted from the front Place power strip on back side of...
-
Page 7: Operation
Electrical Operation POWER STRIP DRAWER REMOVAL (Fig.10) This cabinet features a pre-installed power strip with 1. Pull the drawer out so that it is almost fully (4) 5-15 outlets and (2) USB ports, conveniently extended. Push down on the LEFT hand black located for easy access. -
Page 8: Maintenance
Anti-Tipping Hardware Maintenance It is strongly recommended that you anchor this 1. To clean use a soft cloth that will not scratch cabinet. Toppling furniture can cause serious the surface. injury or death. 2. DO NOT use solvents of any kind they may An Anti-Tipping kit has been provided with this damage the surface. - Page 9 Warning This power strip is equipped with a power cord WARNING that has an equipment-grounding wire and a grounding plug. Only insert plug into a matching receptacle (outlet) that is properly installed and • Do not connect to plug receptacle via grounded in accordance with all local codes and extension cords or in series with other ordinances.
Need help?
Do you have a question about the 555-81445 and is the answer not in the manual?
Questions and answers