Table of Contents
Advertisement
Advertisement
Table of Contents

Summary of Contents for UNIVIEW OET-213H-NB
- Page 1 Face Recognition Access Control Terminal User ManualⅡ Document Version: V1.08...
- Page 2 Thank you for purchasing our product. If there are any questions, or requests, please do not hesitate to contact the dealer. Disclaimer No part of this manual may be copied, reproduced, translated, or distributed in any form or by any means without prior written consent from us.
- Page 3 Subject to uncertain factors such as the physical environment, actual values of some data may differ from the reference values described here. In case of any question or dispute, the right of final interpretation resides with us. Follow this manual when using the product. Professional guidance is recommended. ...
-
Page 4: Table Of Contents
Contents 1 Application Scope of the Manual · · · · · · · · · · · · · · · · · · · · · · · · · · · · · · · · · · · · · · · · · · · · · · · · · · · · · · · · · · · · · · · · · · · · · · · · · · · · · · · · · · · · · · · · · · 1 2 Product Overview ·... - Page 5 7.2.6 Exporting Photos · · · · · · · · · · · · · · · · · · · · · · · · · · · · · · · · · · · · · · · · · · · · · · · · · · · · · · · · · · · · · · · · · · · · · · · · · · · · · · · · · · · · · · · · · · · · · · · · · · 25 7.2.7 Deleting a Photo ·...
-
Page 6: Application Scope Of The Manual
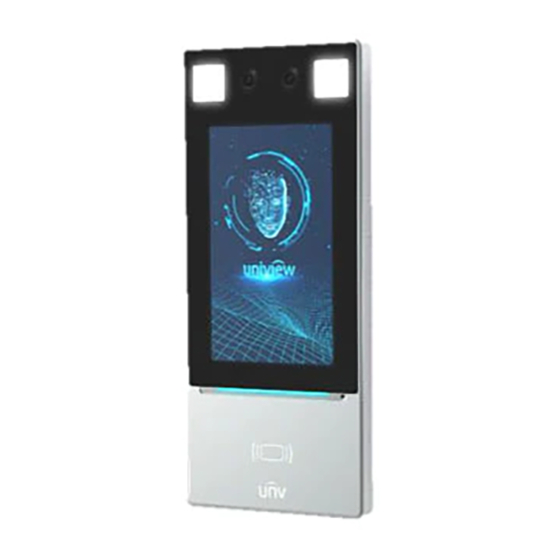
Application Scope of the Manual Table 1-1 Application Scope of the Manual Model Name OET-213H-NB Face Recognition Access Control Terminal OET-523L-NB Face Recognition Terminal Product Overview Face recognition access control terminal ("the face recognition terminal" for short) is a face recognition access control product featuring high performance and high reliability. - Page 7 1. Light supplement lamp 1 2. Camera 1 3. Infrared light supplement lamp 4. Camera 2 5. Light supplement lamp 2 6. Display screen 7. Pass-through indicator 8. Microphone 9. Card reading area 10. Loudspeaker 11. Reboot 12. USB2.0 13. Network interface 14.
-
Page 8: Product Installation
18. Power output (DC 5V) 19. Power input (DC 12V±25%) Product Installation Installation of OET-213H-NB For the wiring and installation of the device, refer to the Face Recognition Access Control Terminal Quick Guide. Installation of OET-523L-NB For the wiring and installation of the device, refer to the Face Recognition Terminal Quick Guide. -
Page 9: Main Interface
Main Interface The main interface displayed on the face recognition terminal varies with the device type. See Device Info. Figure 5-2 Main Interface Description Displays the current date, time, and connection status of different services. indicates the following items from left to right: ... -
Page 10: Ad Mode
Description Title bar, which can be defined by users. For detailed operations, see Custom Logo and Prompt Logo bar, which can be defined by users. For detailed operations, see Custom Logo and Prompt Displays the identification result (such as identified successfully or unregistered person), authentication mode (such as face scan or card swiping), and other information. - Page 11 temperature (exceeding the preset maximum temperature threshold) or without masks, the face recognition access control terminal displays an alarm on the GUI, plays a warning sound. And determines whether to open the door based on actual application scenes, thereby achieving epidemic prevention and control. For detailed configuration, see Advanced Setting Authentication...
- Page 12 Figure 5-4 Normal Temperature and Mask Worn Measure Forehead Temperature Measure Wrist Temperature Figure 5-5 Mask Worn but Abnormal Temperature Measure Forehead Temperature Measure Wrist Temperature...
- Page 13 NOTE! When both the temperature measurement and mask detection functions are enabled, temperature measurement is prior to mask detection. Once an abnormal temperature is detected, an "abnormal temperature" alarm is reported on the GUI and the warning sound is played no matter whether the person wears a mask.
- Page 14 Figure 5-7 Temperature Measurement Mode Measure Forehead Temperature Measure Wrist Temperature Normal Temperature: The temperature of a detected person is normal. For the prompt on the GUI and voice prompt, see Figure 5-4. Abnormal Temperature: The temperature of a detected person is abnormal. For the prompt on the GUI and voice prompt, see Figure 5-5.
-
Page 15: Activation Config
Figure 5-8 Mask detection Mask Worn Mask Unworn Activation Config Hold down the main interface of the face recognition terminal for a long period of time (longer than 3s). In the displayed password input interface, enter the configured activation password to go to the Activation Config interface. -
Page 16: Basic Info
Figure 5-10 Activation Config Interface 5.5.1 Basic Info The Basic Info interface allows you to view the status of the current device in real time, so as to rapidly know about the device condition and better maintain the device. On the Activation Config interface, tap to go to the Basic Info interface. -
Page 17: Device Location
5.5.2 Device Location The configuration is not supported. 5.5.3 Network Setting On the Network Setting interface, you can modify the device IP address and other communication parameters so that the device can communicate with external devices. On the Activation Config interface, tap to go to the Network Setting interface. - Page 18 1. Face photo collection requirements When adding a person to the whitelist, collect the face photo by strictly observing the following requirements: General requirement: bareheaded full-face photo. Only the face photo of the person under collection is displayed on the screen of the terminal during collection and face photos of other people cannot be contained.
- Page 19 Parameter Description Remarks interface. See Face Library for details. Enter the card No. of the person. Card No. After successful input, the person can swipe the card for access. At least one of the parameters needs to be set so that personnel Collect and input face photos by referring to the Face photo information can be input...
-
Page 20: Activation Password
Figure 5-15 Photo Confirmation Interface On the User Management interface, tap Save to complete the personnel information input. 5.5.5 Activation Password To change the configured activation password, do as follows: On the Activation Config interface, tap to go to the Activation Password interface. Figure 5-16 Activation Password Interface Enter the old password, new password, and confirm the new password as required. -
Page 21: Admin Password
NOTE! The password must contain at least eight characters (including at least two of the following types: upper case letters, lower case letters, digits, underscores, and hyphens). The confirmation password must be consistent with the new password. The activation password is consistent with the password for the admin to log in to the Web interface. - Page 22 Figure 5-18 Authentication Scene Interface Parameter Description The visual intercom face recognition terminal only measures people's temperatures and does not conduct other authentication. For the prompt on Temperature the GUI, see Temperature measurement mode. Measurement Only Note: In this scene, the authentication modes of all libraries configured in the visual intercom face recognition terminal will be cleared.
-
Page 23: Volume
Parameter Description message in audio. Value range: [30–45]; default value: 37.3 5.5.8 Volume On the Activation Config interface, tap to set the volume. 5.5.9 Device Maintenance On the Device Maintenance interface, you can restart the visual intercom face recognition terminal and restore default configuration. -
Page 24: Data Management
d. The terminal will automatically restart after the upgrade is completed. NOTE! The terminal only supports FAT32 USB drives with one partition. Local upgrade is also supported. See Software Upgrade for details. 5.5.10 Data Management Figure 5-20 Data Management Interface ... -
Page 25: Personnel Management
NOTE! To export snapshots, go to Setup > Intelligent > Face and enable Face Cutout. See Face details. The exported temperature records are saved as a CSV file in the root directory of the USB flash drive. The exported snapshots are saved to Image/SnapPic_Device IP/Export Time/. - Page 26 1. Check before login The network connection between the client PC and the face recognition terminal is in good condition. The PC is installed with Internet Explorer 10.0 or higher. (Optional) The resolution is set to 1440 x 900. 2.
-
Page 27: Logging In To The Web Interface
NOTE! The IP address 192.168.1.13 in this example is the default IP address. Please replace it with the actual address of your face recognition terminal if it has been changed. 3. (Optional) Modify user access control settings You are recommended to set the user control permission to minimum before accessing the device. Choose Start >... - Page 28 NOTE! To manually load the ActiveX, enter http://IP address/ActiveX/Setup.exe in the address bar and press Enter. The default password is used for your first login. To ensure account security, please change the password after your first login. You are recommended to set a strong password (no less than eight characters). ...
-
Page 29: Photo
Photo Face photos captured by the terminal are stored in the Photo menu bar. Click Photo in the menu bar. The current photo storage status is displayed. Figure 7-5 Photo Information 7.2.1 Photo List Sorting You can click Ascending Order or Descending Order to sort the photo list. 7.2.2 Total Capacity/Available Capacity The total capacity and the available capacity of the local storage resource are displayed. -
Page 30: Refreshing The Photo Library
Snapshot time + match result code + highest similarity value (one value) + information about the person corresponding to the highest similarity (person ID + face ID + name) + detected temperature Possible match results include the following: 1: authentication succeeded ... -
Page 31: Exporting And Deleting Photos
In the deletion confirmation box, click OK to complete the deletion operation. Figure 7-8 Deletion Operation Interface 7.2.8 Exporting and Deleting Photos When Export & Delete is clicked, selected photos will be exported and deleted from the face recognition terminal. Go to the Photo List interface. - Page 32 Figure 7-10 Basic Info Interface Click Refresh to update the device to the latest state. On the refreshed interface, you can view status information about the current device. External Device External device interface can view related information of temperature measurement module. Choose Setup >...
- Page 33 Choose Setup > Common > Local Settings to go to the Local Settings interface. The figure below shows the Local Settings interface. Modify parameters based on actual requirements by referring to the table below. Figure 7-12 Local Settings Interface Table 7-2 Parameter Description Area Parameter Description...
- Page 34 Area Parameter Description You can enter the value based on actual conditions. This parameter is displayed only when Recording is set to Subsection by Size. Subsection Size (MB) The value ranges from 10MB to 1024MB. You can enter the value based on actual conditions. The options are as follows: ...
- Page 35 Figure 7-14 Static Address Configuration Interface Table 7-3 Parameter Description Parameter Description Network Isolation Keep the default value Off. It cannot be configured. Enter the IP address of the device. IP Address The IP address of the device must be unique across the network and cannot begin with 127. Subnet Mask Enter the subnet mask of the device.
- Page 36 The IPv6 configuration is not supported as shown in in the figure above. Set parameters as shown in in the figure above. Table 7-5 Parameter Description Parameter Description The value ranges from 576 to 1500. This parameter is not displayed when Obtain IP Address is set to PPPoE. Port Type The default value is FE Port.
- Page 37 Parameter Description This parameter is available only when Sync Mode is set to Sync with System Configuration or Sync with Latest Server Time. Sync with Computer Time The system time for synchronization is the time of the local PC. This parameter is displayed only when Sync Mode is set to Sync with NTP Server. NTP Server Address Enter the IP address of the NTP server.
- Page 38 Table 7-8 Parameter Description Parameter Description Server IP IP address of the server Server Port Port number on the server. Default: 5196 Choose a communication protocol according to the actual connection method: UV-V2: Choose this option if the terminal is to be connected with Guard Station. ...
- Page 39 NOTE! If the terminal is to be connected to two Guard Station servers, select the check box for Enable Intelligent Server 2 and then complete the configuration by referring to this above table. 6. User The device supports no more than one administrator and a maximum of 32 ordinary users. The administrator is admin (the administrator name cannot be modified) by default and has all management and operation permissions for the device and users.
- Page 40 Figure 7-20 Ordinary User Information Editing Interface After editing information, click OK to save the user information. Deleting an ordinary user Log in to the terminal interface as admin. Choose Setup > Common > User to go to the User interface. Select the ordinary user to be deleted and follow the steps as shown in the figure below to delete the user.
- Page 41 When the face recognition terminal conducts O&M management on a gate machine through a serial port or it connects to an IC card reader, serial port information needs to be configured. Perform the following operations to configure a serial port: NOTE! The serial port configuration interface varies with the device type.
- Page 42 Parameter RS485_1 RS232_1 Flow Control Stop Bits: 1 Parity: None Flow Control: None NOTE! The parameters cannot be set when Port Mode is set to IC Card Mode. Enable Trans- It is used for internal debugging. Ignore it. Channel Configure serial port information based on actual scene configuration. Click Save to complete the serial port configuration.
- Page 43 IO Configuration The face recognition terminal connects to gate machines, door locks, or access control buttons and sends the door opening signal to them. Perform the following operations to complete configuration: Choose Setup > Common > Ports & Devices and click the IO Configuration tab. NOTE! ...
- Page 44 Parameter Description each time the unlock signal is received, and the door opening duration of the door lock will be re- timed. Value range: [0–300]s; Default value: 0s After Auto Door Lock Upon Closing is enabled, if the door closing time exceeds the value here and the door magnet detects that the door is in the closed position, the face recognition terminal automatically locks the door.
- Page 45 Figure 7-26 Energy Conservation Configuration Interface Table 7-12 Parameter Description Parameter Description On: When the face recognition terminal detects a face within the preset Schedule, all lights (including the LCD light, display screen, and light supplement lamp) are on (only when the brightness of the current ambient light does not reach the minimum brightness threshold of the device).
- Page 46 Figure 7-27 Device Info Configuration Interface Table 7-13 Parameter Description Parameter Description Device Location The configuration is not supported. NOTE! Changing the device type will restart the device and restore the authentication mode to the default configuration. 9. Personalization Ad Mode The face recognition terminal supports ads (pictures only).
- Page 47 Parameter Description The value is an integer in the range of 10s to 3600s. The default value is 10s. The face recognition terminal exits the ad mode when the face scan fails or a user taps the screen. Users can define ad images. The requirements for ad images are as follows: ...
-
Page 48: Network
Figure 7-30 Custom Button Interface Define buttons based on application scenes. Display: The corresponding button is displayed on the GUI. Hide: The corresponding button is not displayed on the GUI. Click Save to complete the custom button configuration. 7.3.2 Network 1. -
Page 49: Image
6. E-mail The system can send captured images (snapshots) to user-specified email addresses according to the configured parameters. Choose Setup > Network > E-mail Set parameters by referring to the table below. Click Save to complete the configuration. Parameter Description Name Set a name as needed. - Page 50 Figure 7-31 Scene Configuration Interface Scene Name: name of the current scene. Several scene modes have been preset in the device. After a scene mode is selected, image parameters are automatically switched (you can adjust image parameters as required). Common: recommended for outdoor scenes.
- Page 51 Figure 7-32 Image Enhancement Interface Use the sliders to change the settings. You may also enter values directly. The following table describes some major parameters. Table 7-16 Parameter Description Item Description Set the degree of brightness of images. Brightness Low brightness High brightness The amount of a hue contained in a color.
- Page 52 Item Description Low sharpness High sharpness 2D Noise Reduce the noise of images. The function may cause image blurring. Reduction 3D Noise Reduce the noise of images. The function may cause motion blur (or ghosting in some applications). Reduction Rotation of the image. Normal Flip Vertical Image Rotation...
- Page 53 Click Setup > Image > Image and then click Exposure. Figure 7-33 Exposure Configuration Interface Set parameters as required. The table below describes the exposure parameters. Table 7-17 Parameter Description Item Description Select a mode to achieve the desired exposure effect. ...
- Page 54 Item Description NOTE! You can set this parameter only when Exposure Mode is not set to Shutter Priority and when Image Stabilizer is disabled. Set the slowest shutter speed that the device can use during exposure. Slowest Shutter NOTE! You can set this parameter only when Slow Shutter is set to On. Adjust the compensation value as required to achieve the desired effects.
- Page 55 Item Description Enable WDR to distinguish the bright and dark areas in the same image. NOTE! This parameter is available only when Exposure Mode is set to Automatic, Custom, Shutter Priority, Indoor 50Hz, or Indoor 60Hz and electronic image stabilization and defog are disabled. You can set this parameter only when Exposure Mode is neither Customize nor Manual and when Image Stabilizer is disabled.
- Page 56 To restore the default settings, click Default. White Balance White balance is the process of offsetting unnatural color cast in images under different color temperatures so as to output images that best suit human eyes. Click Setup > Image > Image and then click White Balance. Figure 7-35 White Balance Configuration Interface Select a white balance mode as required.
- Page 57 NOTE! You can set this parameter only when WDR is turned off. Only some camera models support optical defog. When Defog is set to On, defog intensity level 6-9 represent optical defog, and images change from color to black/white when defog intensity is set from level 5 to 6;...
- Page 58 NOTE! Currently, the OSD configuration is not displayed on the GUI of the face recognition terminal. 3. Privacy Mask The device supports privacy mask and allows user to cover certain areas (such as sensitive or private areas) on the image for privacy protection. ...
-
Page 59: Intelligent
7.3.4 Intelligent 1. Face Face snapshot configuration includes the configuration of face detection, face detection threshold, filter by object size (px), and other parameters. Proper parameter configuration is conducive to face detection and match. Choose Setup > Intelligent > Face and click the Face tab. Figure 7-36 Face Snapshot Configuration Interface Set parameters by referring to the table below. - Page 60 Pane Parameter Description Value range: [1–100]; default value: 1 Note: After mask detection is enabled, Snapshot Quality Threshold must be set to 1. When Panorama is set to On, the face recognition terminal will save snapshot panorama photos. When Panorama is set to Off, the terminal will not save such photos.
- Page 61 Card: The face recognition terminal conducts 1:N match on the acquired IC card numberand the card numbers in the library. Face: The face recognition terminal conducts 1:N match on the face snapshot photo and face photos in the library. ...
- Page 62 Figure 7-38 Time Template Adding a time template NOTE! A maximum of 16 time templates can be set. Choose Setup > Intelligent > Time Template and click Add. Set parameters in the right pane of the interface. Template Name: Enter the name of a time template. Requirements: 1–20 characters, with upper- and lower-case English letters, digits, hyphens, and underscores supported.
- Page 63 A maximum of eight arming time ranges can be set for a day. The time ranges cannot be overlapped. A recognition success prompt is displayed only when the authentication succeeds in the preset arming time ranges. The prompt "non-specified time" is displayed when the authentication is successful out of the arming time ranges.
- Page 64 NOTE! If a person is bound to a time template, you need to unbind the person before deleting the time template. Otherwise, a prompt, indicating that deletion failed and you are required to unbind the person first, is displayed when you delete it. 4.
- Page 65 Table 7-19 Parameter Description Parameter Description Set the parameter to either of the following options based on actual conditions: Face Library Type Employee Library Visitor Library Face Library Name Enter a library name of 1 to 63 characters. Select a check template from the drop-down list.
- Page 66 Personnel management Adding persons Persons can be added one by one or be imported in batches. Adding a person (1) Choose Setup > Intelligent > Face Library and select the face library to which persons are to be added.
- Page 67 Pane Parameter Description Photo requirements: Only .jpg photos with the size of 10 KB to 512 KB are supported. EffectiveTime Select a time template and then set the effective time and expiration time of the time template. ExpirationTime Select the check box in front of a time template based on the actual situation. NOTE! Time Template ...
- Page 68 Figure 7-47 Edit Interface (3) On the displayed edit interface, modify person information by referring to Personnel management. (4) Click OK to complete the modification. Deleting persons Persons can be deleted one by one or together. Deleting a person ...
- Page 69 Figure 7-49 Selecting All Persons (2) Click (3) In the displayed confirmation box, click OK to complete the deletion. Searching for a person You can search for personnel information by No.or name. Figure 7-50 Search Box 5. Advanced Setting Choose Setup >...
- Page 70 Figure 7-51 Advanced Setting Interface...
- Page 71 Table 7-21 Parameter Description Parameter Description Authentication: After Door Opening Mode is set to Authentication, the terminal generates the door opening signal only after a person passes the authentication in Check Template. Face: After Door Opening Mode is set to Face, the terminal generates the door opening signal when detecting a face snapshot photo.
- Page 72 Parameter Description On: When a person without a mask is detected, the terminal will display a message “please wear a mask” on the screen and play this message in audio, and the door will open. Authentication Mask Failed And Open Off: When a person without a mask is detected, the terminal will The Door display a message “please wear a mask”...
- Page 73 Parameter Description The digital detection module detects temperatures at intervals, the Detection detection results within the interval time will be filtered. Interval Time The default value is 7s. On: When the face recognition terminal detects an unexpected answer, the door will open. Open The Door Off: When the face recognition terminal detects an unexpected Even When...
- Page 74 Parameter Description The default value is Off. After this function is turned on, the terminal will send a not wearing helmet alarm to the specified email address when it detects a person Not Wearing not wearing helmet. Helmet The default value is Off. After this function is turned on, the terminal will send an authentication failure alarm to the specified email address when face Authentication...
- Page 75 Parameter Description Multiple Faces: The GUI displays information about multiple identified persons after face recognition succeeds. Information about recent five persons identified successfully can be displayed at most. Information about the latest person identified successfully is displayed on the left of the screen.
-
Page 76: Events
7.3.5 Events You can set alarm arming to implement alarm reporting. By configuring triggered actions of other devices, an alarm can trigger one or more types of actions, so that the users handle the alarm and the corresponding actions in time. Alarm arming includes fire alarms, anti-disassembly alarms, and door magnet alarms. - Page 77 After setting the plan time for one day, you can click Copy and then click Paste on another day to copy the plan time to other days. Drawing Arming Time by Using the Mouse Editing Tables to Set Arming Time Click Save.
- Page 78 Select the Enable Plan check box and set the start time and end time of alarms (click Edit). The time ranges cannot be overlapped. The device outputs alarm signals only within the preset valid time ranges. The options of day include Monday to Sunday and the time of each day is defined using four time ranges. After setting the plan time for one day, you can click Copy and then click Paste on another day to copy the plan time to other days.
- Page 79 c. Select whether to enable alarm input. If Alarm Input is set to On, the terminal will receive door magnet alarms. If it is set to Off, the terminal will not receive door magnet alarms. Set actions to be associated with door magnet alarms. Door magnet alarms can be associated with the terminal snapshot action.
-
Page 80: Storage
c. Select whether to enable alarm input. If Alarm Input is set to On, the terminal will receive door magnet alarms. If it is set to Off, the terminal will not receive security gate alarms. Set whether to send alarm emails when security gate alarms occur. Click Save. - Page 81 Parameter Description Not Upload Pictures No need to select Custom Naming Rules The filename allows custom fields when this option is selected. Convert Path into UTF8 No need to select. Format Snapshot Image Save To Root Directory Up to 4 directory levels are allowed.
-
Page 82: Security
Parameter Description Time-Min Show the minute (mm). Time Sec Show the second (ss) Frame ID Configuration is not supported. 4-Digit Random Number A 4-digit number that is generated randomly. Photo Total Configuration is not supported. Customize a field. Choose Custom and then enter the desired content. Custom Please select Custom Naming Rules and then configure this parameter. - Page 83 Parameter Description The options are Digest and None. HTTP Authentication The default value is None. Figure 7-57 RTSP Authentication Setting Interface Click Save. ARP Protection This function protects a camera from ARP attacks. The gateway and the MAC address must be set properly before a PC can access the camera from another network;...
-
Page 84: System
Click Save. NOTE! If Filtering Mode is set to Whitelist, then only the added IP address(es) are allowed to access the camera. If Filtering Mode is set to Deny Access, then only the added IP address(es) are not allowed to access the camera. - Page 85 Click Setup > System > Maintenance. Figure 7-61 Local Upgrade Interface Under Software Upgrade, click Browse and select the correct upgrade file. Click Upgrade and then confirm to start. The terminal will restart automatically after the upgrade is completed. NOTE! ...
- Page 86 Export the current configurations of the camera and save them to the PC or an external storage medium. You can also quickly restore configurations by importing backup configurations stored on the PC or an external storage medium back to the camera. CAUTION! ...
-
Page 87: Faqs
Under Temperature module maintenance, click the corresponding button for the module you want to repair, forehead temperature module or wrist temperature module. In the dialog box displayed, click OK to complete the maintenance. Figure 7-65 Temperature module maintenance FAQs What to do if no message prompts me to install ActiveX when I log in on a Windows 7 PC the first time Answer: Follow these steps to turn off UAC and then log in again: a.
Need help?
Do you have a question about the OET-213H-NB and is the answer not in the manual?
Questions and answers