
Subscribe to Our Youtube Channel
Summary of Contents for 77 ELEKTRONIKA DocUReader 2 PRO
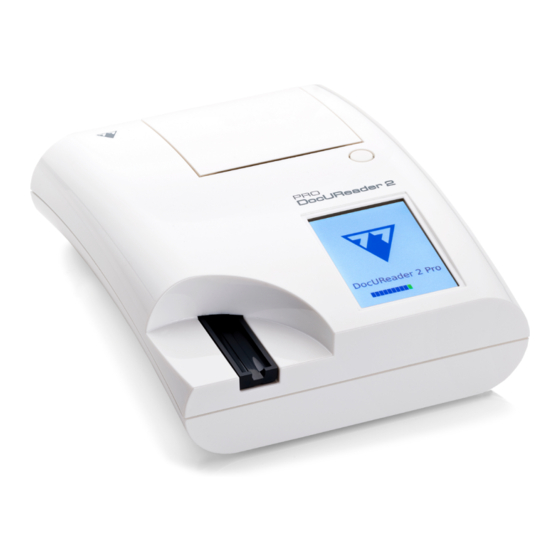
- Page 1 DocUReader 2 PRO Urine chemistry analyzer User Manual (Short version) 77 Elektronika Kft. H-1116 Budapest, Fehérvári út 98., Hungary sales@e77.hu www.e77.hu...
- Page 2 The information in this manual was correct at the time of printing. However, 77 Elektronika Kft. continues to improve its products and reserves the right to change specifications, equipment, and maintenance procedures at any time without notice. Companies, names and data used in examples are fictitious unless otherwise noted.
-
Page 3: Table Of Contents
Table of Contents 1 Introduction 10 Instrument Settings 1.1 Intended purpose 10.1 Output (Connectivity: 1.2 Indications for use Transfer/Export) 1.3 Limitation of use 10.2 Strip options 1.4 How to use this manual 10.3 Power management 1.5 Safety information 10.4 Operators 1.6 Approvals 11 Maintenance 2 System description... -
Page 4: Introduction
1.2 Indications for use The DocUReader 2 Pro urine test strip analyzer is a bench top IVD designed to be used exclusively with LabStrip U11 Plus, and LabStrip U mALB/CREA urine test strips manufactured by 77 Elektronika Kft. -
Page 5: Limitation Of Use
Introduction ǽ For more detailed information about the urine test strips, please refer to the strip’s instructions for use. 1.3 Limitation of use Do not use the semi-quantitative results that the device provides to make diag- nostic or therapeutic decisions without additional analysis. The device was developed and manufactured for human diagnostics use only (original function). - Page 6 Introduction The following symbols appear on the device, its AC Adapter and its packaging: Double insulated product or transformer. May also identify class 2 Indoor use only equipment (power supply only) Indicates that the instrument is The CE mark indicates that the listed by Underwriters Laboratories product complies with the applicable as meeting U.S.
-
Page 7: Safety Information
Correct use: Any disregard of the instructions in the User Manual may result in a safety risk. Use DocUReader 2 Pro to analyzer urine samples only. The device is not intended for any other application. Environmental conditions: The DocUReader 2 Pro analyzer is approved for indoor use only. -
Page 8: Components & Functions
System description Fig. 1: Measurement principle Each LED (1) emits light of a predefined wavelength onto the surface of the test pad (2) from directly above the test zone. The test zone is a 3-mm circle in the center of each pad where the test reaction is optimal. The light from the LEDs is reflected back from the test zone with more or less intensity. -
Page 9: Device Installation
NTFS file system. 3 Device installation 3.1 Unpacking Read the DocUReader 2 Pro User Manual carefully before installation to ensure proper operation of the analyzer from the outset. Follow the specified installation instructions carefully. Otherwise, inac- curate results or damage to the analyzer may occur. -
Page 10: Setup Considerations
Make sure that the strips sit and travel smoothly and stay level in the test strip tray at all times. 3.4 Clearance limits Make sure that there is enough room in front of the device for the test strip tray to move in and out freely. The DocUReader 2 Pro device can... -
Page 11: Setup
Device installation only make accurate measurements if nothing obstructs or touches the test strip tray during the measurement process. Make sure that there is enough room at the back of the device to oper- ate the On/Off switch. Make sure that there is enough room at the back of the device so that the power supply cable, the USB devices, and the cables of other peripherals are not bent, strained, or twisted. - Page 12 3.5.3 Connecting the device to a computer The device can interface with a computer via the female 9-pin D-sub serial port on its rear panel. The connections are the following: DocUReader 2 Pro Host (PC 9-pin pinout) ǽ The connected PC must comply with EN 60950 requirements.
-
Page 13: Software Updates
Only Administrator and higher access level operators can run a software up- date. The manufacturer is continuously upgrading the DocUReader 2 Pro user soft- ware, adding new features and improving usability. From time to time the manu- facturer will send a software update for the device. The following sections de-... -
Page 14: Interacting With The Device
3.6.2 Procedure of the software updates 1. Switch on the DocUReader 2 Pro and wait until the system is ready. 2. Plug the USB flash drive with the software update into one of the USB A con- nectors at the back of the analyzer. -
Page 15: Touchscreen Operation
Interacting with the device Header: Displays important system information, like the date and time, current operator ID queue and status line messages. The four placeholders below the date and time indi- cate, from left to right: • the number of active errors ... - Page 16 Interacting with the device 4.2.1 Buttons and screen input areas Buttons Tapping rectangular buttons can trigger actions or navigate menus. Buttons come in several sizes. An indicator in the bottom left or the top right corner of a button indicates whether it has a menu navigation function. Indicator in the bottom left corner: Tapping such a button closes a screen and moves the user back up one level in the menu hierarchy.
- Page 17 Interacting with the device Text boxes Text boxes are for alphanumeric data input. To edit a value in a text box, tap the input area. A cursor (|) appears in the input area when it is active. 4.2.2 Entering data via the touchscreen Fig.
-
Page 18: Start-Up Wizard
‘Enter’ to select the targeted button or text box. 5 Start-Up Wizard The first time the DocUReader 2 Pro device is switched on, a Start-up Wizard is displayed. Here the user is able to customize the basic options of the device. The Start-up Wizard can be skipped on the second screen. -
Page 19: Testing
Testing 6 Testing 6.1 Measurement process The analyzer can be operated in two different modes: 1. In normal mode, the system automatically waits for the strip to incubate for one minute before it reads the first test pad. This is the default mode and the throughput in this mode is approximately 50 strips per hour. - Page 20 Testing ǽ The DocUReader 2 Pro will perform a sequence of checks (reference pad, strip detection, position of slipped strip, dry strip, etc.) each time a test is run. See “13.1 Strip checking events” for more information. 6. The strip position is checked before measurement.
-
Page 21: Worklist
Testing The pad results are displayed on the first page. Positive findings are clearly marked with red text on the display. To view the remaining test results, touch the Right icon on the screen. The printout is light-sensitive and may turn yellow when exposed to light during storage. -
Page 22: Recalling Results
User Manual (See chapter 1.4 How to use this manual). 7 Recalling Results The DocUReader 2 Pro device can store up to 3000 measurement records and 1000 QC measurement records. Every result is automatically saved after the analysis in an indexed database. Using the database, results can be searched, reviewed, printed or transferred to an external device. -
Page 23: Setting Up Filters To Find Specific Results
The results that belong to LabStrip U mALB/CREA test strips are marked with ‘m’. 7.2 Setting up filters to find specific results To narrow down the list of results DocUReader 2 Pro features a sophisticated filtering engine. The fol- lowing parameters as fil- tering criteria can be set: • Date and Time... -
Page 24: Actions With Selected Items
Several commercial controls are available. Control solutions may vary in the number of levels or components, the necessity for reconstitution or readiness for use or the type and volume of container. 77 Elektronika Kft. recommends the use of CombiScreen Dip Check (Ref.: 93010) or Drop Check (Ref.: 93015) ®... -
Page 25: Editing Qc Lot Information
Quality Control Testing 3. Performing QC testing at regular intervals. See “9.3 QC Testing”. ǽ For more detailed information about the Quality control options, please refer to the full User Manual (See chapter 1.4 How to use this manual). 8.1 Editing QC LOT Information 1. -
Page 26: Qc Testing
Quality Control Testing 8.3 QC Testing The QC measurement buttons are color coded: • If QC lockout is disabled, – grey means no measurement is stored, – green means a valid measurement was made while in the QC Measurement menu, and –... -
Page 27: The Options Menu
The Options menu 9 The Options menu The Options screen displays the following information: • Registration Code • Strip type and LOT code information, • Output settings. Following options are available from this screen: • Strip LOT • View Settings: Review and print settings • User Options (Auto features, fast mode, sound, LCD brightness) • Instrument Settings (See “11 Instrument Set-... -
Page 28: Instrument Settings
User Manual (See chapter 1.4 How to use this manual). 10 Instrument Settings The DocUReader 2 Pro device offers several settings to suit the specific workplace requirements. System settings can be modified on the Main » Options » Settings screen. -
Page 29: Strip Options
Instrument Settings Serial TCP/IP File USB B (RS232) Ethernet ⊕ ⊕ ⊕ Bidir: LIS2 (ASTM+) ⊕ Bidir: HL7 ⊕ Bidir: POCT1-A2 ⊕ ⊕ ⊕ Unidir: CSV ⊕ ⊕ ⊕ Unidir: UTF8 text • For the serial port: The selectable baud rates are 2400, 4800, 9600, 19200, 38400, 57600, and 115200 bits per second. -
Page 30: Power Management
Instrument Settings 10.2.1 Reordering the test pads 1. Select the pad with the row cursor. 2. Tap Move to ‘grab’ the selected pad. Its background will change orange to indicate that it is active. 3. Use to move the selected analyte pad. When it is in the cor- rect position, tap Move once again to release it. -
Page 31: Operators
Instrument Settings 10.4 Operators The Operators screen is used to manage the system security settings and to manage the active operators. Legend: 1. The list of operators 2. Delete selected operator (requires confirmation to prevent accidental data loss) 3. Data Exchange: Clear, Import and Export Opera- tors Lists here (available only to Supervisor and Service level operators) 4. - Page 32 Instrument Settings Operator User rights access level Admin Administrator-level operators can perform all user-level tasks, plus the following: • editing settings • managing operators • installing software updates. Supervisor Supervisor-level operators can perform all of the above actions and modify the system security settings. Service Service operators can perform all of the above actions, and have access to the Service screen.
- Page 33 Instrument Settings Preprogrammed operators • ‘autologin’: See “11.4.2 System security settings” • ‘self add’: See “11.4.2 System security settings” • ‘supervisor’: Supervisor-level operators can modify system security settings. The operator name is ‘supervisor’ (all lower-case, without the inverted com- mas), and the default password is ‘1234’. Supervisor-level operators can never be displayed on the Login screen.
-
Page 34: Maintenance
Maintenance 11 Maintenance 11.1 Cleaning the analyzer It is recommended to keep the DocUReader 2 Pro device clean and dust free. Always make sure that the analyzer is switched off before cleaning. Do not turn the analyzer on its side or upside down during cleaning as previously spilled urine or cleaning liquid could run inside the case and damage electrical parts. -
Page 35: Cleaning The Test Strip Tray
Maintenance 11.2 Cleaning the test strip tray Keep the test strip tray clean and free of obstructions. Pay particular attention to the reference pad (1) and the see-through LED window (2). Always wear protective gloves when handling the test strip tray. See “2.4 Safety information”... -
Page 36: Troubleshooting
Errors in sample handling and testing procedure may lead to false results. In order to improve the diagnostic decision making process advanced strip recog- nition features were introduced in DocUReader 2 Pro. The outcome of these features is categorized into three groups: • R1. -
Page 37: Troubleshooting Chart
Troubleshooting 12.2 Troubleshooting chart Problem Cause Corrective action 1 The device does not 1.1 The mains cable or the Check that the adapter is respond to the On/Off AC adapter is not plugged in connected to the analyzer switch. correctly. and that the mains cable is plugged into the wall socket. - Page 38 Troubleshooting Problem Cause Corrective action 6 The test strip tray does 6.1 The serrated edge of Carefully push the test strip not move. the test strip tray does not tray farther inside the device engage with the stepper until it locks firmly into the motor cogs.
-
Page 39: Error Messages
12.3 Error messages This section lists all the messages the DocUReader 2 Pro system uses to com- municate with the operator and the relevant corrective actions where necessary. 12.3.1 General error-, warning-, and information messages Key to the system messages table The DocUReader 2 Pro system displays messages when the user’s attention is... - Page 40 Troubleshooting Short text Full text Corrective action Reference Failure of reference pad See “13.3.2 Handling of failure check. Reference pad of reference pad check (E90)”. value of the tray is out of range. See User Manual for further instructions. QC lockout Go to “QC measurement” Perform QC check to perform QC check.
- Page 41 Troubleshooting Short text Full text Corrective action Output Output line busy. Please The system continuously tries busy wait and try again in a to deliver the output. When it minute. can successfully display the output, the error message will automatically disappear. If the error persists, check and verify output settings.
- Page 42 Troubleshooting Short text Full text Corrective action Strip-holder Stripholder error. Can’t go Check if the test strip tray is to home position. Please properly inserted and remove check it! any obstacles from its path (See “Clearance limits”) Door open Printer door is open. Check if the paper roll is Please close it! correctly loaded in the printer...
- Page 43 Troubleshooting Short text Full text Corrective action E172 Time is expired The expiry date of the QC solution LOT is already past. Register a LOT of QC solution that is still valid. E171 Cannot export log. Make sure that the USB flash drive is connected properly and that the system detects it.
- Page 44 Troubleshooting Short text Full text Corrective action W156 Cannot connect to server Check output server settings. for output. W140 Due to changes the Perform a QC measurement to lockout time has been lift the lockout. expired. W139 Previous “strip pads” Tap the Apply button to save settings lost.
- Page 45 Troubleshooting Short text Full text Corrective action W131 DB failure: possible data Data was probably lost. The loss! Trying to repair. May system is trying to repair itself. take some minutes, please wait W131 DB failure: possible data Check the worklist to see if loss! data was lost.
- Page 46 Troubleshooting Short text Full text Corrective action I102 All samples are selected. I101 Sample ID was not found, please try again or cancel the search 12.3.2 Handling of failure of reference pad check (E90) 1. Remove the test strip tray and clean it paying particular attention to the refer- ence pad.
- Page 47 Troubleshooting Full text Testing: Error Source & Corrective Action E280 Configuration error. Delete item from the database. System configuration (or If problem persists, contact your database) failed. certified service personnel. E270 Strip tray reference pad The reference pad is contaminated error.
- Page 48 Troubleshooting Full text Testing: Error Source & Corrective Action E262 Flipped strip error. Strip Test strip was placed downwards. is put backside top on Repeat the test ensuring the strip is stripholder. correctly positioned on the test strip tray with the test pads facing up. E261 Strip is (partially) dry.
-
Page 49: Appendices
Restart update. I5XX …… O5XX …… 13 Appendices Appendix A Results table The DocUReader 2 Pro analyzer prints the results in the following gradation of concentration using LabStrip urine test strips: Parameter Conventional Units SI Units (SI) Arbitrary (Conv.) negative... - Page 50 Appendices Parameter Conventional Units SI Units (SI) Arbitrary (Conv.) normal normal normal 1.7 mg/dl 30 mg/dl 2.8 mg/dl 50 mg/dl (Glucose) 150 mg/dl 8 mg/dl 500 mg/dl 28 mg/dl 1000 mg/dl 56 mg/dl negative negative negative (Protein) 15 mg/dl 0.15 g/l 30 mg/dl 0.3 g/l 100 mg/dl...
- Page 51 Appendices Parameter Conventional Units SI Units (SI) Arbitrary (Conv.) <= 30 mg/g <= 3.4 mg/mmol norm 31 - 299 mg/g 3.5 -33.8 mg/ mmol >= 300 mg/g >= 33.9 mg/ mmol ACR> Recollect sample* Recollect sample* Recollect sample* Normal Normal Normal Abnormal Abnormal...
-
Page 52: Appendix B Technical Specifications
Appendices Appendix B Technical specifi- cations Type Reflectance photometer with 4 discrete wavelengths (505, 530, 620, 660nm) Throughput Maximum 50 strips/hour (in normal mode) Display 3.5” QVGA touch-screen LCD (resolution: 240x320) Memory 3000 test results / 1000 QC results Printer Thermal line dot printer, paper width: 58 millimeters Dimensions Width... -
Page 53: Appendix C Default Factory Settings
Appendices Appendix C Default factory settings User options: Autostart: ........................ON Auto print: ........................ON Auto transfer: .......................OFF Sound: .......................... ON LCD brightness (%): .....................100 Measurement: color: ..........................OFF clarity: ..........................OFF Set Sample ID: ......................OFF Set Patient ID: ......................OFF Display units: ....................conv-arbitr Strip: LabStrip U11 PLUS Bil: .............................0... - Page 54 Appendices Output: unidir text (UTF8) Header: ........................empty Frame+CHKSUM: ......................ON Output units: ....................conv-arbitr Baud rate: ........................9600 QC options: QC Lockout (day): ......................0 L1: ..........................ON L2: ..........................ON L3: ..........................OFF LOT expiry lockout: .....................OFF Power management options: LCD off time (min): ......................5 Logout time (min): ......................10 Power off time (min): .......................60 Database management options:...
-
Page 55: Appendix D Support & Ordering
Power supply adapter S-1AGTM911 Appendix E Disposal information Do not dispose of an used DocUReader 2 Pro device or any of its parts as municipal solid waste. Without disinfection or sterilization the device and any of its parts are considered infectious clinical waste (EWC code 180103*). Untreated in- fectious waste is typically incinerated. -
Page 56: Appendix F Safety And Compliance Information
Appendices Appendix F Safety and compliance information The DocUReader 2 Pro device was designed and manufactured to comply with the following international regulations, and left the factory in a safe condition. Follow the instructions and pay attention to the warnings in this manual to keep the analyzer in a safe condition. -
Page 57: Appendix G Modification History
Appendices Appendix G Modification history Version Software Modification UD2-920102-1 2.2.3 First version: Short manual according to IVDR requirements ǽ Due to software changes, some screens on the instrument may appear slight- ly different from those in this manual.
Need help?
Do you have a question about the DocUReader 2 PRO and is the answer not in the manual?
Questions and answers