
Subscribe to Our Youtube Channel
Summary of Contents for National Flooring Equipment BINDPRO
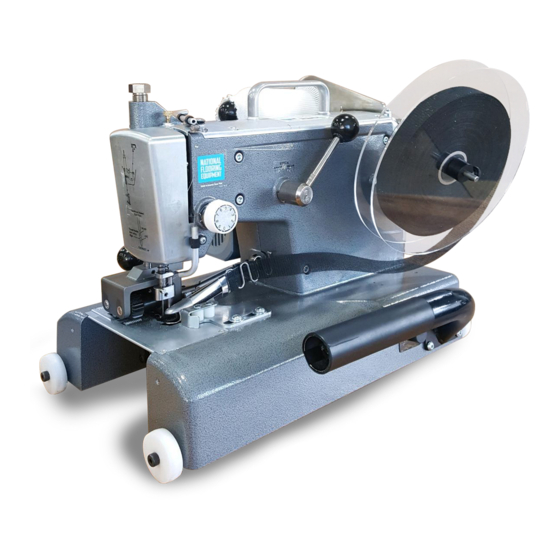
- Page 1 BINDPRO DOUBLE PULL BINDER INSTRUCTION MANUAL Read Manual Before Operating Machine 405294-EN Rev A...
- Page 2 All efforts have been made to ensure the accuracy of the information in this manual. However, should any errors be found, National Flooring Equipment (NFE) would greatly appreciate being notified. Due to con- tinual development of our equipment, NFE cannot take responsibility for any incorrect action taken, or not, due to errors or omissions in this manual that may result from negligence, accident, or any other cause.
-
Page 3: Table Of Contents
Table of Contents Table of Contents ................................3 Features and Specifications ............................4 Safety ....................................6 General Rules for Safe Operation ......................... 6 Recommended Electrical Practices ........................7 Main Controls and Components ..........................8 Operation ..................................10 Unpackaging ................................ 10 Threading the Machine ............................ -
Page 4: Features And Specifications
Features and Specifications FEATURES • Electronic speed control • Heavy-duty transfer rollers for improved mobility • Heavy-duty gear set on top drive shaft makes machine more • Ball bearing cam follower for reduced friction and increased robust longevity • LED light improves visibility of sewing area •... - Page 5 Features and Specifications Product Specifications Width Length Height Weight Power 15” (38.1 cm) 19” (48.3 cm) 14” (35.6 cm) 44 lbs (20.0 kg) 120V, 5A...
-
Page 6: Safety
Safety GENERAL RULES FOR SAFE OPERATION READ AND SAVE ALL INSTRUCTIONS FOR FUTURE USE. Before use, ensure operators read and understand this manual. Read and under- stand labeling on machine and components. Extra copies of the manual are available. KNOW YOUR EQUIPMENT: Read this manual carefully to learn equipment applications and limitations, potential hazards associated with this type of equipment. -
Page 7: Recommended Electrical Practices
Safety RECOMMENDED ELECTRICAL PRACTICES WARNING: ELECTRICAL CORDS CAN BE HAZARDOUS. MISUSE CAN RESULT IN FIRE OR DEATH BY ELECTRICAL SHOCK. READ CAREFULLY AND FOLLOW ALL DIRECTIONS. CAUTION: ALWAYS FOLLOW APPLICABLE ELECTRICAL CODES, STANDARDS AND/OR REGULATIONS. CONSULT YOUR LOCAL ELECTRICAL AUTHORITY OR A LICENSED ELECTRICIAN BEFORE ATTEMPTING TO MODIFY AN ELECTRICAL INSTALLATION. ENSURE THAT CIRCUIT AND GROUND FAULT PROTECTION DEVICES AND ALL OTHER ELECTRICAL SAFETY EQUIPMENT ARE FUNCTIONING PROPERLY. -
Page 8: Main Controls And Components
Main Controls and Components FRONT VIEW Stitch Selector Lever Tension Control Binding Tape Disc Double Pull Feed Roller Speed Control Knob Binding Tape Folder Wheel END VIEW Needle Bar Upper Pivot Pin Screw Needle Bar Drive Collar Feed Roller Lift Lever Power Switch... - Page 9 Main Controls and Components TOP VIEW Drive Gears Handwheel Belt BOTTOM VIEW Roller Fuse* Shuttle Body Shuttle Body Clamp Screw * Located above cord connector...
-
Page 10: Operation
Operation UNPACKAGING Important! It is highly recommended you retain the box and packing your binder was sup- plied in for storage, transporting, or if necessary, shipping the binder for service. Replacement shipping cartons can be purchased. For equipment to be returned, please call NFE at 1-800-245-0267. Each new binder is furnished with the following items: •... - Page 11 Operation THREADING THE MACHINE—CONTINUED Thread bobbin case. A. With bobbin and bobbin case being held as shown, and with approximately 5-6” of thread for feeding, insert bobbin into case (Figure 4). B. Pull thread through slot in the bobbin case (Figure 5). Thread should unwind counterclockwise towards slot.
-
Page 12: Thread Tension
Operation THREAD TENSION Proper and Improper Thread Tension Proper thread tensions are important in obtaining optimal stitch appearance, proper knot location and tensions within the carpet being sewn. When the upper and lower thread tensions are correct, the threads are knotted in the center of the carpet (Figure 7). -
Page 13: Installation And Threading Of Binding Tape
Operation THREAD TENSION—CONTINUED Installation and Threading of Binding Tape Included with your machine are: • Binding tape discs (front and back) • Binding tape centering plug • Binding tape (1/2 gross) Mount the Tape Reel A. Place the back disc on spindle. B. -
Page 14: Stitching
Operation STITCHING Changing Between Zigzag and Straight Stitch Modes Examples of zigzag and straight stitching are shown in Figure 12 (as seen from the back Zigzag Straight of carpet, 7/8” binding tape shown). Right stitch at Approximately edge of tape The machine is shipped in Zigzag mode. -
Page 15: Stitching Around A Corner
Operation STITCHING—CONTINUED Stitching Around a Corner Stop sewing and if necessary, rotate handwheel towards you until needle is in carpet at corner. Raise feed roller. Alter direction of material (or machine). Lower feed roller and resume sewing. Note: Be careful not to pull the tape too tight as this will cause the carpet to curl up at the corners. Removing Carpet Raise feed roller. -
Page 16: Binding Corners
Operation BINDING CORNERS Outside Corners Outside corners can be done in three ways: METHOD 1 Sew first side, then trim flush with edge (Figure 15). Sew over trimmed end leaving a 2-3” tail at the start (Figure 16). FIG. 15 Repeat Steps 1-2 on each corner. - Page 17 Operation BINDING CORNERS—CONTINUED METHOD 2 Sew first side leaving a 2-3” tail (Figure 18). Fold tail under (Figure 19). Place carpet in folder and sew down the next side (Figure 20). Repeat Steps 2 and 3 on each corner. FIG. 18 When completed, fold and glue all the strips down (Figure 21).
-
Page 18: Inside Corners
Operation BINDING CORNERS—CONTINUED Inside Corners Inside corners can be done in two ways: METHOD 1 Cut the carpet back at the corner (Figure 23). Fold back at cut and sew over end (Figure 24). FIG. 23 Fold back sewed side. Start at cut. See Figure 25. Use seam tape to close cut and glue back tails on tape. - Page 19 Operation BINDING CORNERS—CONTINUED METHOD 2 Sew first side into corner as far as possible leaving enough binding tape to reach the corner when hand stitching the rest. Slide carpet in from back of machine (as close to the corner as the machine will allow) leaving a starting tail and continue sewing.
-
Page 20: Folder Options
Operation FOLDER OPTIONS The machine comes complete with a folder mounting bracket. Customers must choose one of the following folders with their purchase: Carpet • 7/8” Folder (P/N 126-154) • 1-1/4” Folder (P/N 126-D-F) • 1-1/4” Wide-Mouth Folder (P/N 126-D3-F) Raw Edge Type FIG. -
Page 21: Operating Tips
Operation OPERATING TIPS General • Always check the needle condition and the amount of bobbin remaining before starting a job. • It is good practice to run a short strip of scrap whenever changing carpet types to check for stitch placement and binding fold. •... -
Page 22: Maintenance
Maintenance WARNING: FOR YOUR SAFETY, DISCONNECT THE POWER SOURCE TO THE BINDER BEFORE ATTEMPTING TO SERVICE OR ADJUST THE MACHINE. LUBRICATION Regular lubrication of your machine is essential to proper operation and long service. Use the lubricant that is supplied with the machine. Lubricate ONLY the components specified below. -
Page 23: Needle Height Adjustment
Maintenance NEEDLE HEIGHT ADJUSTMENT NEEDLE as VIEWED from FRONT Checking Needle Height This adjustment should be checked if the machine skips stitches or after the machine jams or a needle has broken. Install the new needle incorrectly with the scarf to the outside (left) rather than inside (right). -
Page 24: Needle-To-Driver Setting & Race Cover Spring Clearance
Maintenance NEEDLE-TO-DRIVER SETTING & NEEDLE as VIEWED RACE COVER SPRING CLEARANCE from FRONT Note: These settings seldom change or need adjustment. Checking Needle-To-Driver Setting & Race Cover Spring Clearance Remove bobbin and hook. Clean the shuttle area, hook and race cover prior to adjusting. Install new needle correctly with the scarf to the inside of the machine (Figure 41). -
Page 25: Folder Adjustment
Maintenance FOLDER ADJUSTMENT Tail Lowered The machine is shipped with the folder positioned as shown in Figure 46. (Folder is shown removed from machine for clarity.) The tail is lowered with the folder mouth flat against the base of the machine. With the folder in this position, the tape should fold more to the back of the carpet. -
Page 26: Troubleshooting Guide
Troubleshooting Guide WARNING: FOR YOUR SAFETY, DISCONNECT THE POWER SOURCE TO THE BINDER BEFORE ATTEMPTING TO SERVICE OR ADJUST THE MACHINE. Problem Cause Solution Skipping Bad needle Check needle. Deburr or replace if needed. Dirty shuttle area Clean shuttle area and lubricate. Needle height or clearance out of adjustment Check adjustment. - Page 27 Troubleshooting Guide Problem Cause Solution Won’t pick up bobbin thread Needle height or clearance out of adjustment See instruction manual. Bobbin tension incorrect Check tension. Damaged bobbin tension spring Replace spring. Needle in wrong Check needle. Too short of thread lead from bobbin case Leave 2”...
-
Page 28: Complete Parts List
Complete Parts List PART# DESCRIPTION PART# DESCRIPTION 126-03G Guide, Thread 403514 Washer, Lock, Belleville, 1/4", Black Steel 126-100 Shaft, Flex, Drive, with Screws 403516 Screw, Socket Head Cap, 1/4-20 x 7/8, Clear Zinc 126-112-1 Case, Bobbin, with Eyelet 403517 Washer, Lock, Belleville, #10, Black Steel 126-113 Hook, Shuttle 403518... - Page 29 403694 Assembly, Double Puller 404263 Harness, LED, 12V, 40mA 403702 Screw, Flat Head Cap, 6-32 x 5/16, Clear Zinc 404266 Harness, Main, BindPro 403887 Assembly, Plate, Large Roller 404267 Harness, Speed Control, Potentiometer, 20k Ohm, .25W 403891 Nut, Hex, Nylon Insert, 10-24, Zinc Plated 404284 Washer, Shim, .35 x 1/2 x .032...
-
Page 30: Accessories & Attachments
THREAD 126-E Clear Thread • Size #52 • 4,300 yards per spool • Comes with sock • For Binding Brute, BindPro 126-EH Clear Heavy-Duty Thread (Figure A) • Size #63 • 3,500 yards per spool • Comes with sock • For Binding Brute, BindPro •... - Page 31 Accessories & Attachments TOOLS 1840 Tweezers (Figure E) • Deluxe bent 6” tweezers • Included with accessory kit FIG. E 1841 Small Screwdriver Set (Figure F) • Contains two small screwdrivers with plastic handles • Included with accessory kit 680 Thread Clip (Figure G) •...
- Page 32 Accessories & Attachments ACCESSORY KIT 404088 BindPro Tool Kit (Figure J) Includes: 126-A2 Bobbins, Heavy Duty, Nylon, 72 yds, Size D 8 pcs 126-B2A Needle, Size 23, Schmetz, Pk of 10 1 pkg 1840 Tweezer 1 pc 1841 Screwdriver, Set of 2...
-
Page 33: Warranty
Warranty National Flooring Equipment Inc. (referred to as “The Company”) warrants that each new unit manufactured by The Company to be free from defects in materials and workmanship in normal use and service for a period of 90 days from date of shipment from The Company to the end user. - Page 36 NATIONAL FLOORING EQUIPMENT 9250 Xylon Avenue N • Minneapolis, MN 55445 • U.S.A. Toll-free 800-245-0267 • Phone 763-315-5300 • Fax 800-648-7124 • Fax 763-535-8255 Web Site: www.nationalequipment.com • E-Mail: info@nationalequipment.com...
Need help?
Do you have a question about the BINDPRO and is the answer not in the manual?
Questions and answers