Advertisement
Advertisement

Subscribe to Our Youtube Channel
Related Manuals for Quictent YS1106


Summary of Contents for Quictent YS1106
-
Page 2: Table Of Contents
Table of Contents ................About Quictent ..............Safety Instructions ............Basic Series (Model #YS1106) ............Classic Series (Model #1113) ............Upgraded Series (Model #1114) ................Maintenance .................. Warranty .................. Appendix... -
Page 3: About Quictent
Add the following email address to your CONTACT LIST in case of any blocking. Email: sales@quictents.com, maxlead.us@gmail.com. This user manual applies to Quictent 10’ x 20’ carport. It will help you to get to know your Quictent carport. Please read the guidelines in this manual and keep the manual for future reference. -
Page 4: Safety Instructions
c a r p o r t . - Page 5 Warning Do NOT use this product in severe weather such as high wind, heavy rain, heavy snows, etc. Please take down the structure for any potential inclement weather. Damages caused by improper use will NOT be covered by the warranty.
-
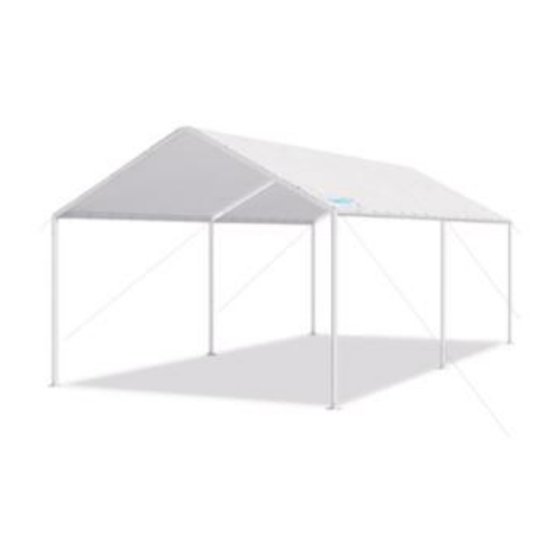
Page 6: Basic Series (Model #Ys1106)
Basic Series (Model #YS1106) Parts List You’ll receive one (1) box for this model. Please pay particular attention to making sure all parts are numbered and graphically indexed as shown on the Parts List, so does the quantity for each part. If you need any help, please contact us promptly (sales@quictents.com or maxlead.us@g-... - Page 7 B u n g e e C o r d...
- Page 8 Step 2 Fix the Roof Cover (#C) to the assembled top frame with the help of some Bungee Cords (#I). Step 3 Start assembling the mainframe. Add 3 x poles (#3) to the connectors (#A & #B) on one side, then lift the structure from the other side (several adults required!).
- Page 9 Step 4 Secure the structure with the L-Shaped Pegs (#D), Auger Anchors (#E), Foot Bases (#F), Screws (#G), and Ropes (#H). Add a Foot Base (#F) to the bottom of each pole (#3), then fix with a Screw (#G). Repeat what you've done with the other 5 foot bases and poles (#3). Insert the 6 x L-Shaped Peg (#D) into the hole of 6 x Foot Bases (#F), one for each.
-
Page 10: Classic Series (Model #1113)
Classic Series (Model #1113) Parts List You’ll receive one (1) box for this model. Please pay particular attention to making sure all parts are numbered and graphically indexed as shown on the Parts List, so does the quantity for each part. If you need any help, please contact us promptly (sales@quictents.com or maxlead.us@gmail.com) with the ORDER NUMBER, REQUIRED PARTS (NAME, QUANTI- TY, and PART NUMBER), PICTURES (OR VIDEO CLIPS, IF APPLICABLE), we’ll get back to help out soon. - Page 11 R o o f C o v e r...
- Page 12 Assembly Steps Before the assembly, please check to make sure that you have all parts listed on the Parts List. For your safety, please always wear gloves (#N) before and during the assem- bly. Step 1 Form the top frame as per the following steps. Layout the frame with the poles (6 x #1, 6 x #2, and 6 x #4) and the connectors (4 x #A, 2 x #B, 2 x #C, and 1 x #D).
- Page 13 Step 2 Adjust the 3 x Steel Cables (#E). Hook the cables to the connectors (#C & #D) at the top. Tighten/loosen the cables to a proper height with the help of the height controller. Step 3 Start assembling the mainframe. Fix the Roof Cover (#G) to the assembled top frame with the help of some Bungee Cords (#L).
- Page 14 Step 4 Secure the whole structure. Connect each pole (#3) at the bottom with a Foot Base (#F) by using a Screw (#J). Insert an L-Shaped Peg (#H) into the hole of each Foot Base (#F). Secure the whole structure with 6 x Ropes (#K) and 6 x Auger Anchors (#I). We highly recommend you diagonally insert the pegs when fixing the ropes to the ground.
-
Page 15: Upgraded Series (Model #1114)
Upgraded Series (Model #1114) Parts List You’ll receive two (2) boxes for this model. Please pay particular attention to making sure all parts are numbered and graphically indexed as shown on the Parts List, so does the quantity for each part. If you need any help, please contact us promptly (sales@quictents.com or maxlead.us@gmail.com) with the ORDER NUMBER, REQUIRED PARTS (NAME, QUANTI- TY, and PART NUMBER), PICTURES (OR VIDEO CLIPS, IF APPLICABLE), we’ll get back to help out soon. - Page 18 Step 3 Start assembling the mainframe. Fix the Roof Cover (#E) to the assembled top frame with the help of some Bungee Cords (#K). Add 4 x poles (#3) to the connectors (#A & #B) on one side, then lift the structure from the other side (several adults required!).
- Page 19 Step 4 Secure the whole structure. Connect each pole (#3) at the bottom with a Foot Base (#F) by using a Screw (#I). Insert an L-Shaped Peg (#G) into the hole of each Foot Base (#F). Secure the whole structure with 8 x Ropes (#J) and 8 x Auger Anchors (#H). We highly recommend you diagonally insert the pegs when fixing the ropes to the ground.
-
Page 21: Appendix
Party Tent Preparing for parties and events? We've got your back. Quictent party tents in different sizes are available. From a small-sized one in 10' x 8' to some regular sizes in 10' x 20' or 10' x 30' to a large one in 20' x 40', you can always find a perfect solution matching your demands. - Page 22 Metal Gazebo Owning a Quictent metal gazebo is just like having another beautiful room in your backyard! The powder-coated steel frame is heavy-duty and can stand firmly outdoors for a long time. The mosquito netting adds privacy and protects you from bugs. The tan ones go with the surroundings well while the red ones are eye-catching.
- Page 23 Shelter for Vehicle Carport The Quictent carports share something in common: They are heavy-duty, easy-to-assemble, and of the most importance, supported by an industrial-leading after-sales service. You can choose from the ones with or without sidewalls depending on your needs.
- Page 24 Truck Tent Light in weight and excellent in performance, Quictent truck bed tents are always a safer and more comfortable choice for road trips with a pickup truck. They can protect you from the elements when traveling and keep warm & keep you away from the crawling insects when sleeping. More importantly, whenever you want to stop to rest, the big awning would get you sheltered.
- Page 25 Available in mini, medium, and large walk-in ones. Grow Tent We highly recommend Quictent grow tents for anyone wanting to grow indoors. Passed the SGS certification, they’ll help create an optimal growing environment. You're sure to be surprised by lots of built-in features like more reflective cover materials, the big observation window, convenient...
- Page 26 Garden Bed A Quictent raised garden bed is highly recommended for gardening beginners since it makes you the controller of the size, location, as well as factors like soil conditions. An elevated one is the ultimate solution for gardeners with back pain or knee issues.
Need help?
Do you have a question about the YS1106 and is the answer not in the manual?
Questions and answers