Advertisement
Quick Links
Advertisement

Related Manuals for BEZIOR XF800

Summary of Contents for BEZIOR XF800
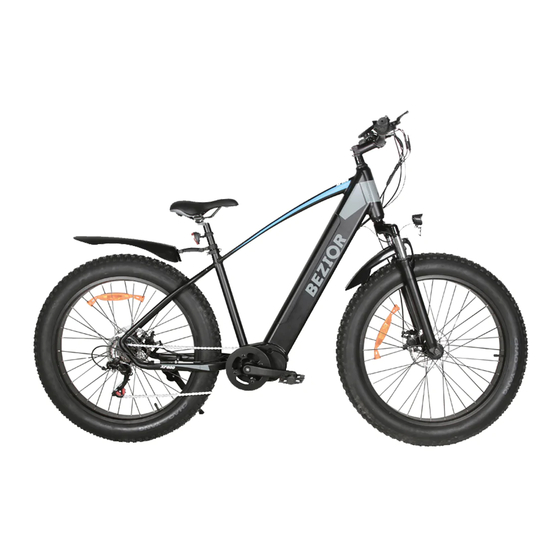
- Page 1 E-BIKE USER’MANUAL XF800 CAUTION: READ THIS MANUAL BEFORE USING YOUR EQUIPMENT...
- Page 3 Congratulations First of all, congratulation on your purchasing of our electric bicycle,it is a carefully designed and manufactured under strict quality control. Please read this instruction manual carefully and thoroughly before riding, as it contains sufficient information, which is very important in safety, maintenance and simple assembly. It is the owner's responsibility for reading this manual before riding this bike.
- Page 4 SECTION I MANUAL FOR MECHANICAL PARTS Contents: Conditions for Riding This Electric Bicycles Selection and Set-up Safe Cycling and Safety Tips Routine Maintenance Check and Lubrication Assembly Instructions 1. Conditions for Riding this Electric Bicycles This electric bicycle is designed for riding on a road or a paved surface where the tires do not lose ground contact, and this electric bicycle must be under proper maintained according to the instruction of this manual.
- Page 5 Warning: If your seat post is not inserted up to the minimum insertion mark, the seat post may break (refer to fig. 3) Once the saddle is at the correct height, make sure the seat post should be up to its minimum insertion mark.
- Page 6 Warning of Wet Weather Riding: No brakes work as well under wet or icy conditions as they do under dry conditions. The braking distance in wet weather would be longer than those in dry, and you should take special precautions to assure safe stopping. Ride than normal and apply your brakes well in advance of anticipated stops.
- Page 7 D-Brakes R-Seat and Stem Nuts Lightly oil exposed cables K-Reflector(Pedal) monthly. Maintain adjustment Be sure seat and stem nuts and replace brake blocks Check all fitting are secure. are tight when worn, brake cables when frayed. L-Cranks E-Battery light (front and rear) Grease bearing monthly, S-Pedals...
- Page 8 5 .Assembly Instruction Here is some important information for electric bicycles assembly, which is very useful for your maintaining your electric bicycle, and especially helpful when you purchase our e-bikes which is partly assembled and packed in a carton. Step 1: Preparation: Take the electric bicycle and parts out of the carton and detach all parts that are tied to the frame.
- Page 9 6) When you are satisfied with the height of the seat post, close the sea post quick release lever. The tightness of the lever is adjusted by rotating the adjustment nut opposite the quick release lever. Turn the nut by hand to adjust the tension while holding the lever stable. Step 3: Handlebar &...
- Page 10 Step 4 Attaching Pedals(refer to fig. 8) : “ 1)The pedals are marked with either a R” or “ L” on the threaded end of the pedal axle. 2)Screw the pedal marked ”R” into the right side of the crank assembly (chain side of electric bicycles). Turn the pedal (by hand) in the clockwise direction.
- Page 11 To alter the travel of the brake lever adjust screw A (see fig. 9), unscrew screw A reduce the amount of lever travel and by tightening it increase the lever travel. If you have fully unscrewed screw A and the lever travel is still excessive you will have to adjust the space between the pads and the disc.
- Page 12 o fit new pads, remove the brake calliper from the fork or frame by unscrewing allien bolts D(Fig.14). Unscrew (anti-clock wise), the smaller allen bolt inside allen bolt B(Fig.11). Lift up and pull the inner pad downward, using the protruding part. Slide a thin slot screwdriver under the outer pad and lift it up. Hold the screwdriver in this position and remove the pad with a pair of long nosed pliers.
- Page 13 7.3 Low Adjustment Turn the “L” adjusting screw (or low gear adjustment screw) so that the guide pulley moves to a position directly below the low gear. operate the shifting lever to shift the chain from top gear to 2nd gear. ...
-
Page 14: Table Of Contents
SECTION II MANUAL FOR ELECTRIC PART The model instructed in this manual is made with “start aid”. This electric assistance system will help riders to save their energy, while they enjoy their easy sports. Here is the function of so-called “start aid”: when you long press the down button for display for seconds, the bike can be started at speed of 6 km/h. - Page 15 Warning: Do not wash this electric bike direct with spraying water, to avoid water entering electric components, which may result in damage of the electric components and then, the electric assistance bicycle can not be normally used. 2. Operation Your new electric bicycle is a revolutionary transporting means, applied with alloy aluminum frame, Lithium battery, a super high efficient electric hub motor and controller with pedal assistance system, to make easy biking.
-
Page 16: Meter Operation
green, after the battery is fully charged. 3.2.4 To finish charging, you must disconnect the charger input plug first from the AC outlet, and after that, disconnect the charger output plug from the battery .Finally, close the cover on the charging socket and check the socket, if covered for sure! Warning: 1) You should only use the charger provided with the electric bike, otherwise damage could occur to... -
Page 17: Meter Operation
4.2 Meter operation: Operating instructions To switch Press “+” to Continue Continue Continue to Press “-” to on/off the increase to press to press press “+” to decrease to E-Bike “+” to increase to “2” “+” “0” peed increase to “5”... -
Page 18: Using And Maintaining The Electric Hubmotor
charging without memory effect big electric energy capacity, small volume, light in weight, with large current output, suitable for high power vehicles. long life A wide working range of temperature: -10°C 5.Using and Maintaining the Electric Hub Motor. To avoid damaging the motor, it is better to start the motor working after the bike has been ... -
Page 19: Maintaining The Controller
instructed above, due to long natural over discharge; 2) Never use any metals directly to connect the two poles of the battery, otherwise, the battery will be damaged due to short circuit. 3) Never put the battery near to fire or heating it. 4) Never strongly shake, punch and toss the battery. -
Page 20: Diagram And Specification
Charging time is not enough Please charge the battery according the instruction Chapter 3.3 The environment temperature is so low In winter or under 0°C,you'd better store that it affect the battery working the battery in room The distance per frequently going up slop, or going again charge become It will be normal if the riding conditions are... - Page 21 8. 2 Main Technical Specification Sheet Here are some general technical Data for electric bikes: Description Information SKU NO. XF800 Maximum speed with electric assistance 40KM/H Over current protective value 18+/-1A(under 48V) Under voltage protective value 40V+/-0.5V(under rated 48V) Please find the technical data regarding your bike motor below:...
- Page 22 More electric bike’s installation and repair instructions . Any question about the item, please contact. Detail Packing List Description Quantity E-Bike Tools (13-15 spanner, 9-11 spanner, 8-10 spanner,14-17 spanner, eleven-shaped screwdriver, M6, M5, M4, M3 Allen wrench) Manual Charger Pedal Fenders Rear light...
Need help?
Do you have a question about the XF800 and is the answer not in the manual?
Questions and answers