Advertisement
Available languages
Available languages
Quick Links
Advertisement

Related Manuals for ANKEWAY K1

Summary of Contents for ANKEWAY K1
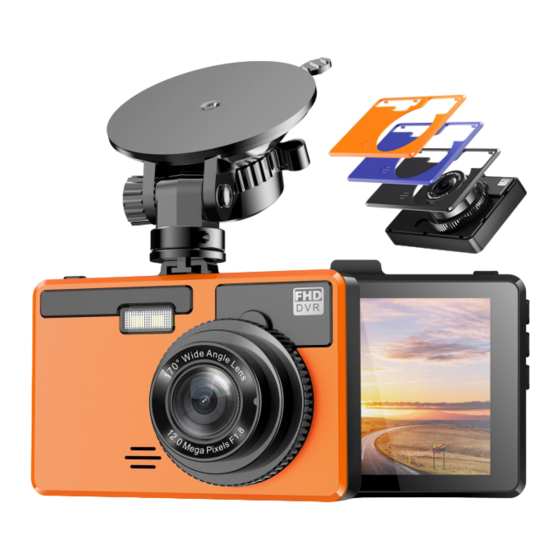
- Page 1 ANKEWAY K1 Dash Cam User Manual...
- Page 2 HINWEIS: Wenn die Dashcam sagt: „Bitte SD-Karte erneut einlegen“, müssen Sie die SD-Karte nur wie oben direkt auf der Dashcam formatieren (32/64G, Micro-SD-Karte der Klasse 10 empfohlen) 2. Dashcam muss ständig aufgeladen werden. K1 nur eingebauter 180 mAh Akku, die Standby-Zeit ist relativ kurz. Normalerweise 3-5 Minuten.
- Page 3 Inhalt 1. So installieren Sie die K1 Dashcam? 2.Produktstruktur 3. Verknüpfungen und Schaltflächen verstehen 4.Wie kann ich die Videos anzeigen? 5.Häufige QA 6.Produktspezifikationen 7.Garantie und Support Multilingual Version:English/Italiana/Deutsch/Espanol/Français...
- Page 4 So installieren Sie die K1 Dashcam • Schritt 1: Legen Sie eine Micro-SD- Karte [Klasse-10, max. 64 GB] ein, wenn das Gerät ausgeschaltet ist. Es muss separat erworben werden • Schritt 2: Befestigen Sie die Dash Cam mit der Saughalterung an der Windschutzscheibe.
- Page 5 Produktstruktur 1. Hoch 2. Speisekarte 3. Runter 4. TF-Karten-Slot 5. Leistung 6. Mini-USB-Steckplatz für Stromeingang und Datenausgang 7. TV-Ausgang 8. Zurücksetzen 9. LED-Licht 10. Frontlinse...
- Page 6 TASTE BILD SCHALTFLÄCHENNAME SHORTCUTS / FUNKTIONEN So schalten Sie die Kamera ein: Drücken Sie einmal den Netzschalter So schalten Sie die Kamera aus: Halten Sie die Einschalttaste 2 Sekunden lang gedrückt Drücken Sie einmal - um bestimmte Einstellungen einzugeben / zu bestätigen, während Sie sich in den Menüeinstellungen befinden Ein-/Aus-Taste Einmal drücken - um die Videoaufnahme zu starten/stoppen...
- Page 7 So zeigen Sie die Videos an Methode 1: Auf Dashcam Videoplayer Schritt 1. Halten Sie die M-Taste 2 Sekunden lang gedrückt: Wechseln 1. Windows media player Sie in den Fotomodus Schritt 2. Halten Sie die M-Taste erneut 2 Sekunden lang gedrückt: Geben Sie den Videomodus ein (Recommen Methode 2: USB-Modus...
- Page 8 Häufige QA Q1: Wie lasse ich die Parküberwachungsfunktion arbeiten? A1: Diese Dashcam benötigt ein Mini Hardwire Kit und schaltet den Parkmodus ein, um die Parküberwachung Q4: Dashcam stoppte automatisch während der zu erreichen Aufnahme Q2: Wie richte ich die Dashcam ein, um das Beste daraus zu A4: Drei Gründe machen? Grund 1: Mirco SD-Karte hat keinen Platz zum...
- Page 9 Produktspezifikationen ANKEWAY K1 DASH CAM Sensor 2.0 million CMOS Sensors IPS Display 3 inch Resolution 1080P Wide Angle 170° Aperture F/1.8 Video Frame Rate 30fps Video Format Photo Format Microphone Built-in speaker 0.8w Frequency 50HZ/60HZ Memory Card CLASS10 TF (SD) Card ,64Max (Not Included)
- Page 10 Garantie & Kundensupport GARANTIE ANKEWAY K1 dash cam comes with full 18 months warranty UNTERSTÜTZUNG Bei Problemen können Sie sich gerne an uns wenden...
- Page 11 Content 1.How To Install K1 Dash Cam? 2.Product Structure 3.Shortcuts & Understanding Buttons 4.How To View The Videos? 5.Frequent QA /Espanol 6.Product Specifications 7.Warranty and Support Multilingual Version:English/Italiana/Deutsch/Espanol/Français...
- Page 12 SD Card directly on the dashcam as above ( 32/64G, Class 10 Micro SD Card Recommended) 2. Dash cam needs to be charged all the time. K1 only built-in 180 mAh battery, the standby time is relatively short. Normally 3-5 minutes.
- Page 13 How To Install K1 Dash Cam • Step1:Insert a Micro SD Card[Class-10,Max 64GB] in power off. It needs to be purchased separately • Step2: Fix the Dash Cam on the windshield by Suction Mount. • Step 3:Power the Dash Cam via USB-Car charger,...
- Page 14 Product Structure Menu Down TF Card Slot Power Mini-USB Power Input &Data Output Slot TV Out Reset LED Light 10. Front Lens...
- Page 15 BUTTON IMAGE BUTTON NAME SHORTCUTS / FUNCTIONS To Turn ON The Cam: Press power button once To Turn OFF The Cam: Hold power button for 2s Press Once - to Enter / Confirm Specific Settings while in Menu Settings POWER BUTTON Press Once - to Start/Stop Video Recording Press Once - to Take Snap-Shot while in Photo Mode...
- Page 16 How To View The Videos? Method 1: On Dash Cam Video Players Step1.Long press M button for 2s:Enter Photo Mode 1. Windows media player Step2.Long press M button for 2s again:Enter Video Mode (Recommen Method 2: USB Mode Strongly Recommended Step1.Connect dashcam to computer directly via mini USB cable in package 2.
- Page 17 Frequent QA Q1: How do I let the Parking Monitor function work? A1: This dashcam needs a Mini Hardwire Kit and turns on the Parking Mode to achieve Q4: Dash cam would automatically stop while recording parking monitoring Q2: How do I set up the dash cam to make the most A4: Three Reasons of it? Reason1 : Mirco SD card has no space to record...
- Page 18 Product Specifications ANKEWAY K1 DASH CAM Sensor 2.0 million CMOS Sensors IPS Display 3 inch Resolution 1080P Wide Angle 170° Aperture F/1.8 Video Frame Rate 30fps Video Format Photo Format Microphone Built-in speaker 0.8w Frequency 50HZ/60HZ Memory Card CLASS10 TF (SD) Card ,64Max (Not Included)
- Page 19 Warranty & Customer Support WARRANTY ANKEWAY K1 dash cam comes with full 18 months warranty SUPPORT Any Issues, Feel Free to Contact US...
-
Page 20: Table Of Contents
Contenuto 1.Come installare K1 Telecamera per Auto? 2.Struttura del prodotto 3. Tasti di scelta rapida e comprensione dei pulsanti 4.Come visualizzare i video? 5.QA frequente 6. Specifiche del prodotto 7.Garanzia e assistenza clienti Multilingual Version:English/Italiana/Deutsch/Espanol/Français... - Page 21 SD Card direttamente sulla telecamera per auto come sopra (32/64G, scheda Micro SD di classe 10 consigliata) 2. La Telecamera per Auto deve essere sempre caricata. K1 solo batteria integrata da 180 mAh, il tempo di standby è relativamente breve. Normalmente 3-5 minuti.
-
Page 22: Come Installare K1 Telecamera Per Auto
Come installare K1 Telecamera per Auto • Passaggio 1: inserire una scheda Micro SD [Classe 10, Max 64 GB] in modalità di spegnimento. Deve essere acquistato separatamente • Passaggio 2: fissare la Telecamera per Auto sul parabrezza tramite il supporto a ventosa. -
Page 23: Struttura Del Prodotto
Struttura del prodotto 1. Su 2. Menù 3. Fuori uso 4. Slot per schede TF 5. Potenza 6. Ingresso alimentazione mini- USB e slot di uscita dati 7. Uscita TV 8. Ripristina 9. Luce a led 10. Lente frontale... -
Page 24: Tasti Di Scelta Rapida E Comprensione Dei
IMMAGINE DEL NOME PULSANTE SCORCIATOIE / FUNZIONI PULSANTE Per accendere la videocamera: premere una volta il pulsante di accensione Per spegnere la videocamera: tieni premuto il pulsante di accensione per 2 secondi Premi una volta - per accedere/confermare impostazioni specifiche mentre PULSANTE DI Tasti di sei in Impostazioni menu... -
Page 25: Come Visualizzare I Video
Come visualizzare i video? Metodo 1: su Telecamera per Auto Lettori video Passaggio 1. Premere a lungo il pulsante M per 2 secondi: accedere alla modalità 1. Windows media player foto Passaggio 2. Premere di nuovo a lungo il pulsante M per 2 secondi: accedere alla modalità... - Page 26 QA Frequent frequente Q1: Come faccio a far funzionare la funzione Parking Monitor? A1: Questa dashcam necessita di un kit Mini Hardwire e attiva la modalità parcheggio per ottenere il monitoraggio Q4: La dashcam si interrompeva automaticamente durante la del parcheggio registrazione Q2: Come posso configurare Telecamera per Auto per sfruttarla al A4: Tre motivi...
-
Page 27: Specifiche Del Prodotto
ANKEWAY K1 Telecamera per Auto Sensor 2.0 million CMOS Sensors IPS Display 3 inch Resolution 1080P Wide Angle 170° Aperture F/1.8 Video Frame Rate 30fps Video Format Photo Format Microphone Built-in speaker 0.8w Frequency 50HZ/60HZ Memory Card... -
Page 28: Garanzia E Assistenza Clienti
Garanzia e assistenza clienti GARANZIA La dash cam ANKEWAY K1 viene fornita con una garanzia completa di 18 mesi SOSTEGNO Qualsiasi problema, non esitare a contattarci... - Page 29 Contenido 1.Cómo instalar K1 Cámara de Coche? 2.Estructura del producto 3.Accesos directos y botones de comprensión 4.¿Cómo ver los videos? 5.QA frecuente 6.Especificaciones del producto 7.Garantía y atención al cliente Multilingual Version:English/Italiana/Deutsch/Espanol/Français...
- Page 30 (32/64G, se recomienda tarjeta Micro SD de clase 10) 2. La Cámara de Coche del tablero debe cargarse todo el tiempo. K1 solo tiene una batería incorporada de 180 mAh, el tiempo de espera es relativamente corto. Normalmente 3-5 minutos.
- Page 31 Cómo instalar K1 Cámara de Coche • Paso 1: Inserte una tarjeta Micro SD [Class-10, Max 64GB] en el apagado. Debe comprarse por separado. • Paso 2: fije la Cámara de Coche en el parabrisas con el soporte de succión.
- Page 32 Estructura del producto 1. Hasta 2. Menú 3. Abajo 4. Ranura para tarjetas 5. Poder 6. Entrada de alimentación mini-USB y ranura de salida de datos 7. TV apagada 8. Reiniciar 9. Luz LED 10. Lente frontal...
- Page 33 IMAGEN DEL BOTÓN NOMBRE DEL BOTÓN ACCESOS DIRECTOS / FUNCIONES Para encender la cámara: presione el botón de encendido una vez Para apagar la cámara: mantenga presionado el botón de encendido durante 2 segundos Presione una vez - para ingresar / confirmar configuraciones específicas mientras está...
- Page 34 ¿Cómo ver los videos? Método 1: en la Cámara de Coche Reproductores de video Paso 1.Mantenga presionado el botón M durante 2 segundos: ingrese al modo 1. Windows media player de foto Paso 2.Presione prolongadamente el botón M durante 2 segundos nuevamente: ingrese al modo de video Muy recomendado Método 2: modo USB...
- Page 35 Preguntas y respuestas frecuentes Q1: ¿Cómo dejo que funcione la función de monitor de aparcamiento? R1: Esta Cámara de Coche necesita un kit de cableado mini y enciende el modo de estacionamiento para lograr el Q4: La cámara del tablero se detendría automáticamente durante monitoreo de estacionamiento la grabación Q2: ¿Cómo configuro la cámara del tablero para aprovecharla al...
- Page 36 Especificaciones del producto ANKEWAY K1 Cámara de Coche Sensor 2.0 million CMOS Sensors IPS Display 3 inch Resolution 1080P Wide Angle 170° Aperture F/1.8 Video Frame Rate 30fps Video Format Photo Format Microphone Built-in speaker 0.8w Frequency 50HZ/60HZ Memory Card...
- Page 37 Garantía y atención al cliente GARANTÍA La cámara de salpicadero ANKEWAY K1 viene con una garantía completa de 18 meses APOYO Cualquier problema, no dude en contactarnos...
- Page 38 Teneur 1.Comment installer la K1 Caméra Embarquée Voiture 2.Structure du produit 3.Raccourcis et boutons de compréhension 4.Comment visualiser les vidéos ? 5. AQ fréquent 6. Spécifications du produit 7. Garantie et assistance Multilingual Version:English/Italiana/Deutsch/Espanol/Français...
- Page 39 (32/64G, carte Micro SD de classe 10 recommandée) 2. La Caméra Embarquée Voiture doit être chargée tout le temps. K1 uniquement batterie intégrée de 180 mAh, le temps de veille est relativement court. Normalement 3-5 minutes.
- Page 40 Comment installer la K1 Caméra Embarquée Voiture • Étape 1: Insérez une carte Micro SD [Classe-10, Max 64 Go] hors tension. Il doit être acheté séparément • Étape 2: Fixez Caméra Embarquée Voiture sur le pare- brise à l'aide d'un support à...
- Page 41 La structure du produit 1. En haut Menu Vers le bas Fente pour carte TF Puissance Entrée d'alimentation mini- USB et emplacement de sortie de données Sortie TV Réinitialiser Lumière LED 10. Lentille avant...
- Page 42 BOUTON IMAGE NOM DU BOUTON RACCOURCIS / FONCTIONS Pour allumer la caméra : appuyez une fois sur le bouton d'alimentation Pour éteindre la caméra : maintenez le bouton d'alimentation enfoncé pendant 2 s Appuyez une fois - pour entrer / confirmer les paramètres spécifiques dans BOUTON les paramètres du menu Raccour...
- Page 43 Comment voir les vidéos ? Méthode 1 : Sur la Caméra Embarquée Voiture Lecteurs vidéo Étape1.Appuyez longuement sur le bouton M pendant 2 secondes : entrez en mode photo 1. Windows media player Étape 2. Appuyez longuement sur le bouton M pendant 2 secondes à nouveau : entrez en mode vidéo (Recommen Méthode 2 : Mode USB...
- Page 44 AQ fréquent Q1: Comment puis-je laisser la fonction Parking Monitor fonctionner ? A1: Cette dashcam a besoin d'un kit Mini Hardwire et active le mode Parking pour assurer la surveillance du Q4: La caméra de tableau de bord s'arrêterait stationnement automatiquement pendant l'enregistrement A4: Trois raisons Q2: Comment configurer la caméra de tableau de bord pour...
- Page 45 Spécifications du produit ANKEWAY K1 Caméra Embarquée Voiture Sensor 2.0 million CMOS Sensors IPS Display 3 inch Resolution 1080P Wide Angle 170° Aperture F/1.8 Video Frame Rate 30fps Video Format Photo Format Microphone Built-in speaker 0.8w Frequency 50HZ/60HZ Memory Card...
- Page 46 Garantie et assistance client GARANTIE La caméra de tableau de bord ANKEWAY K1 est livrée avec une garantie complète de 18 mois SUPPORT Pour tout problème, n'hésitez pas à nous contacter...
Need help?
Do you have a question about the K1 and is the answer not in the manual?
Questions and answers