
Summary of Contents for Mapal WTE HPH
- Page 1 Montage- und Betriebsanleitung Installation and Operating Instructions HPH - High Performance Holder...
- Page 3 I I n n h h a a l l t t s s v v e e r r z z e e i i c c h h n n i i s s Z Z i i e e l l d d e e r r M M o o n n t t a a g g e e - - u u n n d d B B e e t t r r i i e e b b s s a a n n l l e e i i t t u u n n g g ................................................... . 4 4 K K o o n n t t a a k k t t .
- Page 4 Z Z i i e e l l d d e e r r M M o o n n t t a a g g e e - - u u n n d d B B e e t t r r i i e e b b s s a a n n l l e e i i t t u u n n g g Die vorliegende Montage- und Betriebsanleitung beschreibt die richtige Bedienung des HPH Spannfutters mit axialer und radialer Werkzeuglängeneinstellung.
- Page 5 S S i i c c h h e e r r h h e e i i t t 3 3 . . 1 1 Z Z i i e e l l g g r r u u p p p p e e Die Bedienung des HPH Spannfutters darf nur durch ausgebildetes, autorisiertes und zuverlässiges Fachpersonal erfolgen.
- Page 6 3 3 . . 3 3 N N i i c c h h t t b b e e s s t t i i m m m m u u n n g g s s g g e e m m ä ä ß ß e e V V e e r r w w e e n n d d u u n n g g •...
- Page 7 3 3 . . 5 5 A A l l l l g g e e m m e e i i n n e e W W a a r r n n - - u u n n d d S S i i c c h h e e r r h h e e i i t t s s h h i i n n w w e e i i s s e e W W A A R R N N U U N N G G G G e e f f a a h h r r d d u u r r c c h h u u n n a a u u s s g g e e b b i i l l d d e e t t e e s s u u n n d d u u n n a a u u t t o o r r i i s s i i e e r r t t e e s s P P e e r r s s o o n n a a l l ! ! Das Spannen von Werkzeugen und Einbringen in eine Werkzeugmaschine kann durch unausgebildetes und unautorisier-...
- Page 8 3 3 . . 5 5 . . 1 1 G G e e f f a a h h r r e e n n d d u u r r c c h h H H i i t t z z e e - - u u n n d d W W ä ä r r m m e e e e n n t t w w i i c c k k l l u u n n g g W W A A R R N N U U N N G G S S c c h h r r u u m m p p f f e e n n o o d d e e r r E E r r h h i i t t z z e e n n d d e e s s H H P P H H S S p p a a n n n n f f u u t t t t e e r r s s k k a a n n n n z z u u V V e e r r l l e e t t z z u u n n g g e e n n f f ü...
- Page 9 3 3 . . 5 5 . . 2 2 M M e e c c h h a a n n i i s s c c h h e e G G e e f f a a h h r r e e n n W W A A R R N N U U N N G G S S p p a a n n n n e e n n u u n n d d E E n n t t s s p p a a n n n n e e n n b b e e i i l l a a u u f f e e n n d d e e r r M M a a s s c c h h i i n n e e ! ! Durch das Spannen und Entspannen des HPH Spannfutters bei laufender Maschine können schwere Verletzungen des...
- Page 10 H H I I N N W W E E I I S S W W e e r r k k z z e e u u g g l l ä ä n n g g e e n n e e i i n n s s t t e e l l l l u u n n g g b b e e i i g g e e s s p p a a n n n n t t e e m m W W e e r r k k z z e e u u g g ! ! Die Durchführung einer axialen oder radialen Werkzeuglängeneinstellung des Werkzeugs bei vollständig gespanntem Werkzeug führt zur Beschädigung des HPH Spannfutters.
- Page 11 H H I I N N W W E E I I S S V V e e r r s s c c h h l l e e i i ß ß d d u u r r c c h h m m a a s s c c h h i i n n e e l l l l e e n n S S c c h h r r a a u u b b e e n n d d r r e e h h e e r r b b e e i i m m S S p p a a n n n n e e n n d d e e r r S S p p a a n n n n s s c c h h r r a a u u b b e e ! ! Der Einsatz eines maschinellen Schraubendrehers beim Spannen der Spannschraube führt zu einem erhöhten Verschleiß...
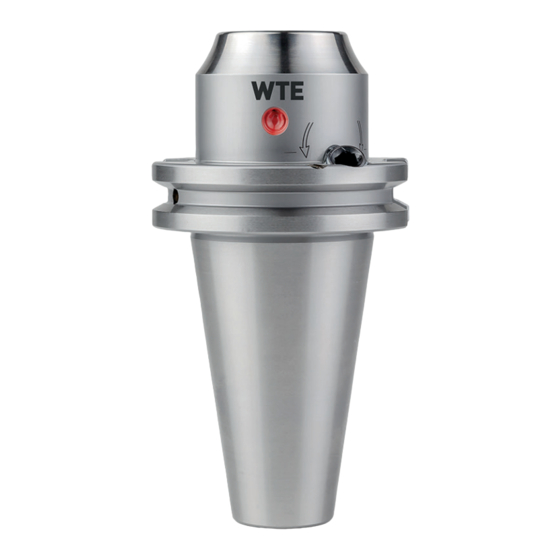
- Page 12 L L e e g g e e n n d d e e Anschlagschraube zur axialen Werkzeuglängenein- stellung Sicht von unten auf das HPH Spannfutter 4 4 . . 1 1 . . 2 2 H H P P H H S S p p a a n n n n f f u u t t t t e e r r m m i i t t r r a a d d i i a a l l e e r r W W e e r r k k z z e e u u g g l l ä ä n n g g e e n n e e i i n n s s t t e e l l l l u u n n g g L L e e g g e e n n d d e e Spannschraube Radiale Werkzeuglängeneinstellschraube...
- Page 13 4 4 . . 2 2 B B e e s s c c h h r r i i f f t t u u n n g g d d e e r r B B e e t t ä ä t t i i g g u u n n g g s s e e l l e e m m e e n n t t e e Beschriftung zur Prüfung der Spannkraft: Drei mögliche Positionen auf dem Spannfutter L L e e g g e e n n d d e e + + Werkzeug spannen (im Uhrzeigersinn)
- Page 14 4 4 . . 3 3 B B e e n n ö ö t t i i g g t t e e W W e e r r k k z z e e u u g g e e , , H H i i l l f f s s - - u u n n d d B B e e t t r r i i e e b b s s s s t t o o f f f f e e •...
- Page 15 • Allgemeine technische Daten: • Werkstoff 1 1 . . 6 6 0 0 0 0 N N / / m m m m • Härte 5 5 2 2 + + 2 2 H H R R c c . •...
- Page 16 • Technische Daten [m m m m ] Z Z u u l l . . Ü Ü b b e e r r t t r r a a g g b b a a r r e e s s D D r r e e h h m m o o m m e e n n t t b b e e i i S S p p a a n n n n d d u u r r c c h h m m e e s s s s e e r r M M i i n n d d e e s s t t e e i i n n s s p p a a n n n n t t i i e e f f e e M M a a x x i i m m a a l l e e B B e e t t r r i i e e b b s s d d r r e e h h z z a a h h l l...
- Page 17 • Technische Daten [Z Z o o l l l l ] Z Z u u l l . . Ü Ü b b e e r r t t r r a a g g b b a a r r e e s s D D r r e e h h m m o o m m e e n n t t S S p p a a n n n n d d u u r r c c h h m m e e s s s s e e r r M M i i n n d d e e s s t t e e i i n n s s p p a a n n n n t t i i e e f f e e M M a a x x i i m m a a l l e e B B e e t t r r i i e e b b s s d d r r e e h h z z a a h h l l...
- Page 18 4 4 . . 5 5 P P r r ü ü f f u u n n g g d d e e r r S S p p a a n n n n k k r r a a f f t t Kapitel 4.2 Die Mindestumdrehungen werden auf dem HPH Spannfutter angegeben (siehe ) und stellen eine einfache und...
- Page 19 W W A A R R N N U U N N G G S S p p a a n n n n e e n n u u n n d d E E n n t t s s p p a a n n n n e e n n b b e e i i l l a a u u f f e e n n d d e e r r M M a a s s c c h h i i n n e e ! ! Durch das Spannen und Entspannen des HPH Spannfutters bei laufender Maschine können schwere Verletzungen des Bedieners verursacht werden.
- Page 20 Schieben Sie das Werkzeug mit dem Schaft voraus bis zur Anschlag- schraube in die Aufnahmebohrung des HPH Spannfutters. Werkzeug einschieben I I N N F F O O R R M M A A T T I I O O N N Kapitel Je nach Ausführung des HPH Spannfutters, kann die Werkzeuglängeneinstellung entweder axial (siehe 5.1.1...
- Page 21 H H I I N N W W E E I I S S B B e e s s c c h h ä ä d d i i g g u u n n g g d d u u r r c c h h W W e e r r k k z z e e u u g g l l ä ä n n g g e e n n e e i i n n s s t t e e l l l l u u n n g g b b e e i i g g e e s s p p a a n n n n t t e e m m W W e e r r k k z z e e u u g g ! ! ...
- Page 22 I I N N F F O O R R M M A A T T I I O O N N Die Spannschraube ist gegen Herausfallen nicht gesichert! Achten Sie darauf, dass die Spannschraube schmutzfrei ist. Drehen Sie die Spannschraube mit Hilfe eines Innensechskantschlüssels mit Quergriff b b i i s s z z u u m m A A n n s s c c h h l l a a g g (siehe Abb.
- Page 23 H H I I N N W W E E I I S S B B e e s s c c h h ä ä d d i i g g u u n n g g d d u u r r c c h h W W e e r r k k z z e e u u g g l l ä ä n n g g e e n n e e i i n n s s t t e e l l l l u u n n g g b b e e i i g g e e s s p p a a n n n n t t e e m m W W e e r r k k z z e e u u g g ! ! ...
- Page 24 W W A A R R N N U U N N G G U U n n z z u u r r e e i i c c h h e e n n d d e e s s S S p p a a n n n n e e n n b b i i s s z z u u m m A A n n s s c c h h l l a a g g u u n n d d N N i i c c h h t t e e i i n n h h a a l l t t u u n n g g d d e e r r M M i i n n d d e e s s t t u u m m d d r r e e h h u u n n g g e e n n ! ! Durch unzureichendes Spannen bis zum Anschlag und Nichteinhaltung der Mindestumdrehungen kann sich das Werk- stück geschossartig lösen und zu schweren Verletzungen führen.
- Page 25 5 5 . . 2 2 E E n n t t s s p p a a n n n n e e n n e e i i n n e e s s W W e e r r k k z z e e u u g g s s W W A A R R N N U U N N G G E E n n t t s s p p a a n n n n e e n n b b e e i i z z u u h h o o h h e e r r S S p p a a n n n n f f u u t t t t e e r r t t e e m m p p e e r r a a t t u u r r ! ! Durch das Entspannen bei zu hoher Spannfuttertemperatur können sich Teile des HPH Spannfutters geschossartig lösen...
- Page 26 Entnehmen Sie das Werkzeug aus der Aufnahmebohrung des HPH Spann- futters. Werkzeug entnehmen E E R R G G E E B B N N I I S S Das Werkzeug ist nun entspannt und gelöst. Montage- und Betriebsanleitung Montage- und Betriebsanleitung Installation and Operating Instructions Installation and Operating Instructions...
- Page 27 5 5 . . 3 3 M M a a s s c c h h i i n n e e n n s s e e i i t t i i g g e e A A n n p p a a s s s s u u n n g g d d e e r r K K ü ü h h l l m m i i t t t t e e l l z z u u f f ü ü h h r r u u n n g g n n a a c c h h F F o o r r m m A A D D / / A A F F W W A A R R N N U U N N G G V V e e r r b b r r e e n n n n u u n n g g s s g g e e f f a a h h r r d d u u r r c c h h h h e e i i ß...
- Page 28 5 5 . . 3 3 . . 1 1 G G r r u u n n d d e e i i n n s s t t e e l l l l u u n n g g F F o o r r m m A A D D b b z z w w . . J J D D n n a a c c h h D D I I N N I I S S O O 7 7 3 3 8 8 8 8 Falls keine andere Bestellung vorliegt, werden die Werkzeughalter in F F o o r r m m A A D D ausgeliefert.
- Page 29 W W A A R R N N U U N N G G E E x x p p l l o o s s i i o o n n s s g g e e f f a a h h r r b b e e i i m m E E r r w w ä ä r r m m e e n n d d e e r r H H y y d d r r o o d d e e h h n n e e l l e e m m e e n n t t e e ! ! Beim Erwärmen des Gewindestiftbereichs kann sich der Dehnspannbereich sowie die Bereiche der Druckeinlei- tung erhitzen und das Hydrodehnspannfutter verformen oder explosionsartig platzen.
- Page 30 Schrauben Sie in den abgekühlten Werkzeughalter an „Pos. 2“ die Ge- windestifte mit Schraubensicherung (Klebstoff) mittelfest ein (siehe Abb. 15: Kühlmittelzuführung F F o o r r m m A A F F / / J J F F Entfernen Sie eventuelle Klebstoffreste. Kontrollieren Sie nach der Aushärtezeit des Klebers die Gewindestifte auf festen Sitz und wuchten Sie den Werkzeughalter neu.
- Page 31 Erwärmen Sie die Gewindestifte bzw. den Gewindestiftbereich, bis sich die Gewindestifte herausdrehen lassen. W W A A R R N N U U N N G G V V e e r r b b r r e e n n n n u u n n g g s s g g e e f f a a h h r r d d u u r r c c h h h h e e i i ß ß e e n n G G e e w w i i n n d d e e s s t t i i f f t t b b e e r r e e i i c c h h ! ! ...
- Page 32 E E R R G G E E B B N N I I S S Die Kühlmittelzuführung ist nach F F o o r r m m A A D D / / J J D D umgestellt. P P f f l l e e g g e e u u n n d d W W a a r r t t u u n n g g •...
- Page 34 T T a a b b l l e e o o f f c c o o n n t t e e n n t t s s P P u u r r p p o o s s e e o o f f t t h h e e i i n n s s t t a a l l l l a a t t i i o o n n a a n n d d o o p p e e r r a a t t i i n n g g i i n n s s t t r r u u c c t t i i o o n n s s ........................................3 3 5 5 C C o o n n t t a a c c t t .
- Page 35 P P u u r r p p o o s s e e o o f f t t h h e e i i n n s s t t a a l l l l a a t t i i o o n n a a n n d d o o p p e e r r a a t t i i n n g g i i n n s s t t r r u u c c t t i i o o n n s s These installation and operating instructions describe the correct operation of the HPH clamping chuck with axial and radi- al tool length adjustment.
- Page 36 S S a a f f e e t t y y 3 3 . . 1 1 T T a a r r g g e e t t g g r r o o u u p p The HPH clamping chuck may only be used by trained, authorised and dependable specialist personnel.
- Page 37 3 3 . . 3 3 I I n n c c o o r r r r e e c c t t u u s s e e • The HPH clamping chuck, the tool or the tool assembly and further components can only be used in compliance with the relevant technical data (see section 4.4 ) and the max.
- Page 38 3 3 . . 5 5 G G e e n n e e r r a a l l w w a a r r n n i i n n g g s s a a n n d d s s a a f f e e t t y y i i n n s s t t r r u u c c t t i i o o n n s s W W A A R R N N I I N N G G D D a a n n g g e e r r f f r r o o m m u u s s e e b b y y u u n n t t r r a a i i n n e e d d a a n n d d u u n n a a u u t t h h o o r r i i s s e e d d p p e e r r s s o o n n n n e e l l ! ! The clamping of tools and their installation on a machine tool by untrained and unauthorised personnel can lead to haz-...
- Page 39 3 3 . . 5 5 . . 1 1 D D a a n n g g e e r r s s f f r r o o m m h h e e a a t t d d e e v v e e l l o o p p m m e e n n t t W W A A R R N N I I N N G G S S h h r r i i n n k k i i n n g g o o r r h h e e a a t t i i n n g g t t h h e e H H P P H H c c l l a a m m p p i i n n g g c c h h u u c c k k c c a a n n l l e e a a d d t t o o i i n n j j u u r r i i e e s s a a n n d d d d a a m m a a g g e e t t o o m m a a c c h h i i n n e e s s a a n n d d a a c c c c e e s s s s o o r r i i e e s s ! ! Shrinking or heating can cause the HPH clamping chuck to become deformed or to burst explosively.
- Page 40 3 3 . . 5 5 . . 2 2 M M e e c c h h a a n n i i c c a a l l h h a a z z a a r r d d s s W W A A R R N N I I N N G G C C l l a a m m p p i i n n g g a a n n d d u u n n c c l l a a m m p p i i n n g g w w i i t t h h r r u u n n n n i i n n g g m m a a c c h h i i n n e e ! ! Clamping and unclamping the HPH clamping chuck with the machine running may result in serious injuries to the op-...
- Page 41 N N O O T T I I C C E E T T o o o o l l l l e e n n g g t t h h a a d d j j u u s s t t m m e e n n t t w w i i t t h h t t h h e e t t o o o o l l c c l l a a m m p p e e d d ! ! Performing an axial or radial tool length adjustment while the tool is completely clamped will result in damage to the HPH clamping chuck.
- Page 42 N N O O T T I I C C E E W W e e a a r r d d u u e e t t o o u u s s e e o o f f a a p p o o w w e e r r s s c c r r e e w w d d r r i i v v e e r r f f o o r r t t i i g g h h t t e e n n i i n n g g t t h h e e c c l l a a m m p p i i n n g g s s c c r r e e w w ! ! Use of a power screwdriver for tightening the clamping screw will result in increased wear of the clamping set.
- Page 43 K K e e y y Stop screw for axial tool length adjustment View of the HPH clamping chuck from below 4 4 . . 1 1 . . 2 2 H H P P H H c c l l a a m m p p i i n n g g c c h h u u c c k k w w i i t t h h r r a a d d i i a a l l t t o o o o l l l l e e n n g g t t h h a a d d j j u u s s t t m m e e n n t t . . K K e e y y Clamping screw Radial tool length setting screw...
- Page 44 4 4 . . 2 2 M M a a r r k k i i n n g g o o f f t t h h e e a a c c t t u u a a t t i i n n g g e e l l e e m m e e n n t t s s Schrauben Sie in den abgekühlten Werkzeughalter an „Pos.
- Page 45 4 4 . . 3 3 T T o o o o l l s s a a n n d d m m a a t t e e r r i i a a l l s s r r e e q q u u i i r r e e d d •...
- Page 46 • General technical data: • Material 1 1 6 6 0 0 0 0 N N / / m m m m • Hardness 5 5 2 2 + + 2 2 H H R R c c • Tool holders balanced as standard. •...
- Page 47 • Technical data [m m m m ] P P e e r r m m i i s s s s i i b b l l e e t t r r a a n n s s f f e e r r r r a a b b l l e e t t o o r r q q u u e e C C l l a a m m p p i i n n g g d d i i a a m m e e t t e e r r M M i i n n i i m m u u m m c c l l a a m m p p i i n n g g d d e e p p t t h h M M a a x x .
- Page 48 • Technical data [i i n n c c h h ] P P e e r r m m i i s s s s i i b b l l e e t t r r a a n n s s f f e e r r r r a a b b l l e e t t o o r r q q u u e e C C l l a a m m p p i i n n g g d d i i a a m m e e t t e e r r M M i i n n i i m m u u m m c c l l a a m m p p i i n n g g d d e e p p t t h h M M a a x x .
- Page 49 4 4 . . 5 5 C C h h e e c c k k i i n n g g t t h h e e c c l l a a m m p p i i n n g g f f o o r r c c e e section 4.2 The minimum number of rotations are indicated on the HPH clamping chuck (see ) and provide a simple and reli-...
- Page 50 W W A A R R N N I I N N G G C C l l a a m m p p i i n n g g a a n n d d u u n n c c l l a a m m p p i i n n g g w w i i t t h h r r u u n n n n i i n n g g m m a a c c h h i i n n e e ! ! Clamping and unclamping the HPH clamping chuck with the machine running may result in serious injuries to the op- erator.
- Page 51 Push the tool, shank first, to the stop screw in the location bore in the HPH clamping chuck. Inserting tool I I N N F F O O R R M M A A T T I I O O N N Depending on the design of the hydraulic chuck, tool length adjustment can be performed either axially (see section 5.1.1 section 5.1.2...
- Page 52 N N O O T T I I C C E E D D a a m m a a g g e e c c a a u u s s e e d d b b y y t t o o o o l l l l e e n n g g t t h h a a d d j j u u s s t t m m e e n n t t w w i i t t h h c c l l a a m m p p e e d d t t o o o o l l ! ! ...
- Page 53 I I N N F F O O R R M M A A T T I I O O N N The clamping screw is not captive! Ensure that the clamping screw is clean. Turn the clamping screw u u p p t t o o t t h h e e s s t t o o p p using an hex-wrench with T- Fig.
- Page 54 N N O O T T I I C C E E D D a a m m a a g g e e c c a a u u s s e e d d b b y y t t o o o o l l l l e e n n g g t t h h a a d d j j u u s s t t m m e e n n t t w w i i t t h h c c l l a a m m p p e e d d t t o o o o l l ! ! ...
- Page 55 W W A A R R N N I I N N G G I I n n s s u u f f f f i i c c i i e e n n t t c c l l a a m m p p i i n n g g u u p p t t o o t t h h e e s s t t o o p p a a n n d d f f a a i i l l u u r r e e t t o o o o b b s s e e r r v v e e t t h h e e m m i i n n i i m m u u m m n n u u m m b b e e r r o o f f t t u u r r n n s s ! ! Insufficient clamping up to the stop and failure to observe the minimum number of rotations can cause the workpiece to fly off like a projectile and cause serious injuries.
- Page 56 5 5 . . 2 2 U U n n c c l l a a m m p p i i n n g g a a t t o o o o l l W W A A R R N N I I N N G G U U n n c c l l a a m m p p i i n n g g a a t t e e x x c c e e s s s s i i v v e e c c l l a a m m p p i i n n g g c c h h u u c c k k t t e e m m p p e e r r a a t t u u r r e e s s ! ! Unclamping at excessive clamping chuck temperatures can cause parts of the HPH clamping chuck to fly off uncon- trolled, allowing hot oil to escape.
- Page 57 Remove the tool from the location bore of the HPH clamping chuck. Removing tool R R E E S S U U L L T T The tool has been unclamped and released. Montage- und Betriebsanleitung Montage- und Betriebsanleitung Installation and Operating Instructions Installation and Operating Instructions...
- Page 58 5 5 . . 3 3 M M a a c c h h i i n n e e - - s s i i d d e e a a d d a a p p t t a a t t i i o o n n o o f f t t h h e e c c o o o o l l a a n n t t s s u u p p p p l l y y t t o o F F o o r r m m A A D D / / A A F F W W A A R R N N I I N N G G R R i i s s k k o o f f b b u u r r n n s s f f r r o o m m h h o o t t t t h h r r e e a a d d e e d d p p i i n n a a r r e e a a ! ! Serious burns and injuries can occur during heating and unscrewing the threaded pins.
- Page 59 5 5 . . 3 3 . . 1 1 N N o o r r m m a a l l s s e e t t t t i i n n g g F F o o r r m m A A D D o o r r J J D D t t o o D D I I N N I I S S O O 7 7 3 3 8 8 8 8 Unless otherwise indicated in the purchase order, the tool hold- ers are delivered in F F o o r r m m A A D D .
- Page 60 W W A A R R N N I I N N G G R R i i s s k k o o f f e e x x p p l l o o s s i i o o n n d d u u r r i i n n g g h h e e a a t t i i n n g g o o f f t t h h e e h h y y d d r r a a u u l l i i c c e e l l e e m m e e n n t t s s ! ! During heating of the part of the threaded pin, the chucking section and the pressure application areas can become hot and cause the hydraulic chuck to become deformed or to burst explosively.
- Page 61 Screw the threaded pins with medium-strength thread locking com- pound (adhesive) into the cooled tool holder at “Pos. 2” (see Fig. 15: Coolant Supply F F o o r r m m A A F F / / J J F F Remove any adhesive residues.
- Page 62 Heat the threaded pins or the threaded pin area until the threaded pins can be unscrewed. W W A A R R N N I I N N G G R R i i s s k k o o f f b b u u r r n n s s f f r r o o m m h h o o t t t t h h r r e e a a d d e e d d p p i i n n a a r r e e a a ! ! ...
- Page 63 C C a a r r e e a a n n d d m m a a i i n n t t e e n n a a n n c c e e • Protect the HPH clamping chuck against corrosion during storage. •...
- Page 64 Bestellnummer / Order number: 10138218 Montage- und Betriebsanleitung | HPH Spannfutter Installation and Operating Instructions | HPH clamping chuck WTE Präzisionstechnik GmbH, Germany Gültig für: / Applies for: 12. Auflage Mai 2022 / 12 issue May 2022 © WTE Präzisionstechnik GmbH Kein Teil dieser Anleitung darf in irgendeiner Form (Druck, Fotokopie, Mikrofilm oder einem anderen Verfahren) ohne schriftliche Zustimmung der Firma WTE Präzisionstechnik GmbH, Ehrenfriedersdorf, Germany reproduziert oder unter Verwendung elektronischer Systeme verarbeitet werden.
Need help?
Do you have a question about the WTE HPH and is the answer not in the manual?
Questions and answers