Table of Contents
Advertisement
Upgrade to the industry's most advanced Motor Program:
AMP
Motorization features 2-way technology with superior value
™
and innovation paired with a smart, seemless user interface.
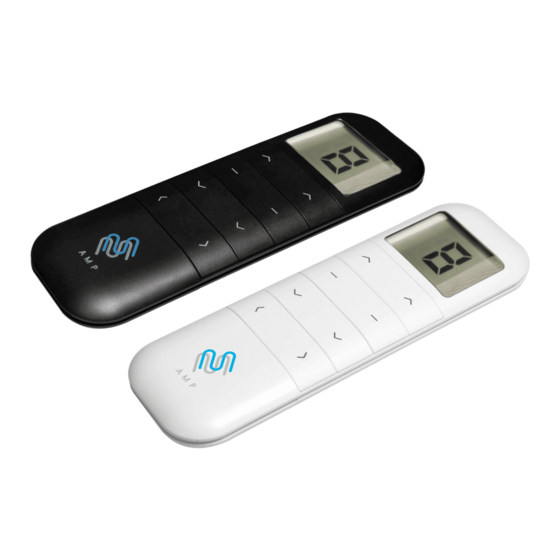
RF 2W 15 Channel TDBU
Remote Control
Programming Guide
Specifications
•
Specially designed for patented AMP TDBU honeycomb shades
•
Up to 15 channels with 3V (CR2450) battery, magnetic
holder included
•
Channel 0 controls all shades assigned to remote;
ability to hide extra channels
•
Favorite position activated by quick touch of a button
•
Locking feature prevent unwanted configuration changes
AMP 2 color logo: PMS Cool Gray 2 & PMS 306 B
Advertisement
Table of Contents

Related Manuals for AMP AMP TDBU REMOTE

Summary of Contents for AMP AMP TDBU REMOTE
- Page 1 AMP 2 color logo: PMS Cool Gray 2 & PMS 306 B Upgrade to the industry’s most advanced Motor Program: Motorization features 2-way technology with superior value ™ and innovation paired with a smart, seemless user interface. Specifications • Specially designed for patented AMP TDBU honeycomb shades •...
-
Page 2: Table Of Contents
Motorization Table of Contents ™ AMP 2 color logo: PMS Cool Gray 2 & PMS 306 Blue Declarations Safety Instructions TDBU Remote Overview ™ TDBU Remote Function ™ P1 Button Instructions Initial Set-up Adjust Limits Favorite Position Add or Remove Additional Remote... -
Page 3: Declarations
Declarations U.S. Radio Frequency FCC Compliance This device complies with Part 15 of the FCC Rules. Operation is subject to the following two conditions: (1) This device may not cause harmful interference, and (2) This device must accept any interference received, including interference that may cause undesired operation. This equipment has been tested and found to comply with the limits for a Class B digital device, pursuant to Part 15 of the FCC Rules. -
Page 4: Safety Instructions
Safety Instructions Attention Never drop, knock, drill or submerge the motor and RF receiver. Read all safety instructions before installation. Incorrect installation can lead to serious injury and will void manufacturer’s liability and warranty. × × × × × × Important Safety Instructions 1. -
Page 5: Amp ™ Tdbu Remote Overview
TDBU Remote Overview ™ Fields of Application Cellular/Honeycomb Cellular/Honeycomb TDBU Day/Night Specification Voltage 3V (CR2450) Radio Frequency 433.92 MHz Bi-directional Transmitting Power 10 milliwatt Operating Temperature 14°F to 122°F (-10°C to 50°C) RF Modulation Lock Function IP Rating IP20 Transmission Distance up to 200m (outdoor) Remote Button Instructions Button Instructions... -
Page 6: Amp ™ Tdbu Remote Function
Channel Options TDBU Remote Function ™ 3.2 Set Lower Limit 3.2 Set Lower Limit Action on Action Channel Options Channel Options Remote C Remo Action on Select A Channel Press Left “Down” button to lower the Press Left “Down” button to lower the Remote Control Bottom Rail, then press Left “Stop”... -
Page 7: P1 Button Instructions
P1 Button Instructions P1 Button Location P1 Button AMP TDBU honeycomb shades P1 Button Instruction Test Motor Happening as you press for 1 second Press P1 Less than 1 sec. Activate Pairing Mode Happening as you press for 2 seconds Press P1 Approx. -
Page 8: Initial Set-Up
“Down” and Left “Stop” b “Down” and Left “Sto Response “Down” and Left “Stop” butto simultaneously until motor jo simultaneously until mo simultaneously until motor jog x Press and hold (about 5 Essential Settings Essential Settings Essential Settings * All setup needs to * All setup needs to * All setup needs to “Down”... -
Page 9: Adjust Limits
Left Down Left Stop Response Response Remot simultaneously until motor jog x2. the Middle Rail, then press Right “Stop” Channel Channel Press and hold (about 2 sec) Left Motor Response Motor Press and hold (about 5 sec) Left “Up” Jog x2 button when it is in the desired lower limit. -
Page 10: Favorite Position
Press and hold (about 5 sec) Left Press and hold (about 5 sec) Left lower limit. and hold (about 2 sec) one “P2” button hold (about 2 sec) one “P2” button until Remote Control “Up” and Left “Stop” buttons Action on Left Up Left Stop Follow instructions under the section 1. -
Page 11: Add Or Remove Additional Remote
Add or Remove Additional Remote 1. Using Current Remote Control Action on Current Remote Control Current Remote Control Remote Control On the current remote control, press Right “P2” button until motor jog x1. Motor Response Once more, on the current remote control, press Jog x1 Jog x1 Right “P2”... -
Page 12: Adjust Motor Speed
Left Down Motor Response Right Down Jog x1 Jog x1 Bottom Rail Middle Rail Motor Response op” control, press and hold (about 2 sec) one additional remote control. Middle Rail 7.2 New Remote Control Response Response “P2” button until motor jog x1. 7.2 New Remote Control Response Bottom Rail... -
Page 13: Roller Or Sheer Mode
Roller or Sheer Mode 6. Roller Mode and Sheer Mode Right Down 1. Roller Shade Mode - continue movement 6.1 Roller Shade Mode - continue Action on Action on Remote Control movement after a short press - after a short press - Default Mode Remote Control Left Up Left Down... -
Page 14: Quick Index
4 Add / Remove Favorite Position > Left Stop > Left Stop 5 Roller Mode & Sheer Mode Switch Left Up + Left Down (hold down for 5s) > Stop Upper Limit: Left Up + Left Stop (hold down for 5s) >...
Need help?
Do you have a question about the AMP TDBU REMOTE and is the answer not in the manual?
Questions and answers