Activinsights GENEActiv Instructions For Use Manual
Hide thumbs
Also See for GENEActiv:
- Instructions manual (30 pages) ,
- Instructions for use manual (24 pages)

Related Manuals for Activinsights GENEActiv


Summary of Contents for Activinsights GENEActiv
- Page 1 GENEActiv Instructions for Use Document ID MAR-013-v1 Activinsights, Unit 11, Harvard Industrial Estate, Kimbolton, Cambridgeshire, PE28 0NJ, United Kingdom activinsights.com | +44 (0)1480 862082 | info@activinsights.com...
-
Page 2: Table Of Contents
Table of Contents Overview a) About GENEActiv ..............3 b) Technical Specification ............4 Getting Started a) System Requirements ............5 b) What’s Included ..............5 Charging a) Charging ................6 b) LED Signals ................7 Device Setup & Configuration a) Installing Software ..............8 b) Software Overview ............... -
Page 3: Overview
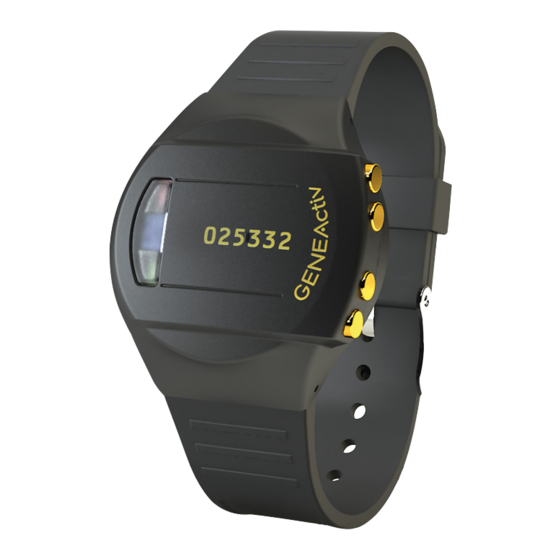
The motion sensor (accelerometer) inside GENEActiv records the occurrence and degree of motion. The device’s relative movement data is stored internally. The captured data can be further downloaded through the charging cradle and the software. GENEActiv also incorporates a light sensor to record luminous intensity (lux) of white light. -
Page 4: B) Technical Specification
Technical Specification Physical Parameters Size 43mm x 40mm x 13mm Weight 16g (without strap) Main Housing Material PC/ABS (medical device grade) Light Guide Material PC (medical device grade) Data Contact Material Gold-plated Strap PU resin Battery Type Rechargeable lithium ion polymer Environmental Protection Moisture Ingress Water-resistant to 10m (IP67 –... -
Page 5: Getting Started
Spring bar tool with pins • 4-up charger/download cradle with USB cable To successfully use the GENEActiv, you must have access to the 4-up charger/download cradle to connect to the PC via USB cable. Additional body straps and accessories are available upon request. -
Page 6: A) Charging
Charging & Storing a) Charging Once you have received your GENEActiv device(s) allow them to fully charge in the cradle for 3 hours before configuring with the software. This can be done via the USB port on your computer or using a USB wall plug. We recommend using a wall plug when charging your devices so that it does not interfere with the GENEActiv software. -
Page 7: B) Led Signals
b) LED Signals When not recording, the battery charge level can be checked by pressing the button on the device. See diagram below for LED indicators. A green flash indicates that the device is OK to go into storage if it is no longer in use. A red flash or no flash at all means that the device should be charged (this function is not available if a device has been configured to record). To ensure that a device is fully charged, it must be left in the cradle for a full 3 hours before deployment. -
Page 8: Device Setup & Configuration
• Insert device into cradle • Navigate to the local drivers folder • Double left click the ‘install.bat’ file • Follow the automatic pop-up Wizard steps • Once complete, the GENEActiv serial number will appear listed at the top of the GENEActiv PC software. If device does not appear in software, drivers have not installed correctly. In this instance: • Open device manager •... -
Page 9: B) Software Overview
3. Data Extractor This is where you will go to extract the data once recording has finished. 4. Data Converter The Data Converter allows you to convert one or more .bin files into .csv files that can be read by the GENEActiv viewer and Excel. The convertor can combine the data for up to 5 devices to have a single time stamp. The combine .bin files function is not recommended for trials of more than a couple of hours due the data processing time and file size. Data conversions can take up to 15 minutes to complete. 5. Data Analysis The Data Analysis tab allows you to view .bin and .csv files and zoom in on a particular section. -
Page 10: C) Device Setup
c) Device Setup Once the device is connected, you will see the device number(s) displayed in the panel at the top of the screen. i). Measurement Frequency Choose your Measurement Frequency (hz). The Maximum Measurement Period will be automatically calculated. The Maximum Measurement Period will depend on the frequency selected below. Measurement Frequency Max. -
Page 11: Iv) Subject Info
Personally Identifying Information stored on the device. v). Configuration Select which device(s) are to be configured. A tick box will appear next to the relevant device serial number. At least one device must be selected. It can be useful to configure multiple devices together when a trial subject will wear several GENEActiv devices on different body locations. When ‘Erase & Configure’ is clicked, a pop-up message will automatically appear to warn that continuing will erase all previously stored data and to confirm the recording start mode. There will also be warning pop-ups if any mandatory information is missing, or if the battery charge is below 80%. If the warning message appears due to the battery being less than 80% do not deploy the device. -
Page 12: Vi) Quick Setup
vi). Quick Setup Quick setup mode is most useful if the frequency data being collected is going to be the same for all devices and there is no additional trial or subject information to enter. To get started, click the ‘Edit Defaults’ tab and complete the required fields. Then, return back to the ‘Erase and Configure’... -
Page 13: Data Collection & Extraction
Data Collection & Extraction a) Extracting Data 1. Open the GENEActiv software and connect the charging cradle to a USB port. Insert a GENEActiv device into the cradle. Ensure ‘Advanced Mode’ is checked in the bottom right-hand corner. 2. Click ‘Data Extractor’ from the left-hand menu. This page previews the first few minutes of recorded data and allows for the download of the data to a chosen file location. -
Page 14: B) Reading Data
b) Reading Data i). Data Converter and Data Analysis T o convert the .bin file to .csv format/compressed .csv format, select the ‘Data Converter’ and ‘Data Analysis’ tabs from the left-hand menu. This will allow files to opened in Excel and the original format can be saved and converted to other formats when needed. The ‘Data Converter’ creates .csv files, which can be used by Excel, from .bin files. Please note that older versions of Excel cannot manage very large .csv files. To convert a .bin file to .csv, select the input .bin file and copy the name of the file. After this select the output .csv file path and paste the file name and type .csv at the end then you will be able to Start Convert. The ‘Epoch Converter’ can be used to turn .bin and large .csv files into a smaller compressed version. It does this by creating epochs of 1, 5, 10, 15, 30, or 60 seconds – the means for each parameter and the Sum Vector Magnitude are calculated for each epoch. -
Page 15: Ii) Understanding .Bin Files
(+/- 2048)* c 12 bits accelerometer z axis (+/- 2048)* d 10 bits light meter (0-1024)* e 1 bit button status (1 on / 0 off) f 1 bit reserved (set to zero) The GENEActiv device stores raw data to allow all processing to be completed off-line. Calibration data is created in production and recorded to be applied in post-processing. Accelerometer x, y & z axis: calibrated measurement = (output*100 - offset) / gain (g) Light meter: calibrated measurement = output * lux / volts (lux) -
Page 16: Iii) Understanding .Csv Files
iii). Understanding .csv files The first 100 rows of the .csv file contains all the information about the device, its firmware and the trial information included upon device configuration. In both the raw data and the epoch compressed files, the data starts from line 101 and is organised in the following columns. Column Raw Data Epoch Compressed Time stamp Time stamp of epoch end X axis (g) Mean x axis Y axis (g) Mean y axis Z axis (g) Mean z axis Light level (lux) Mean lux Button (1/0) Sum of button press time... -
Page 17: Cleaning & Storing
Cleaning the Device To clean the GENEActiv, wipe with a cloth or scrub with a soft bristle brush using warm soapy water or a mild detergent solution and allow to air dry. Alcohol wipes and mild sterilising solutions are also appropriate. -
Page 18: Regulatory Standards
Regulatory Compliance European Compliance GENEActiv is a Class I Medical Device based on Rules 1 & 12 from Annex IX, conforming to the Essential Safety & Health requirements and provisions of EC Council Directives 93/42/EEC, Annex VII. The application of the classification rules is governed by the intended purpose of the device. US Compliance GENEActiv is an FDA Regulatory Class II, 21 CFR 882.1400 Neurological Diagnostic Devices and Class II, 21 CFR 882.5050 Biofeedback Devices. -
Page 19: Getting More Help
Getting More Help For more information about Frequently Asked Questions (FAQs), please visit our website: www.activinsights.com For further information or assistance, please contact: Activinsights Limited Unit 11, Harvard Industrial Estate Kimbolton Cambridgeshire PE28 0NJ United Kingdom Telephone: +44 (0)1480 862082 Email: info@activinsights.com Website: www.activinsights.com A company registered in England & Wales. Registered number: 06576069 Activinsights Document ID: MAR-013-v1 Updated March 2022... - Page 20 Activinsights Ltd, Unit 11, Harvard Industrial Estate, Kimbolton, Cambridgeshire, PE28 0NJ United Kingdom...
Need help?
Do you have a question about the GENEActiv and is the answer not in the manual?
Questions and answers