Table of Contents
Advertisement
Quick Links
AUTOMATIC CARPET CLEANER
IMPORTANT: Read all instructions carefully before assembly and use.
This product is intended for Household use only. If used Commercially warranty is VOID.
FACCWSM21M
USER MANUAL
Double
This product
Indoor
Read
Insulated
meets applicable
Use
Instructions
regulatory
Only
requirements
Advertisement
Table of Contents

Summary of Contents for Hover Smartwash FACCWSM21M
- Page 1 USER MANUAL AUTOMATIC CARPET CLEANER IMPORTANT: Read all instructions carefully before assembly and use. This product is intended for Household use only. If used Commercially warranty is VOID. FACCWSM21M Double This product Indoor Read Insulated meets applicable Instructions regulatory Only requirements...
- Page 2 Welcome to HOOVER ownership. ® If you have any queries or concerns about using your Hoover cleaner: Visit hoover.com.au or hoover.co.nz Double This product Indoor Read Insulated meets applicable Instructions regulatory Only requirements DISTRIBUTED BY: Techtronic Industries Australia Pty Ltd 31 Gilby Rd, Mount Waverley, VIC, 3149, Melbourne.
-
Page 3: Table Of Contents
Table of Contents Safety Instructions ........................4 Grounding Instructions .........................5 What’s in the Box ..........................6 Product Guide ..........................7 Tools and Accessories ........................8 Before You Begin Cleaning ......................9 Getting Started ..........................10 How to Assemble Your SmartWash Pet Complete Carpet Cleaner ........10 Using Your SmartWash Pet Complete Carpet Cleaner ............11 Maintenance ..........................13 Troubleshooting ..........................21 Notes .............................23... -
Page 4: Safety Instructions
IMPORTANT SAFETY INSTRUCTIONS SAVE THESE INSTRUCTIONS READ ALL SAFETY WARNINGS AND INSTRUCTIONS BEFORE USING THIS PRODUCT. WARNING: manufacturer’s recommended attachments and products. on floor. Do not place cleaner on stairs or furniture, as When using an electrical product, basic it may result in injury or damage. •... -
Page 5: Grounding Instructions
WARNING: GROUNDING INSTRUCTIONS: CAUTION: TO REDUCE THE RISK OF DAMAGE: • Avoid picking up hard, sharp objects with this product, as Improper connection of the equipment-grounding This appliance must be grounded. If it should malfunction they may cause damage. conductor can result in the risk of electric shock. Check or breakdown, grounding provides a path of least with a qualified electrician or service person if you are in •... -
Page 6: What's In The Box
What’s in the Box? Carpet Solution Spot Chaser FlexForce™ Cleaner Tank Pretreat Wand PowerBrushes 2-in-1 Accessory Tool Clean Dirty Accessory SpinScrub Tool Pet Tool Mesh Tool Water Water Hose Storage Bag Tank Tank Sample Bottle of Pet Stain & Odour Solution and Oxy Spot Chaser Pretreat Solution... -
Page 7: Product Guide
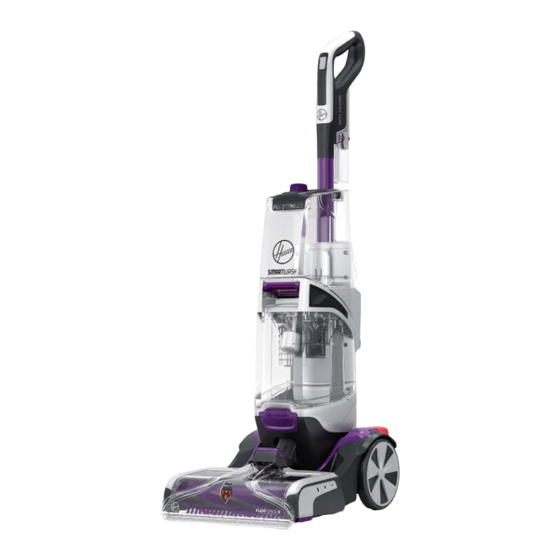
Getting to Know Your HOOVER SmartWash Pet Complete ® Triggerless Handle Design & Removable Spot Chaser Pretreat Wand Clean Water Tank Filter Dirty Water/Recovery Tank Hose Connection Removable Recovery Nozzle Automatic Wash/ Dry LED Display Removable FlexForce™ PET PowerBrushes Solution Tank 10. -
Page 8: Tools And Accessories
Tools & Accessories: CAUTION Tools & Accessories are NOT to be used on pets. Always remove the power plug from the power supply before fitting or removing accessories 2-in-1 Accessory Tool: Spot Chaser Pretreat Wand: Tackle dirt and stains throughout the home, from stairs, Removable handle with a separate solution tank to upholstery and even in the car clean-ups. -
Page 9: Before You Begin Cleaning
Before You Begin Cleaning: Pretreating: CAUTION Do not clean over floor electrical outlets. Water will drip Dry vacuum carpet and upholstery thoroughly before use. For best results, pretreat stains with a HOOVER® from the brushes and underside of the product after use pretreatment solution to help loosen and remove even the and may puddle. -
Page 10: Getting Started
Getting Started With Your SmartWash Carpet Cleaner: IMPORTANT: Fully assemble before operating. Ensure that the power plug is removed from the power supply before assembly. ASSEMBLY FILL THE SOLUTION TANK FILL THE CLEAN WATER TANK Slide the handle into the Lift up to remove the Clean Remove the Solution base until you hear a “click”. -
Page 11: Using Your Smartwash Pet Complete Carpet Cleaner
Using Your SmartWash Pet Complete Carpet Cleaner CAUTION IMPORTANT: Do not use bleach. Damage to the cleaner will result. Only use approved Hoover Carpet Washer solutions in your cleaner. Not to be used for grooming a pet. Unwrap the power cord and Step on the On/Off Pedal plug cleaner in an electrical to turn ON. - Page 12 Using Your SmartWash Pet Complete Carpet Cleaner Slowly move forward. The When you finish cleaning, NOTE: For best cleaning results cleaner will automatically but further drying is required, use slow straight parallel strokes. dispense the optimal amount press the DRY ONLY BUTTON. of water and cleaning solution.
-
Page 13: Maintenance
Maintenance How to Empty This product contains no serviceable parts. If appliance is not working as it should, has been dropped, damaged, left outdoors, or dropped into water, contact Customer Service by visiting www.hoover.com.au / www.hoover.co.nz prior to continuing use. Place on a flat surface and Turn the cleaner off and unlatch Dirty Water Tank lid... - Page 14 Notices CAUTION IMPORTANT: Test for colourfastness in a small, hidden area. NOTE: Regarding the Dirty Water Tank: For Gently rub surface with a dampened white cloth. Wait full suction it is important that the Dirty Water Tank Lid Do not clean over floor electrical outlets. Water will drip ten minutes and check for colour removal or bleed with is securely in place.
- Page 15 Maintenance WARNING IMPORTANT Risk of personal injury – Brush roll may suddenly The Nozzle must be in the proper position How to Remove and Clean Nozzle restart – unplug before cleaning or servicing. for the cleaner to have proper suction. To prevent possible leaking, Rinse debris from Nozzle.
- Page 16 Maintenance WARNING Risk of personal injury – Brush roll may suddenly How to Change and Clean Brushes restart – unplug before cleaning or servicing. HOW TO REMOVE HOW TO REPLACE Grab Side A and pull up At an angle, align side To prevent possible to remove.
- Page 17 Tools and Accessories CAUTION Always turn off this product before connecting or disconnecting hose. HOW TO ATTACH HOSE HOW TO REMOVE HOSE Open Hose Connection Press trigger on tool to Port. Insert hose end by ensure all fluid has inserting FIRMLY into Hose discharged from the hose.
- Page 18 Tools and Accessories CAUTION How to Attach Tools Not to be used for grooming a pet. To ensure maximum Using your thumb, push performance and to protect forward and up on the latch your carpet, be sure to place to remove tool. the handle in the upright position while using the hose.
- Page 19 Tools and Accessories How to Use the Pretreat Wand NOTE: Install two AAA batteries before using the Spot Chaser Pretreat Wand. REMOVING BATTERY With the Spot Chaser Press and release the Remove the battery cover Pretreat Wand installed “Wand Release” button by unscrewing the screw into the machine, press next to the Spot Chaser...
- Page 20 Tools and Accessories CAUTION Tips: Use extra care when cleaning on stairs. To avoid personal injury or damage, and to prevent the cleaner from falling, always place cleaner at the bottom of stairs or on floor. Do not place cleaner on stairs or furniture, as it may result in injury or damage. To avoid saturating carpet, do not use more than 4 wet strokes over any one Cleaning Carpeted Stairs and Upholstery...
-
Page 21: Troubleshooting
Need Help? Troubleshooting: Questions or Concerns? Cleaning Solutions If you need further assistance: This product contains no serviceable parts. To see Hoover’s full range of cleaning If you have any questions, visit solutions, visit If your product needs servicing within hoover.com.au / hoover.co.nz If appliance is not working as it should, hoover.com.au / hoover.co.nz to... - Page 22 Troubleshooting: PROBLEM POSSIBLE CAUSE POSSIBLE SOLUTION WARNING Cleaner won’t run 1. Not firmly plugged in 1. Plug unit in firmly. To reduce the risk of personal injury, 2. No voltage in wall plug 2. Check fuse or breaker in home. unplug before cleaning or servicing.
-
Page 23: Notes
NOTES:... - Page 24 HOOVER.COM.AU HOOVER.CO.NZ...
Need help?
Do you have a question about the Smartwash FACCWSM21M and is the answer not in the manual?
Questions and answers