Table of Contents
Troubleshooting

Related Manuals for Plockmatic BT 30

Summary of Contents for Plockmatic BT 30
- Page 1 BLEED TRIMMER BT 30 Operating Instruction Read this manual carefully before you use this product and keep it handy for future reference. For safety, please follow the instructions in this manual. 20 August 2010...
- Page 2 V001 FS01 2010-08-20 DBCB-0512-0069-V001 Part no. Doc no. 3300 words 14900 characters Warning This is a Class A product. In a domestic environment this product may cause radio interference in which case the user may be required to take adequate measures. The product (System) which is connected to this machine will be class A Note The domestic environment is an environment where the use of broadcast radio and television receivers may...
-
Page 3: Table Of Contents
TABLE OF CONTENTS SAFETY..............................4 GENERAL ..............................5 BASIC INFORMATION STR........................6 OPERATING THE STR..........................8 4.1 S ............................8 YSTEM ETUP 4.2 L ..............................9 ANGUAGE 4.3 J .............................. 10 ETUP 4.4 P ..........................11 APER ETUP 4.5 J .............................. -
Page 4: Safety
1. Safety The Bleed Trimmer may only be plugged into an approved and by circuit breakers protected electrical installation, secured with a maximum of 16A. The outlet socket shall be installed near the equipment and shall be easily accessible. Never put your hands, other body parts or anything else than booklets within specifications in the infeed or outfeed area of the Bleed Trimmer. -
Page 5: General
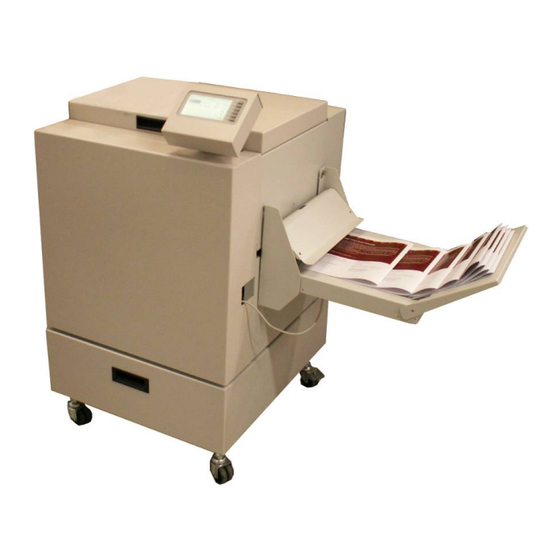
2. General Bleed Trimmer BT 30 is used together with Booklet Maker system Pro 30. The main purpose of the Bleed Trimmer, further referred to as STR, is that it can be used for trimming the bleed off the booklet. Booklets with a maximum up to 25 sheets 80g/m can be trimmed from 2mm to 35mm on each short edge of the booklet, to a minimum of 200 mm and a maximum of 320mm finished size. -
Page 6: Basic Information Str
Due to mirrored versions of this product, typical Front and Rear designations that normally are viewed from the operator location have been replaced by Left and Right. Left and Right are defined from the paper input direction. Clarification: Right = Front for BT 30 Left = Rear for BT 30... - Page 7 3. Basic Information (continued) See the Top View picture below to get familiar with the components inside the machine. Infeed Outfeed side side Description Description Docking Bracket Motor 1, Knife Transport Belts Motor 7, Side Jogger Knives Motor 2, Knife Solenoid Trimmer Stop Motor 3, Knife...
-
Page 8: Operating The Str
4. Operating the STR This section explains how to use the STR during normal operation. From either side (top or bottom) 40mm of the finished booklet should be free from staples to ensure safe operation. NOTE: The System Setup has to be set once. 4.1 System Setup Fig. -
Page 9: Language
4. Operating the STR (continued) 4.2 Language NOTE: The Language has to be set once. Fig. 1 Fig. 2 Fig. 3 Step Action Remarks Enter ‘Admin’ menu Press the ‘Admin’ button (Fig. 1) Enter ‘Language:’ menu Use the ‘▲ / ▼ buttons’ to select ‘Language:’ and press the ‘Enter’... -
Page 10: Job Setup
4. Operating the STR (continued) 4.3 Job Setup Perform the following steps to set up the job: 1) Determine the width of the booklet before trimming (Input Size). 2) Determine the width of the booklet after trimming (Trim Size). 50-245 mm Trim waste 2-35 mm Trim waste... -
Page 11: Paper Size Setup
4. Operating the STR (continued) 4.4 Paper Size Setup NOTE: “Standard paper size” has to be set once. NOTE: “Select Paper Size” suitable to your requirements. Fig.1 Fig.2 Fig.3 Step Action Remarks Enter ‘Admin’ menu Press the ‘Admin’ button (Fig. 1) Enter ‘Standard Paper Size:’... -
Page 12: Job Setup
4. Operating the STR (continued) 4.5 Job Setup Fig. 1 Fig. 2 Fig. 3 Fig. 4 Step Action Remarks Job Setup Press the ‘Jobs’ button two times (Fig. 1& 2). Make a new Job Press the ‘New’ button (Fig. 3). Enter Job name Use the ‘+ / -‘... -
Page 13: Paper Input Size Setup
4. Operating the STR (continued) 4.6 Paper Input Size Setup In this menu the Input Size can set or adjusted. Fig. 1 Fig. 2 Fig. 3 Step Action Remarks Input Size adjustment Use the ‘▲ / ▼ buttons’ to select ‘Input Size’ and press the ‘Enter’... -
Page 14: Side Trim On / Off
4. Operating the STR (continued) 4.7 Side Trim ON / OFF Fig. 1 Fig. 2 Fig. 3 Fig. 4 Fig. 5 Step Action Remarks Side Trim ON/OFF Use the ‘▲ / ▼ ’ buttons on the UI to select ‘Side Trim’ and press the ‘Enter’... -
Page 15: Centre Offset
4. Operating the STR (continued) 4.8 Centre Offset For trimming the bleed off the booklet a Center Offset can be set. This means that it is possible to trim asymmetrical (trim more from the upper or lower side of the booklet). A positive Center Offset will result in a booklet trimmed more on the upper side of the booklet. -
Page 16: Purge Button
4. Operating the STR (continued) 4.9 Purge Button Fig.1 Step Action Remarks Press Purge Button. Use the ‘Purge buttons’ to move booklets forward on Belt Stacker (Fig.1). -
Page 17: Troubleshooting
5. Troubleshooting There are several errors or fault codes that generally can be solved by the operator: When the Trim Waste Bin is full or trim waste is prevented from falling down into the Waste Bin, the message ‘Empty Trim Bin' will be displayed (Fig. When a Paper Jam appears, like Clear Area, the message ‘Error STR…’... -
Page 18: Clearing A Paper Jam
5. Troubleshooting (continued) 5.2 Clearing a Paper Jam 5.2.1 Warnings / Cautions An increasing number of Paper Jams is an indication of the need to clean the belts. The STR Upper knife blades are protected by a Knife Safety Plate that moves away during the Trim cycle movement. - Page 19 5. Troubleshooting (continued) 5.2 Clearing a Paper Jam (continued) Fig. 1 Fig. 2 Step Action Remarks Open the Top Cover. The STR will automatically try to empty the machine 1.1. Close the Top Cover. when a Paper Jam is detected. 1.2.
-
Page 20: Troubleshooting (Continued)
5. Troubleshooting (continued) 5.3 Stop if booklet is too thick NVM ‘Stop if booklet too thick’ is a value to set a warning for the Operator when a booklet is too thick to trim. There are 3 different warnings adjustable, which are: Value Value Value... -
Page 21: Cleaning / Maintenance
6. Cleaning / Maintenance 6.1 General Before Cleaning or Maintenance, always make sure to disconnect the appropriate power cord. An increasing number of jams are an indication of the need to clean the belts. The exterior can be cleaned with a slightly moist cloth. With exception of the belts, the interior of the STR does not need cleaning. -
Page 22: Removing Trim Waste From Waste Area
6. Cleaning / Maintenance (continued) 6.2 Cleaning the belts (continued) Fig. 1 Fig. 2 Step Action Remarks Clean the belts The upper belt (A) can easily be rotated in either direction. The lower belts can be rotated in either direction by pulling them (Fig. 1). Place the belts in normal position. -
Page 23: Technical Information
7. Technical information Capabilities: Electrical: 220/230V, 2.0A Compatibility: Standalone BT 30: 60Hz: 220/230V, 2.0A 50Hz: 100/110/120/127V, 4.0A 60Hz: (upon request) Up to 25 sheets Capacity: (80 g/m, 100 pages booklet) The Bleed Trimmer should only be connected to an approved electrical system which is rated at a maximum of 16A and which is protected by circuit breakers.
Need help?
Do you have a question about the BT 30 and is the answer not in the manual?
Questions and answers