Advertisement
Quick Links
Advertisement

Summary of Contents for RC CAD2Vr L-1011
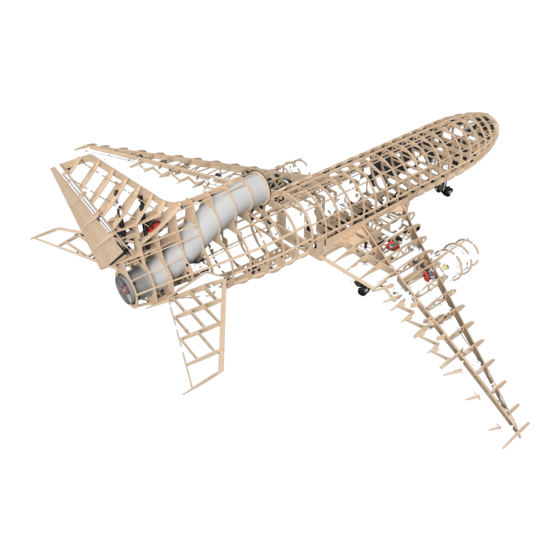
- Page 1 L-1011 Assembly Manual 1:20 Scale Radio Controlled Airliner...
- Page 2 EN: Advisories & Requirements EN: Center Fuselage EN: Forward Fuselage EN: Nose Gear DE: Hinweise & Anforderungen DE: Mittelrumpf DE: Vorderer Rumpf DE: Bugfahrwerk FR: Avis et exigences FR: Centre du fuselage FR: Fuselage avant FR: Équipement de nez ES: Avisos y requisitosl ES: Fuselaje central ES: Fuselaje delantero ES: Tren delantero...
- Page 3 READ BEFORE YOU CONTINUE LESEN, BEVOR SIE WEITERGEHEN | A LIRE AVANT DE CONTINUER | LEER ANTES DE CONTINUAR | LEIA ANTES DE CONTINUAR | ПРОЧИТАЙТЕ ПЕРЕД ПРОДОЛЖЕНИЕМ EN: This kit has been designed using CAD zu verwenden, um die Schlitze zu erweitern. Las tolerancias incorporadas en cada parte cada peça e usar uma ferramenta rotativa para software and manufactured using high precision...
- Page 4 Wood glue is required on Holzleim ist auf der Oberfläche La colle à bois est requise sur la Se requiere pegamento para A cola de madeira é necessária Клей для дерева требуется на surface or joint oder Fuge erforderlich surface ou le joint madera en la superficie o junta.
- Page 5 S E C T I O N C e n t e r F u s e l a g e W I N G B O X & G E A R B A Y...
- Page 6 Section C - Materials, Parts, and Tools Fuselage Hatch Skin Hatch Hatch Latch Hatch Mounting Plate Bracket Cover Latch Hatch Hinge Hatch Hinge Hatch Hinge Hatch Hinge Hatch Stay Mounting Hubs M3 6mm M3 12mm 570mm x 2mm 6mm Round Hatch Hex Button Head Hex Button Head...
- Page 7 Laser Cut Parts Index Bulkhead 1 Hatch Rod Plate 2 Wing Mount Brace Bracket 1 Bulkhead 2 Keel 1 Wing Mount Brace Bracket 2 Bulkhead 3 Keel 2 Wing Mount Brace Bracket 3 Bulkhead 4 Longeron 1 CM10 Wing Mount Brace Bracket 4 Bulkhead 5 Longeron 2 CM11 Wing Mount Brace Bracket 5...
- Page 8 CC2 - CC5 CC3 - CC6 EN: Glue CF4 & CF5 to CB9 after sliding CB9 to the end caps of CC2-CC5 and CC3-CC6 DE: Kleben Sie CF4 & CF5 auf CB9, nachdem Sie CB9 auf die Endkappen von CC2-CC5 und CC3-CC6 geschoben haben FR: Collez CF4 et CF5 sur CB9 après avoir fait glisser CB9 sur les embouts de CC2-CC5 et CC3-CC6 ES: Pegue CF4 y CF5 a CB9 después de deslizar CB9 a las tapas de los extremos de CC2-CC5 y CC3-CC6 PT: Cole CF4 e CF5 em CB9 após deslizar CB9 nas tampas de CC2-CC5 e CC3-CC6...
- Page 9 CC12 CC11 CM20 CM31 CM34 CM32 CC18 CC13 CM17 CM18 All Joints Alle Gelenke Toutes les articulations CM33 Todas las articulaciones Todas as juntas Все суставы...
- Page 10 All Joints Alle Gelenke Toutes les articulations Todas las articulaciones Todas as juntas Все суставы CM19 CC10 CC17 CC14 CM30 CC16 CM35 CC15 CM29 CM15 CM36 CM16...
- Page 11 CB10 EN: Apply wood glue to the tabs on CC7, CC8, CC15, CC16 before sliding CF1-CF7 into place. Next, apply wood glue to the inside surface of CB5 before attaching to the surface of CF1-CF7. Apply wood glue to inner surfaces of the slots as depicted in the diagram of CB2 and CB1 before afixing to the the wing box.
- Page 12 CM11 CB13 CM12 CM13 CM10 CM14 CM27 CM28 CM26 CM23 CM24 CM22 All Joints CM25 Alle Gelenke Toutes les articulations Todas las articulaciones CM21 Todas as juntas Все суставы...
- Page 13 All Joints Alle Gelenke Toutes les articulations Todas las articulaciones Todas as juntas Все суставы...
- Page 14 CB11 CB12 All Joints Alle Gelenke Toutes les articulations Todas las articulaciones Todas as juntas Все суставы...
- Page 15 Fuselage Mounting Hub M3x12 M3x12 M3x6 M3x6 Fuselage Mounting Hub M3x12 M3x12 EN: Pre-Thread the M3 holes with a threading tool to ensure mounting hub is properly secured. DE: Schrauben Sie die M3-Bohrungen mit einem Gewindewerkzeug vor, um sicherzustellen, dass die Montagenabe richtig befestigt ist. FR: Pré-filez les trous M3 avec un outil de filetage pour vous assurer que le moyeu de montage est correctement fixé.
- Page 16 Spring *6mm Magnets Hatch Latch Plate Hatch Spring Cover Hatch Latch CC10 EN: Using a pliers or wire cutting tool, cut the metal springs to a lenth of 14mm DE: Schneiden Sie die Metallfedern mit einer Zange oder einem EN: Use Adjustable Pliers to wedge magnets into the round insets. Drahtschneidewerkzeug auf eine Länge von 14 mm DE: Verwenden Sie eine verstellbare Zange, um die Magnete in die runden FR: À...
- Page 17 CH12 All Joints Alle Gelenke Toutes les articulations Todas las articulaciones Todas as juntas Все суставы CH11 CH13...
- Page 18 Forward All Joints Alle Gelenke Toutes les articulations Todas las articulaciones Todas as juntas Все суставы...
- Page 19 2mm Rod 2mm Rod...
- Page 20 S E C T I O N F o r w a r d F u s e l a g e N O S E , G E A R B A Y, F U S E L A G E...
- Page 21 All Joints Alle Gelenke Toutes les articulations Todas las articulaciones Todas as juntas FF5P Все суставы FF5S FB2S FG3S FG3P FG1S FB3P FG1P FB3S FB2P...
- Page 22 EN: Bottom Side Up View FGT2 DE: Ansicht von unten nach oben FR : Vue de dessous vers le haut < Forward Aft > ES: Vista desde abajo hacia arriba PT: Vista de baixo para cima RU: вид снизу вверх 1mm x 7mm NGH4 NGH1 NGH2...
- Page 23 EN: Allow 0.25mm gap between mount and hinge for free rotation DE: Lassen Sie einen Abstand von 0,25 mm zwischen Halterung und Scharnier für eine freie Drehung FR: laissez un écart de 0,25 mm entre le support et la charnière pour une rotation libre 0.25mm / 0,25mm ES: Deje un espacio de 0,25 mm entre el soporte y la bisagra para una rotación libre...
- Page 24 M3x3 M3x3 M3x3 EN: Flat Face Forward DE: Flache Oberfläche vorwärts FNGH FR: Surface plane vers l’avant FNGBa ES: Superficie plana hacia adelante Forward PT: Superfície plana para frente RU: Плоская поверхность вперед...
- Page 25 30KG+ Servo FNGB x2 < Forward Aft >...
- Page 26 FGL5 FGL3 FGL8 2mm x 8mm FGL1 FGL8 FGL7 FGL2 FGL4 FGL1 2mm x 8mm FGL6...
- Page 27 EN: Use JB Weld to secure the slot track into the landing gear housing DE: Verwenden Sie JB Weld, um die Schlitzschiene im Fahrwerksgehäuse zu befestigen FR: Utilisez JB Weld pour fixer la piste de la fente dans le boîtier du train d’atterrissage ES: Utilice JB Weld para asegurar la pista de la ranura en la carcasa del tren de aterrizaje PT: Use JB Weld para prender a trilha do slot na caixa do...
- Page 28 M3x5 M3x5 FG2P FG2S...
- Page 29 All Joints Alle Gelenke Toutes les articulations FB1S Todas las articulaciones Todas as juntas Все суставы FB1P FF1S FD10 FF1P M3 12mm Hex Button Head...
- Page 30 FD11 FF3P FF2P FF4P FF3S FF2S FF4S M3x6...
- Page 33 FS8a FS8b FL4a FL4b FS6a FS6b FL2a FL2b FS5a FS5b FL3b FL3a FL1b FL1a FS1b FS1a NHS1 NHL1 NHL2 NHF2 NHS2 NHB1 NHB2 NHF3 NHF1 NHF4...
- Page 34 FS10...
- Page 35 Molded Nose Attachment Goes Here...
-
Page 36: N O S E L A N D I N G G E A R
S E C T I O N N o s e G e a r N O S E L A N D I N G G E A R... - Page 37 (4) M2x6 M3x14 (4) M2 (4) M2 M3x28 M3x15 EN: Immediately apply clamps to all areas where epoxy was applied DE: Sofort Klemmen an allen Stellen an denen Epoxidharz aufgetragen wurde FR: Serrez immédiatement à tous les points où la résine époxy a été appliquée ES: Sujete inmediatamente en todos los puntos donde se ha aplicado resina epoxi PT: Prenda imediatamente em todos os pontos onde a resina epóxi foi aplicada RU: Немедленно...
- Page 38 M2x6 15mm Cup-Point Set Screw M2 x 8mm M2x6 EN: NG7’s bottom must be flush with NG5’s bottom DE: Der Boden von NG7 muss mit dem Boden von NG5 bündig sein FR: le fond du NG7 doit être au même niveau que le fond du NG5 ES: la parte inferior de NG7 debe estar al ras con la parte inferior de NG5 PT: O fundo do NG7 deve estar nivelado com o fundo do NG5 RU: дно...
- Page 39 Cup-Point Set Screw M2 x 3mm...
Need help?
Do you have a question about the L-1011 and is the answer not in the manual?
Questions and answers