Table of Contents
Advertisement
Quick Links
Advertisement
Table of Contents

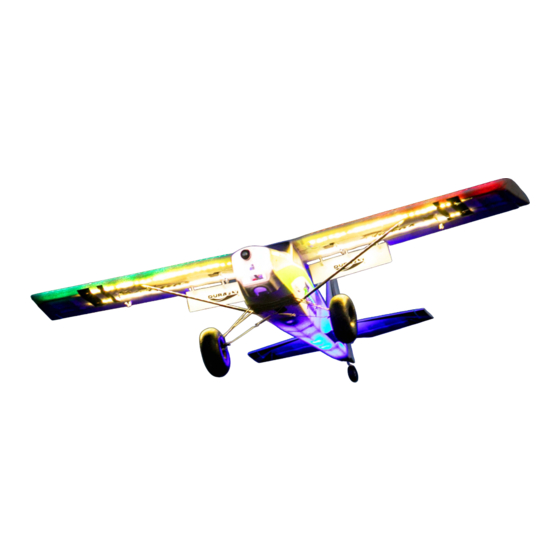
Summary of Contents for DURA NIGHT TUNDRA
- Page 2 & WARNING: Read this instruction manual fully so as to become completely familiar with the features of the product before operating. Failure to operate this product correctly could result in damage to the product, personal property and cause serious injury. This is a sophisticated hobby product and is NOT a toy.
-
Page 3: Table Of Contents
CONTENTS: Introduction Specifications Content Required To Complete Model Optional Accessories Assembly (PNF) Setting Up Your Model 8-10 Tundra Options Floats 11-12 FPV Canopy Tow line mounting point Optional Candy Dropper Optional Skis Model Flying Precautions Pre-flight Checks Flying The Tundra Tundra Tips Spare Parts Listing Trouble Shooting... -
Page 4: Introduction
Simply put the Night Tundra is an immense amount of fun to fly, and you will be flying very quickly due to the very straightforward and speedy assembly process. With either the included floats, tow mounting point and FPV canopy or with optional skis and candy dropper, how you put your Night Tundra to work, is completely up to you. -
Page 5: Content
9. Floats REQUIRED TO COMPLETE MODEL: In its ‘Plug n Fly’ format the Night Tundra will still require some additional accessories to get it ‘flight ready’. Durafly recommends the products below for optimum performance and great value. All are available at Hobbyking.com OrangeRx Tx6i 6ch 2.4GHz... -
Page 6: Assembly (Pnf)
ASSEMBLY (PNF) 1. Out of the box your Night Tundra comes with reinforced foam hinges. However before assembly can begin, each hinge line must be flexed back and forth 5-6 times to reduce tension and load on the servo. Do this for all control surfaces before continuing. - Page 7 2B. Hook one end of the supplied coil springs through the center ring of the spring support wire (E), and the wire cross braces through the other end (F). Then hook the wire cross braces through the plastic brace keeper (E) to complete the sprung cross bracing assembly (F). Now slide the main wheels onto the axle and secure in place with the plastic grip nut (G).
- Page 8 2x8mm 5. Using a pair of pliers (ball link pliers preferably) connect the elevator push rod to the elevator horn (A). To ensure both the elevator and rudder are neutral (with the servos centered) loosen the grub screw of the piano wire fastener and slide the push rods until both surfaces are neutral if required (B).
- Page 9 M2.5x8mm Note: For convenience clear tape alone can be used to secure the wing to the fuselage by running the tape along the entire span of the wing join. However this is not recommended if you intend to fly the Tundra aggressively. 8.
- Page 10 Velcro in the location shown (A) under the rear fuselage access hatch. Ensure Rx aerials are held away from the servos. Congratulations, basic assembly of your Night Tundra is now complete. Please perform a final check on all screws, bolts and components, ensuring all are secureand firm in place.
-
Page 11: Setting Up Your Model
SETTING UP YOUR MODEL: 1. With your receiver installed and all servos plugged into their corresponding channels, connect the flight battery to the ESC to power up the electronics. With the model now armed, ensure all servos are centered and all control surfaces are level. If not, adjust by screwing the control clevises by hand, clockwise or anti-clockwise until the control surfaces are level as shown. - Page 12 *Ailerons: ‘low rates’ 10mm, ‘high rates’ 20mm in either direction from neutral. 4. Flaps on the Night Tundra will need to be set for 3 stages (up/no flap, mid flap and full down flap). Do this either via your radio or mechanically by turning the clevises on the flap control rod (or via both in most cases), set mid flap to approximately 45 degrees and full flaps to approximately 90 degrees to the wing.
- Page 13 5. The recommended center of the gravity (CG) for the Night Tundra is approximately 50-60mm from the leading edge of the wing. Your Night Tundra should balance within this range with anything from a 1800mAh - 2200mAh 3S LiPo installed as far forwards as possible in the battery area.
-
Page 14: Tundra Options
YOUR NIGHT TUNDRA COMES WITH SEVERAL FEATURES Your Night Tundra comes with several features available to you during the assembly. Floats , FPV canopy and tow mounting point are all included in the box. Use of a Candy dropper and skis are optional extra’s not included. - Page 15 2. With the floats now fully assembled and landing gear completely removed, insert the front fuselage mounting strut into the main gear housing and onto the rear mounting plate (A). Secure the rear with supplied M2x8 screws (B) and the front using the original main gear mounting plate and screws.
-
Page 16: Fpv Canopy
FPV Canopy To assemble the plywood FPV canopy you’ll need some CA and no more than 10 minutes to glue it all together. All parts are laser cut and following the below exploded diagram, the assembly should be self-explanatory. Note: Allow some time for the glue to cure on the magnet so the bond is as strong as possible. -
Page 17: Tow Line Mounting Point
1. With each float placed on a level surface and parallel to one other, add the front and rear cross The built-in tow line hard mounting point gives the Night Tundra a solid point close to the CG to attach a tow line for gliders etc. The below cutaway shows how the tow line should be inserted and attached to the main spar through the tow line slot. -
Page 18: Optional Skis
Optional Skis The optional skis are a worth while addition to the Night Tundra for flying from both snow and soft sand. First remove the main wheels and slide the plastic sleeve over both axles (A). Then slide each ski onto the axle/sleeve (B) and once in position hook the tension spring around the back of the landing gear wire (C). -
Page 19: Model Flying Precautions
MODEL FLYING PRECAUTIONS: YOUR NIGHT TUNDRA COMES WITH SEVERAL FEATURES PRE-FLIGHT CHECKS: Always range check your model before any flight (especially when flying a new model for the first time). Follow your radio manufacturers guidelines for performing this check. Check all screw bolts and mounting points are firmly secure, including control horns and clevises. -
Page 20: Flying The Tundra
Off water the only real consideration is getting of the surface of the water itself. This is greatly aided by the use of half flaps on all take off runs as they will help lift the Night Tundra up off the surface of the water. -
Page 21: Tundra Tips
NIGHT TUNDRA TIPS: If flying from a hard surface (tarmac, as a t, concrete etc) it is recommended that you remove the spring system from the undercarriage to void excessive bouncing on landings. When flying with floats of water, it is advised to always use at least half flaps on takeoff. Semi deployed flaps will greatly increase the Tundra's ability to lift off the water surface. -
Page 22: Spare Parts Listing
SPARE PARTS LISTING: Horizontal Tail Set Fuselage Set Main Wing Set w/Hinges & Horns Float Set SKU: 9499000422-0 SKU: 9499000423-0 SKU: 9499000064-0 SKU: 9499000065-0 Canopy/Battery Hatch Main wheels FPV Tray Tail wheel Set w/Magnet SKU: 9499000069-0 SKU: 9499000067-0 SKU: 9499000068-0 SKU: 9499000426-0 Nose Cowl Prop Adapter... -
Page 23: Trouble Shooting
TROUBLE SHOOTING: Problem Cause Solution 1. Charge the batteries. 1. Batteries is not fully charged. 2. Install a charged battery. 2. Transmitter battery low. 3. Check for connection 3. Motor not connected. between the ESC and motor. 4. Replace motor. Motor does 4. -
Page 24: Contact
Contact: Notes:... -
Page 25: Notes
Notes:... - Page 26 Notes:...
- Page 27 Notes:...
- Page 28 APEX CE SPECIALISTS LIMITED UK REP M1 4HT, UK APEX CE SPECIALISTS LIMITED...
Need help?
Do you have a question about the NIGHT TUNDRA and is the answer not in the manual?
Questions and answers