
Related Manuals for Boehringer Miditron Junior II

Summary of Contents for Boehringer Miditron Junior II
- Page 1 ® Junior II Miditron Service Manual ® Service Manual Miditron Junior II / ID 1997491 / MJ / 1.0 - June 1998 / Page 1...
-
Page 2: Table Of Contents
Table of contents Short operating instructions ............... 6 1. General Note ....................7 Limitations ......................7 Mailing / telephone address ................7 Security advice ...................... 8 Confirmation declaration ..................10 2. Documentation ................... 11 Update service for this manual ................11 Instrument code for service ................ - Page 3 Table of contents General ......................... 35 Procedure ......................35 8. Adjustment / Dismantling ................40 9. Mechanics ....................41 Mechanical moduls ..................... 41 9.1.1 Transport arm ....................41 9.1.2 Tray ........................41 9.1.3 Top of housing ....................42 9.1.4 PCB Main ......................43 9.1.5 PCB Interface ....................
- Page 4 Table of contents 10.3.10 LED reference position ..................70 10.3.11 Motor Belt Drive Cross Transport ..............70 10.3.12 Motor Measuring Head Drive ................71 10.4 Circuit diagram ....................72 10.4.1 PCB Main ......................72 10.4.2 PCB Interface ....................77 10.4.3 PCB Measuring Head ..................
- Page 5 Table of contents 12.6.6 Protocol "/SPE-E/ + Data": Data protocol results ........111 12.6.7 Protocol "/SPE-A/ + Pat-Id.": Data protocol Pat-Id........112 12.7 Format of results-data : ..................112 12.7.1 Structure of results-data Programm-1 (International) : ........ 112 12.8 Procedures for checking test bytes ..............114 12.8.1 European language variations of Miditron®...
-
Page 6: Short Operating Instructions
Short operating instructions Directions in Brief Please read carefully the sections marked with this symbol in the margin! Miditron ® Junior II is designed for ease of use. To carry out routine strip measurements in Normal Mode (sequential reading with automatic consecutive numbering), proceed as follows: Switch on Miditron ®... -
Page 7: General Note
1. General Note Limitations The data and information provided in this manual correspond to the state of knowledge existing at the time of ® introducing the Miditron Junior II on the market. Any important changes will be taken into account in the next edition of this manual. -
Page 8: Security Advice
Connectors may also be live. Any adjustment, maintenance or repair on an opened instrument with the power on should be carried out only by trained personnel authorized by Boehringer Mannheim who are aware of the danger involved. If you suspect that the instrument can no longer be operated safely, turn it off and take steps to ensure that it cannot be turned on accidentally. - Page 9 1. General Note A personal computer or printer connected to the analyzer must meet the regulations of EN 60950, UL 1950 or CSA C22.2 No. 950. General Information: The data and information contained in this manual are current as of issue. Any basic changes will be included in subsequent editions.
-
Page 10: Confirmation Declaration
1. General Note Confirmation declaration Confirmation declaration for electromagnetic compatibility according to the laws of the European Union. ® Service Manual Miditron Junior II / ID 1997491 / MJ / 1.0 - June 1998 / Page 10... -
Page 11: Documentation
Update service for this manual New information and modifications will be sent via Technical News. Please send us your name and address to ensure you receive updates automatically. Update Service: Fax this page to Technical Service-Boehringer Mannheim +49 (0)621 759 3985 Name:............Address:........................ -
Page 12: Introduction
3. Introduction System description Urine test strips simplify laboratory diagnosis through their ease of use, sensitivity and specificity. These benefits allow you to identify pathological changes in the urine quickly and reliably. ® Junior II assures that Automated urinalysis with Miditron the reading of results is standardized by eliminating potential sources of error associated with visual reading of test strips (such as unfavourable lighting conditions at the... -
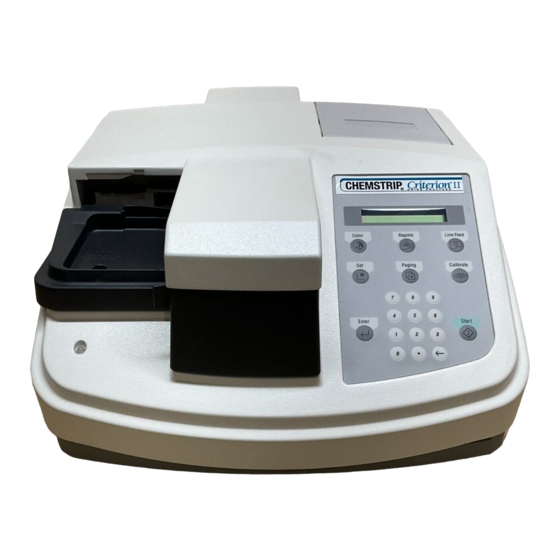
Page 13: Function Elements
3. Introduction 3.1.1 Function Elements Built in printer with lid for documentation of the results Keyboard/ Display Contains 6 function keys, 10 num. keys and liquid crystal display Transport arm Transports test strip from wait position into measuring position Waste tray Three functional areas, test strip insertion, incubation/ measurement area and... - Page 14 3. Introduction Display Color Reprint The display consists of 1 line For manually selecting Reprints the patient report(s) of 16 characters. colour and clarity for as defined in the Reprint inclusion with results. menu. Line Feed advances paper one line at a time or advances continously while key is depressed...
-
Page 15: Measuring Principle
® Junior II is a semi-automated reflectance photometer for in-vitro semi-quantitative reading of urine test strips from Boehringer Mannheim. The light sources (light-emitting diodes, LED’s for short) and reading times are optimized for the reaction chemistry and colour development occurring on the test pads. - Page 16 The photometric reflectance measurement for all of the parameters is carried out after an incubation time of 60 seconds. As with earlier urine analyzers from Boehringer Mannheim, allowance for intrinsic urinary colour, which is a recognized interfering factor, is made through measurement of a blank reagent pad, the so-called "compensation pad".
-
Page 17: Concentration Table (Program I)
3. Introduction 3.1.3 Concentration Table (Program I) Miditron ® Junior II prints the test results in the following concentration ranges: Parameter Conventional Arbitrary (Standard) Specific Gravity 1.000 1.000 1.000 (SG) 1.005 1.005 1.005 1.010 1.010 1.010 1.015 1.015 1.015 1.020 1.020 1.020 1.025... -
Page 18: Changing Range Remisson Bordes
Miditron Junior II to compute and output the test results ® were derived from rigorous comparative tests carried out by Boehringer Mannheim with native urine. If required, the factory-set default ranges for Miditron Junior II may be ® changed to suit individual laboratories’ requirements. -
Page 19: System Specification
3. Introduction System Specification Dimensions: Height: 195 mm Width: 349 mm Depth: 470 mm Weight: 7.45 kg Interfaces: 3 serial RS 232 C interfaces (host/PC, barcode reader, external printer) Power Supply: External Universal Power Supply Model No. 78-095-0300 with integral ON/OFF switch Input: 110 V - 240 V;... -
Page 20: Service Concept
3. Introduction Service Concept 3.3.1 Service level From the early stage of development, Miditron ® Junior II was designed for simple error detection and easy exchangeability of modules. This gives the service workshops the possibility of a fast and easy repair of the instrument on service level A (module level). - Page 21 3. Introduction Handling of warranty claims The warranty claim has to be handled via Return Authorization procedure or accepted equivalent. Please answer all the questions on the RA form with the greatest care. Especially a detailed fault description is needed or the warranty claim will not be accepted by the manufacturer.
- Page 22 3. Introduction Handling of repairs As a general rule, all instrument repairs should be carried out by authorized and trained personnel only. Repair of parts marked with „R“ Parts which are economically worth repairing are marked with „R“ in the spare parts price list. New and repaired parts could be recognized by different material numbers (language version).
- Page 23 - Installation date of spare part All returned parts should be individually labeled with the corresponding RA no. and shipped together with the completed RA form to: Boehringer Mannheim GmbH Logistic Instruments RA Management Friedrich Ebert Str. 100 D - 68167 Mannheim Germany ®...
- Page 24 3. Introduction RA form In the following please find important hints on how to fill in the RA-Form correctly. BOEHRINGER MANNHEIM GmbH Friedrich-Ebert-Strasse 100 Telefon : +49 (621) 759 81 84 D-68167 Mannheim Fax : +49 (621) 759 80 93...
-
Page 25: Installation
4. Installation Checking for Damage in Transit Miditron Junior II is shipped in one package. Please ® contact the supplier or carrier immediately regarding any damage that may have occurred in transit. Unpacking Unpack the Miditron ® Junior II accessories and check that all are present: - Operator’s Manual - Transport Arm... - Page 26 4. Installation 3. Plug one end of the power connector cable into the power socket at the rear of the instrument and the other end into the AC power adapter (Fig. 32). Plug the AC power cord first into the AC power adapter and then into an appropriate AC wall socket.
-
Page 27: Inserting Printer Paper
4. Installation Inserting Printer Paper The printer paper (thermal paper) is heat-sensitive and must be kept away from direct sunlight and high temperatures. Check that there is sufficient printer paper in the printer paper compartment. To insert a new roll of printer paper, follow one of the two methods below: Method 1: 1. -
Page 28: Calibration
5. Calibration Junior II is factory-calibrated before shipment. Miditron ® The analyzer must be calibrated again before being used for the first time, and then every 14 days. The message "Please Calibrate" will appear in the display whenever the 14-day period has expired. - Page 29 5. Calibration Calibration successful: SW.Vers. 1.00 Printout of reflectance 22.01.1998 9:21 values in % R. Calibration o.k. 0 64.50 63.60 63.20 1 64.49 63.76 63.11 2 64.40 63.73 64.56 3 64.44 63.82 63.48 4 64.44 63.70 63.39 5 64.32 63.76 63.37 6 64.05 63.50...
- Page 30 II then uses the stored calibration values to carry out further readings. Note: In this case, "Calibration is necessary" will be printed on the results report. Boehringer Mannheim can give no guarantee as to the accuracy of results if the analyzer has not been calibrated. ®...
-
Page 31: Operation
6. Operation Overview Miditron ® Junior II is extremely easy to use. For normal, routine reading of test strips (Normal Mode) simply press <Start> to begin reading when you see "READY - <START>". The user is guided by display messages and the status LED. -
Page 32: Normal Mode
6. Operation If the analyzer has not been used for more than 10 minutes, it automatically enters Standby Mode. The display blanks out and the status LED is red. When you press any function key (except <Line Feed>), the analyzer performs a self- check and returns to "READY - <START>"... -
Page 33: Principle Movement Of The Miditron® Junior Ii
6. Operation Principle movement of the ® Junior II Miditron Base-Position Grid Test strip Measuring head Insert Strip Transport arm Measuring head Waste starts moving to Insert position the waste position, moves Waste upwards and back. over the Teststrip Grid waiting strip, M.h. -
Page 34: Service Mode And Adjustment
7. Service mode and adjustment How to make adjustments To be able to measure Combur X M strips it will be necessary to position them in such a way over the respective test field that the receiver can register the accessible core zone of the test field. -
Page 35: General
7. Service mode and adjustment Adjustment is made with the help of an optical signal from the measuring head. A special adjustment strip has a bright bar 2 mm in width on a dark background in the test field position 7. If this test field is now traveled over stepwise and measured, a measurement curve will be produced which will then show a maximum when the measuring head with its optical center... - Page 36 7. Service mode and adjustment Service Mode: This display reading indicates that you are in the Service Mode: "The analyzer is in Service mode" Press <Paging> to select the next menu item "Check Keys" SW.Vers. 1.00 or initiate a printout of the status protocol with <Set>. The 29.01.1998 15:01 printout will start after approx.
- Page 37 7. Service mode and adjustment When "Check Keys" is selected the display reads: "All keys can be checked" Press <Paging> to select the next menu item "Check LCD", or initiate the key test by pressing <Set>. To carry out the key test, all keys have to be pressed one after another.
- Page 38 7. Service mode and adjustment Place the first adjustment strip in the middle of the insertion area and initiate the adjustment procedure by pressing <Start>. The adjustment of the first adjustment strip begins. Once adjustment is completed, a report will be printed and sent to the printer interface.
- Page 39 7. Service mode and adjustment Tabelle Service Mode Selfcheck Password (1704) Print SET= Protocol Service-Prot. Paging Echo Key Echo Key SET= Check Keys Key = XXXX Paging Paging SET= Check LCD Testpattern No.1..6 Paging Paging SET= Delete Data Data deleting blinking Paging 3 sec.
-
Page 40: Adjustment / Dismantling
8. Adjustment / Dismantling Adjustment and dismantling are described in detail: Chapter 9 (Mecanics) 9.1.1 Transport arm 9.1.2 Tray 9.1.3 Top of housing 9.1.4 PCB Main 9.1.5 PCB Interface 9.1.6 Display 9.1.7 Printer 9.1.8 Status LED 9.1.9 Keyboard 9.1.10 PCB Measuring Head 9.1.11 LED Measuring Head Home Position 9.1.12 LED Home Position 9.1.13 Motor Belt Drive Cross Transport... -
Page 41: Mechanics
9. Mechanics Mechanical moduls Pull power plug before working on the open instrument. 9.1.1 Transport arm The transport arm (1) is snapped in from diagonally above. Exchangeable components: - Transport arm (1). Dismantling: - Pull power plug Fig. 1 - Lift transport arm (1) up until it snaps out - Remove transport arm (1) Assembling: - Insert transport arm (1) from diagonally above and push... -
Page 42: Top Of Housing
9. Mechanics 9.1.3 Top of housing The top of housing (3) is connected to the lower casing (33) with 6 screws (4). Exchangeable components: - Top of housing (3). Dismantling: - Remove transport arm (see chapter 9.1.1) - Remove tray (see chapter 9.1.2). - Take out paper roll (5). -
Page 43: Pcb Main
9. Mechanics 9.1.4 PCB Main The PCB Main (9) is screwed to the base plate (10) with 4 screws (18). Exchangebable components: - PCB Main (9) Dismantling: - Remove top of housing (see chapter 9.1.3). - Remove cable (16) to PCB Measuring Head. - Remove 6 screws (17) at the interface plugs. -
Page 44: Pcb Interface
9. Mechanics 9.1.5 PCB Interface The PCB Interface (20) is screwed to the top of housing (3) with 4 screws (21). Exchangeable components: - PCB Interface (20). Dismantling: - Remove top of housing (see chapter 9.1.3). - Remove all five plug connections of PCB Interface (20). Plug (22) to keyboard Plug (23) to display Plug (24) to printer... -
Page 45: Display
9. Mechanics 9.1.6 Display The display (28) is screwed to the top of housing (3) with 4 screws (29). Exchangeable components: - Display Dismantling: - Remove top of housing (see chapter 9.1.3) - Remove plug connection (31) of flat cable to PCB Inter- face (20). -
Page 46: Printer
9. Mechanics 9.1.7 Printer The printer (32) is screwed to the top of housing (3) with 4 screws (33). Exchangeable components: - printer (32) Dismantling: - Remove top of housing (see chapter 9.1.3) - Remove cable of PCB Interface - Remove 4 screws (33) from above - Carefully remove printer. -
Page 47: Status Led
9. Mechanics 9.1.8 Status LED The status LED (35) is glued to top of housing (3). Exchangeable components: - Status LED (35). Dismantling: - Remove top of housing (see chapter 9.1.3) - Remove plug (36) - Remove status LED (35) Assembling: - Glue on status LED (35). -
Page 48: Keyboard
9. Mechanics 9.1.9 Keyboard The keyboard (37) is glued to the top of housing (3). Exchangeable components: - keyboard (37) Dismantling: - Remove top of housing (see chapter 9.1.3) - Remove plug (22) from PCB Interface (20) - Remove keyboard (37) from top of housing (3) Assembling: - Remove glue remains from top of housing (3) - Pull cable (38) through hole of top of housing (3) -
Page 49: Pcb Measuring Head
9. Mechanics 9.1.10 PCB Measuring Head The PCB Measuring Head (39) is assembled to the measuring head carrier (40). Exchangeable components: - PCB Measuring Head (39) - cable PCB Measuring Head (41) - measuring head carrier (40) Dismantling: - Remove top of housing (see chapter 9.1.3). - Remove cable (41) from PCB Main (9). -
Page 50: Led Measuring Head Home Position
9. Mechanics 9.1.11 LED Measuring Head Home Position The LED measuring head home position (46) is screwed to the base plate (10). Exchangeable components: - LED measuring head home position (46). Dismantling: - Remove top of housing (see chapter 9.1.3) - Remove plug (15) from PCB Main (9). -
Page 51: Led Home Position
9. Mechanics 9.1.12 LED Home Position The LED home position (48) is screwed to the base plate (10). Exchangeable components: - LED home position (48) Dismantling: - Remove top of housing (see chapter 9.1.3) - Remove plug (14) from PCB Main (9). - Remove 2 screws (49). -
Page 52: Motor Belt Drive Cross Transport
9. Mechanics 9.1.13 Motor Belt Drive Cross Transport The motor belt drive cross transport (50) is screwed to the base plate (10). Exchangeable components: - Motor belt drive cross transport (50) including plate (53) and LED reference position (52). Dismantling: - Remove top of housing (see chapter 9.1.3) - Remove plugs (11) and (13) from PCB Main (9). -
Page 53: Motor Measuring Head Unit
9. Mechanics 9.1.14 Motor Measuring Head Unit The motor measuring head unit (54) is screwed to the base plate (10). Exchangeable components: - motor measuring head unit (54). Dismantling: - Remove top of housing (see chapter 9.1.3). - Remove plug (12) of PCB Main (9). - Remove 2 screws (55). -
Page 54: Tooth Bar Measuring Head Unit
9. Mechanics 9.1.15 Tooth Bar Measuring Head Unit The tooth bar measuring head unit (56) is assembled to the base plate (10). Exchangeable components: - tooth bar measuring head unit (56). Dismantling: - Remove top of housing (see chapter 9.1.3). - Unhook spring (42) of measuring head carrier (40). -
Page 55: Carrier For Tray
9. Mechanics 9.1.16 Carrier for tray The carrier for tray (60) is plugged to the base plate (10). Exchangeable components: - Carrier for tray (60). Dismantling: - Remove top of housing (see chapter 9.1.3). - Loosen right joint on the bottom of the carrier for tray (60). -
Page 56: Reference Field Carrier
9. Mechanics 9.1.17 Reference Field Carrier The reference field carrier (61) is plugged to the base plate (10). Exchangeable components: - Reference field carrier (61). Dismantling: - Remove top of housing (see chapter 9.1.3). - Hold away plastic spring on the inside of the reference field carrier (61). -
Page 57: Crossbar Complete
9. Mechanics 9.1.18 Crossbar complete The crossbar complete (62) are laterally plugged to the base plate (10). Exchangeable components: - Crossbar complete (62) including holding clamps. Dismantling: - Remove top of housing (see chapter 9.1.3). - Remove carrier for tray (see chapter 9.1.16). - Remove holding clamps (63). -
Page 58: Cross Transport
9. Mechanics 9.1.19 Cross Transport The cross transport consists of the sled (64) and the guiding (67). Exchangeable components: - Sled (64) - Guiding (67). Dismantling: - Remove top of housing (see chapter 9.1.3) - Remove carrier for tray (see chapter 9.1.16). - Remove holding clamps (63). -
Page 59: Overview Electronics
Upper housing Lower housing Chip-Card Measuring head Keyboard Light barrier X200 sole bar X205 Interface-board X204 CPU-board Step motor X204 X202 X400 sole bar Beeper Light barrier X201 Status LED LC-Display Printer-board cross bar Light barrier cross bar Printer Gear motor x200 X202 cross bar... -
Page 60: Electronics
10. Electronics 10.2 Power supply Mains power is supplied via an external mains power supply (Fig. 30). The mains power inlet is protected with pigtail fuses 1.25A/slow at 2 contacts. The mains power supply provides supply voltages of +5V to +12V to the instrument. PTCs (poly switches) act as current limitation for both voltages. - Page 61 10. Electronics Electrical Data 5V Output Nominal voltage: adjusted to: 5.5V Adjusting accuracy: ±1% Accuracy: ±5% - 7% Voltage standing wave <100mV p-p ratio (100Hz) Oscillation amplitude: <100mV p-p (Ripple and Noise) Nominal current: 2.0A Cut-off of current approx. 4A limitation: Table: tab-20e Current limitation makes the ouput statically and dynami-...
-
Page 62: Electronic Modules
10. Electronics 10.3 Electronic modules 10.3.1 PCB Main The mainboard (9) is screwed to the base plate of ® Junior II. The plug for the voltage supply, the Miditron serial interface and the ROM-card are directly soldered. All other components (light barriers, motors ...) are connected to the PCB Main via cable and plug. - Page 63 10. Electronics Voltage supply The voltage is supplied via an 8-pin western plug X200 (70). Plug functions: SIGNAL FUNCTIONS + 12V Supply main board (max. 1.15 A) + 12V GND- 12 GND Main board GND- 12 Fig. 20 GND- 5 GND printer GND- 5 Printer supply (max.
- Page 64 10. Electronics LED-control, Registration of counts ® Miditron Junior II has 3 LEDs for the control and monitoring of the motor belt drive cross transport and the motor measuring head unit. The LEDs are connected to the PCB Main via plugs. The LEDS are: - plug (15) LED measuring head home position;...
-
Page 65: Pcb Interface
10. Electronics 10.3.2 PCB Interface The PCB Interface (20) is screwed to the top of housing. It is connected to the PCB Main via a 40 pin cable (27). The supply voltage for the printer (26) is made via a separate 5 pin cable. - Page 66 10. Electronics Status LED The status LED is connected to the PCB Interface via a plug (25) Keyboard The keyboard control is integrated to the PCB Interface (20). The keyboard is connected to the PCB Interface via a plug (22). Plug function: Fig.
-
Page 67: Display
10. Electronics 10.3.3 Display The display (28), a LCD-display, has a line with 16 digits. The display is connected to the PCB Interface with a plug (14 pin spring rail). It is controlled by the PCB Main with 4 bit data and 3 control signals. The contrast is ruled via a voltage factor on the PCB Main, as well. -
Page 68: Keyboard
10. Electronics 10.3.6 Keyboard The keyboard control is integrated to the PCB Interface. The keyboard is connected to the PCB Interface via a plug. plug functions: SIGNAL FUNCTIONS Scan- Lines (Y5...Y1) Fig. 28 Select- Rows (X4...X1) not connected LF-1 printer - feed LF-2 printer - feed Table: tab-17e... -
Page 69: Led Measuring Head Home Position
10. Electronics 10.3.8 LED Measuring Head Home Position The LED measuring head home position (46) determines the home position of the measuring head. The LED is connected to the PCB Main via a plug. The timing to contact all 3 LEDs and to measure the initial frequency of the U/f-converter on the analog board is realized via counters (three settable via software) by partitioning the initial frequency of the micro control. -
Page 70: Led Reference Position
10. Electronics 10.3.10 LED reference position The LED reference position determines the reference position for the movement of the cross transport. The LED is connected to the PCB Main via a plug. The timing to contact all 3 LEDs and to measure the initial frequency of the U/f-converter on the analog board is realized via counters (three settable via software) by partitioning the initial frequency of the micro control. -
Page 71: Motor Measuring Head Drive
10. Electronics 10.3.12 Motor Measuring Head Drive The motor measuring head drive (54) is connected to the PCB Main via a plug (12). The 2 phases step motor is contacted with a driving component. This component has 6 inputs which can be contacted from the micro controller. A total, half and micro step use is realized by a corresponding contact. -
Page 72: Circuit Diagram
10. Electronics 10.4 Circuit diagram 10.4.1 PCB Main PCB Main Part 1 Sheet1 ® Service Manual Miditron Junior II / ID 1997491 / MJ / 1.0 - June 1998 / Page 72... - Page 73 10. Electronics PCB Main Part 2 Sheet2 ® Service Manual Miditron Junior II / ID 1997491 / MJ / 1.0 - June 1998 / Page 73...
- Page 74 10. Electronics PCB Main Part 3 Sheet3 ® Service Manual Miditron Junior II / ID 1997491 / MJ / 1.0 - June 1998 / Page 74...
- Page 75 10. Electronics PCB Main Part 4 Sheet4 ® Service Manual Miditron Junior II / ID 1997491 / MJ / 1.0 - June 1998 / Page 75...
- Page 76 10. Electronics PCB Main component layout Best ® Service Manual Miditron Junior II / ID 1997491 / MJ / 1.0 - June 1998 / Page 76...
-
Page 77: Pcb Interface
10. Electronics 10.4.2 PCB Interface PCB Interface Part 1 (keyboard, display, beeper and LED) l2755a2 ® Service Manual Miditron Junior II / ID 1997491 / MJ / 1.0 - June 1998 / Page 77... - Page 78 10. Electronics PCB Interface Part 2 (printer control) l2755a3 ® Service Manual Miditron Junior II / ID 1997491 / MJ / 1.0 - June 1998 / Page 78...
- Page 79 10. Electronics PCB Interface Part 3 (printer interface) l2755a4 ® Service Manual Miditron Junior II / ID 1997491 / MJ / 1.0 - June 1998 / Page 79...
- Page 80 10. Electronics PCB interface component layout l2755a4 ® Service Manual Miditron Junior II / ID 1997491 / MJ / 1.0 - June 1998 / Page 80...
-
Page 81: Pcb Measuring Head
10. Electronics 10.4.3 PCB Measuring Head 980520 ® Service Manual Miditron Junior II / ID 1997491 / MJ / 1.0 - June 1998 / Page 81... -
Page 82: Software
These can also be selected by Boehringer Mannheim Customer Support or your service agent in a software download to the printer port. - The Print Setup menu can be used to generate a hard copy of the analyzer settings. -
Page 83: Flow Diagram Of Menu Selection
11. Software Closing a menu or submenu: Press <Start> to close the menu and return directly to Ready Mode. When you press <Start> to close a menu, all of the settings made up to that point and confirmed with <Enter> will be saved. 11.2 Flow Diagram of Menu Selection READY-<START>... -
Page 84: Flow Diagram Of The Worklist Menu
11. Software 11.2.1 Flow Diagram of the Worklist Menu Paging Ready Worklist menu select select Color / Set Color / Set Color Clarity Enter Enter xxx+1 Start via serial port scroll Color where xxx = worklist back xxx sequence number Edit List Enter pppppppppp xxx... -
Page 85: Flow Diagram Of The Working Mode Menu
11. Software 11.2.2 Flow Diagram of the Working Mode Menu ..Paging Working Mode Set/ Enter Setup Normal Mode Accelerated Mode Fast Mode Paging Enter Enter Enter Paging Paging Paging Setup Reprint toggle menu item Enter save selected menu item and switch forward Paging switch forward without saving switch backward without saving ®... -
Page 86: Flow Diagram Of The Reprint Menu
11. Software 11.2.3 Flow Diagram of the Reprint Menu ..Paging Setup Reprint Enter Paging Last 1 result Enter Last series Paging Enter Abnormals today Paging Enter Nomals today Paging Enter Today's Paging Enter Paging ..® Service Manual Miditron Junior II / ID 1997491 / MJ / 1.0 - June 1998 / Page 86... -
Page 87: Flow Diagram Of The Setup Menu
11. Software 11.2.4 Flow Diagram of the Setup Menu Setup menu, Part 1 Setup Paging Memory ? Clear=<Enter> (only appears when there is a reading in memory) Language Paging / Enter Paging / Enter English Deutsch Francaise Espanol Italiano Paging / Enter Paging / Enter Paging / Enter Paging / Enter... - Page 88 11. Software To memory to /from Setup menu, Part 2 clear/language ext. printer Paging / Enter Patient ID PatId.10-digits PatId.13-digits Paging / Enter Paging / Enter Color Off Color Auto. Color Manual Set Colour Paging Paging Enter Enter Paging / Enter Colour Setup Enter...
-
Page 89: Flow Diagram Of Color Setup
11. Software 11.2.4.1 Flow Diagram of Color Setup Paging Paging Color Off Color Manual Color Auto. Enter Enter Paging Paging Paging / Enter Color Default 5 Colors Enter Color Select Paging 4 Colors Paging / Enter Enter Paging / Enter Num Lock 3 Colors Paging / Enter... -
Page 90: Flow Diagram Of Clarity Setup
11. Software 11.2.4.2 Flow Diagram of Clarity Setup Paging Clarity Off Clarity On Enter Paging Paging Clarity Default Enter Paging Clarity Select Enter Num Lock + Enter Paging clear Paging / Enter Num Lock + Enter Paging sl. cloudy Num Lock + Enter Paging very cloudy... -
Page 91: Flow Diagram Of Parameter Setup
11. Software 11.2.4.3 Flow Diagram of Parameter Setup 1.: SG 1.: SG 2 x Set 1.: LEU ..Enter <End> <End> Selection 1st of 10 (for selection) Paging or Enter 2.: PH 2.: SG 1 x Set 2.: PH .. -
Page 92: Service/Status Software
- Loading via service mode with the printer interface 11.4.1 Software update via chip cards Boehringer Mannheim distributes new versions of software, and software updates, on two chip cards. To install or update software, proceed as follows: Switch off power at the AC power adapter. -
Page 93: Software Update Via Printer Interface
11. Software You then see displayed: Press <Set> to select one of the two display screens: "Restore the existing customer setting" "Restore the default settings" When you see "Default settings" displayed, all of the analyzer’s settings will be restored to the factory defaults. Press <Enter>... - Page 94 11. Software Call the Service Mode (see Chapiter 7). The display will then read: "Analyzer is in the Service Mode" Inquire the current software version, date, time and error number via a return from service PC to the analyzer. Miditron ®...
- Page 95 11. Software Once the last file has been sent, the display reads: Press <Set> to select one of the two display readings: "Restore the existing customer setting" When "Default settings" is selected, all instrument settings will be reset to factory default settings. "Restore the default settings"...
- Page 96 11. Software Flow Diagram of the SW-update Printer Interface Connect PC and Junior II Power on 3308 & Enter Software Update Enter Source: Source: PC ROM-Card Enter Erasing Program Send binary Send 1. File File or First HEX-File Loading Program Send Second Send 2.
-
Page 97: Loading Instrument Settings Via Download
11. Software 11.5 Loading instrument settings via Download All instrument settings, variable parameters as well as the texts can be downloaded via the printer interface. To do so, edit an INI-file in the ASCII mode. Sections are described via keywords in square brackets (e.g. -
Page 98: Specification Of The Ini-File
11. Software 11.5.1 Specification of the INI-file ; identification: ‘[‘ first position, ‘]’ last position ; parameter: parameter name, ‘=’, parameter; upper/lower case printing allowed (except for texts) ; empty lines allowed (CR/LF) ; each parameter must be preceded by the appropriate block ID ;... - Page 99 11. Software 5=red ; is displayed 6=other [CLARITY] 1=clear 2=“leicht trüb” cloudy ???? ; texts in the sequence to be displayed 3=“stark trüb“ very cloudy ???? ; observe sequence (1..End) 4=mucous ; texts are shortened to12 characters 5=sanguinous [HEAD] 1=“line 1" ;...
-
Page 100: Saving Instrument Settings Via Upload
11. Software 11.6 Saving instrument settings via Upload All instrument settings, variable parameters as well as the texts can be saved to the service PC by means of an upload via the printer interface. Saving via the interface takes place in the Service Mode by means of a terminal program (e.g. -
Page 101: Interface
12. Interface 12.1 Host Interface The Miditron ® Junior II appliance has a serial interface connection to the customer’s laboratory EDP system, hereinafter called the „Host“. These specifications are concerned with the exchange of data, its activation, protocol formats and timing. These specifications are based on the host connection of the Miditron ®... -
Page 102: Character Definitions, Representation Conventions
12. Interface 12.2 Character definitions, representation conventions Table for Character definitions: Abb. Meaning Representation ENTER Line-Feed ASCII-character to DIN 66003 Table 1 to 7D (International Reference version) Letter characters or spaces , 41 to 7D to 39 and ",", ";", ".", ":", "-", "_", Numbers/ punctuation marks "/", "\", "(", ")", "+", "=", "|", "*". -
Page 103: Protocols
12. Interface 12.3 Protocols No protocol is longer than 255 bytes. If a data field exists, it will consist of a function code, one space (or „Spare“, to use Hitachi’s nomenclature, space = 20 16 ) and the data in question. - Page 104 12. Interface Table for Protokcol structure: Pat Id length of 10 characters Header Data field Trailer ∑ Pat- Seq.- Transmitter SC FC SP Date Time Data Bytes 10 chr Host STX SPE A SP ETX CS1,2 CR 10 chr 5 num. 8 num.
- Page 105 12. Interface TThe „protocol header“ or just „header“ means the start character, the frame code, function and the spare which follows (columns 1, 2, 3 and 4). The „protocol trailer“ or just „trailer“ consists of the end character, the test bytes and return (columns 10, 11 and 12).
-
Page 106: Upload Timing And Handshake
12. Interface 12.4 Upload timing and handshake The protocols are identified by abbreviated codes on the arrows symbolizing the direction of transfer. Those protocols which appear more than once are executed more than once. ® Miditron Junior II (Master) HOST (Slave) Start communication after pressing /SPM/ ——————>... - Page 107 H: xxx M: REP send evaluating checksum MOR received and framecode M: Message from Miditron Junior II H: Message fromHost bold lines: normal communication without error ® Service Manual Miditron Junior II / ID 1997491 / MJ / 1.0 - June 1998 / Page 107...
-
Page 108: Download Timing And Handshake
12. Interface 12.5 Download timing and handshake ® Junior II (Master) Miditron HOST (Slave) Start communication after pressing /ANY/ ——————> "receive list": Miditron is asked whether Host is ready to send <————————/SPA-A/- Reply Pad ID If disturbance or not ready to receive, no reply. - Page 109 H: xxx M: send REP evaluateing checksum and framecode M: Message from Miditron Junior II H: Message from Host bold lines : normal Communication without error ® Service Manual Miditron Junior II / ID 1997491 / MJ / 1.0 - June 1998 / Page 109...
-
Page 110: Protocol Structure
12. Interface 12.6 Protocol structure 12.6.1 Protocol "/REP/": Repeat request Transmitter HOST/Miditron ® Junior II Byte No.: Meaning Comments Start character Frame code; „repeat“; End code Test byte 1 Test byte 2 Return 12.6.2 Protocol "/SPM/": Start Communication ® Transmitter Miditron Junior II Byte No.:... -
Page 111: Protocol "/Spe-D/ + Data": Data Protocol Color + Turbidity
12. Interface 12.6.5 Protocol "/SPE-D/ + Data": Data protocol color + turbidity ® Junior II Transmitter: Miditron Byte Nr. Byte Nr. meaning comment for 10 for 13 Pat-Id-length Start character Frame character; 3B 16 ; ‘;’ ‘D’ Block D; ‘D’ = 44 16 Space 5 .. -
Page 112: Protocol "/Spe-A/ + Pat-Id.": Data Protocol Pat-Id
12. Interface 12.6.7 Protocol "/SPE-A/ + Pat-Id.": Data protocol Pat-Id. Transmitter: HOST Byte Nr. Byte Nr. meaning explanation for 10 for 13 Pat-Id-length Start character Frame character; 3B 16 ; ‘;’ ‘A’ Block D; ‘D’ = 41 16 Space 5 .. 14 5 .. - Page 113 12. Interface 113...132 116...135 GLU| 1000 mg/dl| ++++| | 133...152 136...155 KET| 5 mg/dl| +| | 153...172 156...175 UBG| 4 mg/dl| ++| | 173...192 176...195 BIL| 3 mg/dl| ++| | 193...212 196...215 ERY| 25/ul| ++| | 213...232 216...235 NAG| example : setting “SI” or “SI & Arb” ; Programm-1 Byte Nr.
-
Page 114: Procedures For Checking Test Bytes
12. Interface 12.8 Procedures for checking test bytes 12.8.1 European language variations of Miditron ® software: LRC test bytes The LRC test bytes are a Longitudinal Redundancy Check - a kind of longitudinal parity test of the bits contained in the data protocol. The procedure is quite simple: Byte for byte, the protocol is linked bit by bit to XOR. -
Page 115: American/Canadian Language Version Of Miditron® Junior Ii Software
12. Interface 12.8.2 American/Canadian language version of ® Miditron Junior II software: Check total The check total is reached simply by adding together the bytes to be transferred, the individual bytes being interpreted as positive, whole numbers. STX, BTX and CR are not included in the addition. The result of the addition is taken as modulo 256. -
Page 116: Automatic Adaption To The Test Procedure Used By The Host
12. Interface 12.8.3 Automatic adaption to the test procedure used by the host ® Miditron Junior II is in a position to adapt itself automatically to the test procedure used by the host. If an error is discovered when checking the test bytes of the receive protocol, the check will be continued using the algorithms of the alternative procedure. -
Page 117: Troubleshooting
13. Troubleshooting The instrument contains software control functions which test the electronic hardware and peripherals after being switched on or after stand-by and which detect occuring errors during measurement. According to the importance of the error the just measured results are dismissed or in case of non-repairable errors (Major Error) the instrument changes to error condition. -
Page 118: Repairable Errors During Normal Mode
13. Troubleshooting The SQW exit is activated at the RTC-component and therefore the command list of the RTC is checked. In addition, the condition of the RTC battery is checked via the VRT-flag. When starting the display test, first of all an initialisation command is sent to the display. -
Page 119: Non-Repairable Errors During Normal Mode (Major Error)
13. Troubleshooting Calibration errors are deviations exceeding 10 % of the known remission values of the profile grey strips respectively exceeding 1 % of the previous calibration values. In case of an error, the user is asked to repeat the calibration. -
Page 120: Errors During Ini-File Download
13. Troubleshooting 13.4 Errors during INI-file Download Errors during INI-file download Message Description COMPLETED download completedt ‘]’ expected end of identification (section) missing date expected (dd.mm.jj) error in date setting date format error date format error different number of steps foncentration steps error flaging exceeds number of steps flagging exceeds number of steps... -
Page 121: List Of All Error Codes
13. Troubleshooting 13.5 List of all error codes Display Messages Description "Self-Check" self-test of the instrument "Empty Waste Tray" Cleaning device "READY-<START>" Ready for measurement normal mode "ACC MODE <START>" Ready for measurement accelarated mode "FAST MODE<START>" Ready for measurement fast mode "Please Calibrate"... - Page 122 13. Troubleshooting Repairable Error Error Code Reason What to do? 1-99 Step loss on measuring head transport Dark counts not within value range Difference counts too low Out of range Concentration range not chosable Light counts exceed value range One or more sollint-values are <60% or >80% 10-45 1%-clause of calibration error = - A second calibration strip has to be...
- Page 123 13. Troubleshooting Positioning Error / Lightbarrier Error Error Code Reason What to do? 100-199 Timeout error of measuring head reference - Check measuring head movement - Check light barrier- Perform adjustment procedure (see chapter 7) Timeout error during movement from - Check measuring head- Check light reference position barrier...
- Page 124 13. Troubleshooting LCD Error Error Code Reason What to do? 200-299 Busy signal error - Check connections - Change display Table: tab-24e EEPROM Error Error Code Reason What to do? 400-499 CRC error during reading from EEPROM - Change CPU board - Perform adjustment procedure ( see chapter 7) CRC error during writing to EEPROM...
- Page 125 13. Troubleshooting Divide/Measuring-LED Error Error Code Reason What to do? 800-899 error during waiting of measuring LEDs - Check/ change measuring head - Change CPU board - Perform adjustment procedure ( see chapter 7 ) PGA not adjustable - Check/ change measuring head - Change CPU board - Perform adjustment procedure ( see chapter 7 )
- Page 126 13. Troubleshooting Error during software update: Display-hint "error no.xx" Error Code Reason What to do? 01-12 Error during programming Flash Error during deleting Flash Wrong ROM checksum Abort by user Error during serial transmission Timeout during transmission Buffer overflow during serial receipt Wrong record length of Hex-file Wrong checksum of Hex-file record No chipcard inserted...
-
Page 127: Spare Parts
14. Spare Parts 14.1 Complete spare part list Partname ID Number Status Remarks Cable to PCB Main to PCB Interface 1997467 flexible cable only Cable to PCB Measuring Head 1702793 flexible cable only Carrier for tray 1702769 plastic part only Clip set 1709631 5 pcs. -
Page 128: Part Identification
14. Spare Parts 14.2 Part identification Fig. 53 Cable to PCB Main to PCB Fig. 43 Cable to PCB Measuring Head Interface (1997467) (1702793) Fig. 41 Carrier for Tray (1702769) Fig. 48 Clip set (1709631) Fig. 51 Display (1221817) Fig. 28 Keyboard (1997432) Fig. - Page 129 14. Spare Parts Fig. 56 Motor Belt Drive Cross Transport Fig. 45 Motor Measuring Head Unit (1997521) (1997530) Fig. 52 PCB Interface (1997513) Fig. 47 PCB Main (1997424) Fig. 42 PCB Measuring Head (1702696) Fig. 49 Printer Junior II (1997505) Fig.
- Page 130 14. Spare Parts Fig. 55 Suspension compl. (1702688) Fig. 44 Tooth Bar Measuring Head Unit (1702785) Fig. 58 Top of housing (1997459) Fig. 38 Transport arm (1702637) Fig. 39 Tray (1702629) Fig. 62 User Program Chip Card I + II (1997548 + 1997556) ®...
-
Page 131: Exploded View Miditron® Junior Ii
14. Spare Parts ® 14.3 Exploded view Miditron Junior II ® Service Manual Miditron Junior II / ID 1997491 / MJ / 1.0 - June 1998 / Page 131... - Page 132 14. Spare Parts ® Service Manual Miditron Junior II / ID 1997491 / MJ / 1.0 - June 1998 / Page 132...
-
Page 133: Instrument, Strips, Accessories
15. Instrument, Strips, Accessories 15.1 Complete list Partname Instruments, Strips, ID- Number Remarks Accecssories Miditron® Junior II 1937596 Combur10Test® M (100 strips) 1379208 Combur9Test® M (100 strips) 1447637 Control-Test M (50 strips) 1379194 Adjustment strips (10 strips) 1704656 used for adjustment procedure (service only) Printer Paper for Miditron®... -
Page 134: Interface Assignment
16. Interface Assignment Junior II has three RS 232 C serial ports for Miditron ® connecting the following devices: - host/PC - barcode reader - external printer These ports can be enabled and disabled in the interface setup menus. If "Host/PC Yes" is selected in the Setup menu, data will be sent to the host/PC port as an ASCII dataset. -
Page 135: External Printer Interface
16. Interface Assignment 16.2 External Printer interface Connector: D-Sub, 9 pins, male Cable configuration: External Junior II connection Miditron ® Pin 1 Pin 1 TxD Pin 2 RxD Pin 2 RxD Pin 3 TxD Pin 3 DTR Pin 4 DTR Pin 4 (+12V 400 GND Pin 5 GND Pin 5 Pin 6... -
Page 136: Routine Care And Cleaning
17. Routine Care and Cleaning 17.1 General Miditron Junior II is a maintenance-free instrument. For ® reasons of hygiene, keep the exterior of the analyzer clean. Where necessary, the exterior surfaces may be cleaned with commercial cleaning and disinfecting agents, preferably 70 % isopropanol. - Page 137 17. Routine Care and Cleaning To re-insert the cleaned parts, proceed as follows: 1. Grasp the strip receiving tray by its outer edges and insert it into the analyzer along the guide bar until it eases into position (Fig. 12). 2.
Need help?
Do you have a question about the Miditron Junior II and is the answer not in the manual?
Questions and answers