Advertisement
4G Module Setup Instructions
The device can be supplied with or without a SIM, depending on the options selected at purchase. If you are
https://www.telstra.com.au/small-business/internet-of-things/data-sim-plans#shared
1
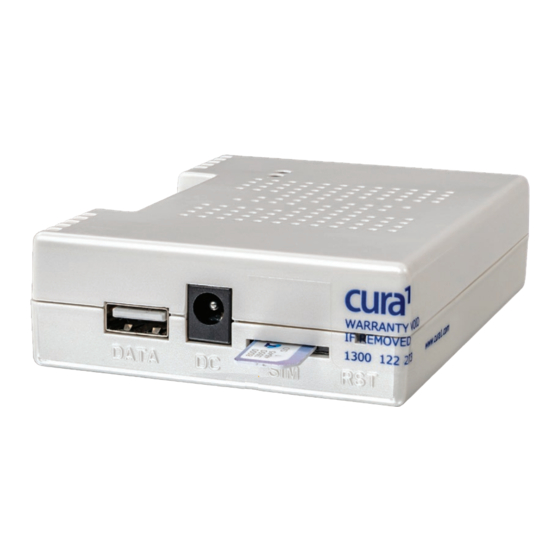
Insert SIM Card
Please ensure there is a SIM card inserted in the SIM
slot of the 4G Module.
If you have opted to supply your own SIM, please
insert is as shown.
2
Connect 4G Module to Bed Sensor Pad (BSP)
Insert the supplied USB Cable into the "DATA"
socket of the 4G Module and the other end into
the USB slot on the Electronics Module of the BSP.
ESD-006
This device has been preconfigured to operate with a Telstra SIM card.
providing your own SIM, the "300 MB IoT" Telstra plan is recommended.
You can browse compatible data SIM plans here:
Note that under your 4G
Module, the correct orientation
of the SIM is printed.
Page 1
Advertisement
Table of Contents

Summary of Contents for Cura1 ENSIGN+
- Page 1 4G Module Setup Instructions This device has been preconfigured to operate with a Telstra SIM card. The device can be supplied with or without a SIM, depending on the options selected at purchase. If you are providing your own SIM, the “300 MB IoT” Telstra plan is recommended. You can browse compatible data SIM plans here: https://www.telstra.com.au/small-business/internet-of-things/data-sim-plans#shared Insert SIM Card...
- Page 2 Connect 4G Module to a mains power source Plug power cable into “DC” socket. Plug power adaptor into mains power outlet & turn on. Wait for connection to be established White Power LED The white Power LED will immediately illuminate when power is switched on.
Need help?
Do you have a question about the ENSIGN+ and is the answer not in the manual?
Questions and answers