Advertisement
Quick Links
If you are satisfied with the product, please give us a 5 stars rating on the website you bought it from. If you
are not satisfied please contact us at
TV Size
13"-83"
33cm-211cm
CAUTION
This Mount is intended for use only
with the maximum weight indicated.
Using heavier products might cause injury.
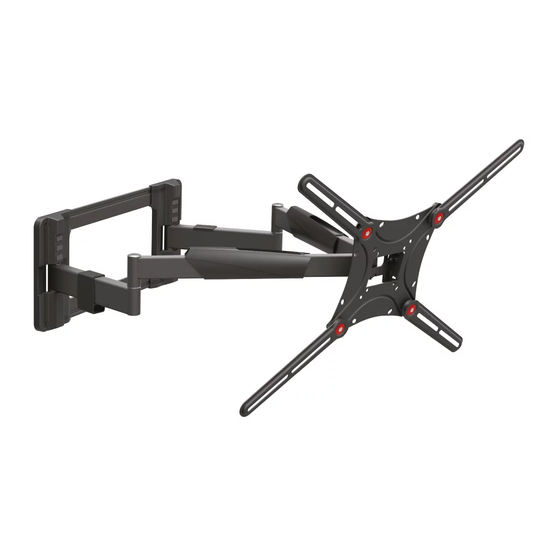
Extra Long Dual Arm
TV Wall Mount
For more information: barkanmounts.com
https://www.barkanmounts.com/support
TV Weight
US
EU
110lbs
50kg
Tilt
Swivel
and we will solve the problem for you.
Page 1
Advertisement

Summary of Contents for Barkan Extra Long Dual Arm
- Page 1 Page 1 Extra Long Dual Arm TV Wall Mount Tilt Swivel For more information: barkanmounts.com If you are satisfied with the product, please give us a 5 stars rating on the website you bought it from. If you are not satisfied please contact us at https://www.barkanmounts.com/support...
- Page 2 WARNING! Barkan does not take responsibility for the installation. Disregarding the safety and assembly instructions may result in the falling of, and/ or damage to your electrical appliance. Opening the package represents your undertaking to closely read and follow the instructions. When the product is installed in public places, the people in charge in those places should make sure it is used according to the instructions.
- Page 3 Nehezebb termékek használata PAŽNJA! Tvrtka Barkan Mounts Ltd. nije sérülést okozhat. odgovorna za ugradnju. ATENÇÃO! A Barkan Mounts Ltd. não oferece Ne obraćanje pažnje na upozorenja o sigurnosti i garantia de instalação. O não cumprimento das ATTENTION! Barkan Mounts Ltd ne garantie sklapanju može imati za posljedicu pad i/ ili oštećenja...
- Page 4 C A U T I O N ! You are obligated to read the safety and assembly instructions! Disregarding them may lead to injury and to the falling of the electrical appliance. A kapcsot legalább 10 mm-rel Ankur tuleb paigaldada The anchor must be (3/8”) kell a vakolat rétege alá...
- Page 5 Требуйте гарантию на Vraag uw installateur om een Poproś instalatora o udzielenie установку от специалиста по garantie voor de installatie van gwarancji na instalacje монтажу. het product. produktu. Это изделие предназначено De meegeleverde hardware is Dołączony okucie nie nadaje для установки на стены/ niet geschikt voor installatie się...
-
Page 6: Included Parts
Page 2 Included Parts not to scale Drilling Adaptor Bracket Front Arms TV Plate Template Sticker Wall Plate Wall Plate Cable Cable Plastic Cover Plastic Cover Management Management inch ൗ 3 4 ൗ 5 8 ൗ 3 4 1 ൗ 3 4 Required Tools 7/16”... - Page 7 Page 3 Connect the TV plate to the back of the TV. Wrong Right Purchase Use the spacers (Z7) in order to adjust longer screws. the screws length inside the TV. Continue according to your TV mounting hole pattern. Page 4 75x75 mm up to 200X200 mm (inclusive) hole pattern.
- Page 8 Page 4 Hole pattern above 200x200 mm up to 600x400 mm: Disassemble the screws. connect the 4 adaptors to the TV plate, and reassemble the screws. Flat screen Curved screen PARTIAL PARTIAL TIGHTENING TIGHTENING Right Right Wrong Wrong...
- Page 9 Position the Adaptors according to your TV’s hole pattern. Page 5 Max. 600mm 300mm 600mm 400mm For more positioning options turn to page 12. Connect the TV Plate with the Adaptors to the TV in all 4 connection holes. Z4/Z5 NO FORCE FULL TIGHTENING Z1/Z2/Z3...
- Page 10 Page 6 Install the bracket on the Wall. Measure the distance between the location of the TV’s mounting holes’ center and the bottom of the TV, in order to set the required height of the TV. 119cm 8” / 20.3 cm 16”...
- Page 11 Page 7 Follow the steps according to your wall type Make sure all holes are drilled inside the studs Mark the holes on the wall according to the required height CONNECTION CONNECTION POINTS POINTS Use a Stud Finder Page 8 Page 8...
- Page 12 Page 8 First use 1/4” \ 6mm drill bit. 1/4” \ 6mm Drill with 5/32” \ 4mm drill bit. 5/32” \ 4mm 2.75” \ 70mm Afterwards use 3/8” \ 10mm drill bit. 3/8” \ 10mm 2.75” \ 70mm 2.75” \ 70mm 3/8”/ 10 mm "...
- Page 13 Page 9 Paste the 6 stickers on the Plastic Assemble the Wall Plate Covers. Plastic Covers. Connect the Front Arms (B) to the Bracket (A). FULL TIGHTENING Place two nuts (Z8) in the Weight test. nut-housing (P2). Apply force on the upper part of the Bracket and make sure it is well connected.
- Page 14 Page 10 Assemble the nut-housing (P2) make sure that the tab is inserted into the slot. Make sure that the tab is inserted into the slot Assemble part (P3) on the nut-housings (P2). push P3 down until the small part that looks like an upside down “T”...
- Page 15 Page 11 Insert and tighten the screws from both sides to create friction for the tilt mechanism. Adjust the TV tilt angle carefully. FALL PROOF Z2/Z3 Place the TV cables in the Cable Management. CABLE MANAGEMENT Level the TV. SCREEN LEVELING...
- Page 16 Page 12...


Need help?
Do you have a question about the Extra Long Dual Arm and is the answer not in the manual?
Questions and answers