Table of Contents
Advertisement
Quick Links
These instructions contain all the necessary fitting and operating instructions for your electric shower.
Care taken during the installation will provide a long, trouble free life from your shower.
INSTRUCTION GUIDE AND USER MANUAL
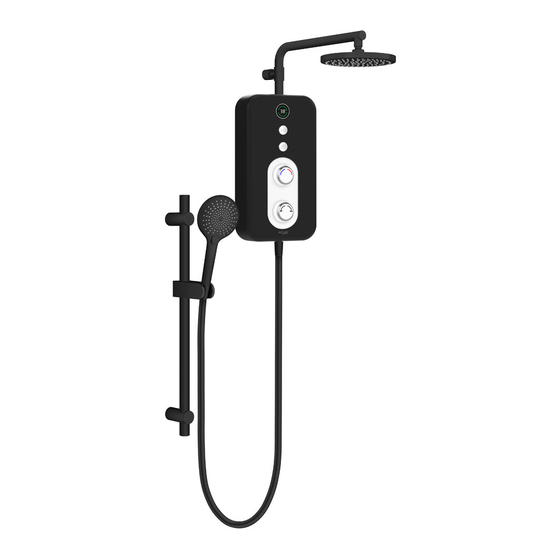
INSTANTANEOUS ELECTRIC WATER HEATER - AQUAS REVA
By
AQUAS REVA FLEX SMART 9.5KW
This Step-by-Step guide should be given to the customer
after installation and demonstration
IMPORTANT !
Advertisement
Table of Contents

Summary of Contents for AQUABELLA SHOWER AQUAS REVA FLEX
- Page 1 INSTRUCTION GUIDE AND USER MANUAL INSTANTANEOUS ELECTRIC WATER HEATER - AQUAS REVA AQUAS REVA FLEX SMART 9.5KW IMPORTANT ! This Step-by-Step guide should be given to the customer after installation and demonstration These instructions contain all the necessary fitting and operating instructions for your electric shower.
- Page 2 PLEASE READ THIS IMPORTANT SAFETY INFORMATION WARNING: DO NOT operate shower if frozen, or suspected of being frozen. It must thaw out before using. DO NOT operate the unit if the showerhead or spray hose becomes damaged. DO NOT restrict flow out of shower by placing showerhead in direct contact with your body.
- Page 3 IMPORTANT • Shower Installation must be carried out by a • Your Aquas Reva electric shower should always be suitably qualified person and conform with IEE mounted on the finished wall surface (usually tiled ). Regulations and comply with water regulations, Under no circumstances must you tile up to or seal building regulations or any specific local water around the unit as this may prevent air circulation and...
- Page 4 GENERAL LAYOUT OF A SHOWER INSTALLATION A TYPICAL INSTANTANEOUS ELECTRIC Avoid connecting the shower unit, if possible, SHOWER INSTALLATION where it will be affected by water drawn off by other appliances, e.g. From the mains feed to the Plan your own installation carefully. Check on the W.C.
- Page 5 RECOMMENDED INSTALLATION DIMENSIONS FOR ALL MODELS AQUAS REVA FLEX 9.5 KW...
- Page 6 SPARE PART DETAILS FOR AQUAS REVA DESCRIPTION AQUAS CODE OVERHEAD - SMART 200 - NO AIR AS02003 2.5mm SEALING WASHER FOR SHOWER HOSE - PACK 5 AS06003 TOP CONNECTOR FOR SHOWER ARM AS07015 NON ROTATION SHOWER ARM AND HEATER CONNECTOR AS07008 FREE FIX WALL BRACKET SET CW FIXINGS AS10004...
- Page 7 AQUAS REVA FLEX 9.5 KW MANUAL WATER HEATERS...
- Page 8 ASSEMBLY OF UPPER SHOWERING COMPONENTS...
- Page 9 ASSEMBLY OF LOWER SHOWERING COMPONENTS...
-
Page 10: Plumbing Connections
PLUMBING CONNECTIONS 200 mm. NOTE! PLUMBING THE SHOWER UNIT MUST Top fixing position PROCEED WIRING! The shower unit can be both plumbed and wired from 6 different POSITIONS: • SIDE LEFT • SIDE RIGHT • BOTTOM LEFT • BOTTOM RIGHT •... - Page 11 PLUMBING CONNECTIONS Turn off the water supply at the isolating stop tap. Having determined the direction of the inlet The shower unit is supplied for both left water supply: It is necessary to remove the and right hand installation. appropriate plastic section from the back plate, To plumb the unit on the left you must before commencing with the installation.
-
Page 12: Electrical Connections
ELECTRICAL CONNECTIONS Your Aquas Reva electric shower is provided with both Left and Right electrical connections to ease installation particularly when replacing an existing unit NOTE: ONLY ONE SET OF ELECTRICAL CONNECTIONS IS NECESSARY The diagram below shows the route of the cable into the shower unit for connection to the terminal blocks, connect as follows: Earth cable to terminal marked... -
Page 13: Electrical Wiring
ELECTRICAL WIRING IMPORTANT: When connecting the cable fully NOTE: The supply cable earth conductor must tighten the terminal block screws and make sure be sleeved. The outer sheath of the supply that no cable insulation is trapped under the cable must be stripped back to the minimum. screws. - Page 14 FITTING THE FRONT COVER INTO POSITION When fitting the cover, it is important to align the divertor spindle and volume control spindle inside the heater. DIVERTOR HANDLE ( LOWER HANDLE ) Make sure that the Divertor spindle and the raised button on the divertor handle are in the 12 O'clock position before fitting the cover.
- Page 15 COMMISSIONING THE SHOWER HEATER IMPORTANT NOTE FOR THE INSTALLER 1. Before installation, rotate the volume control handle clockwise until resistance is felt. Connect the water and electricity supply. 2. Turn on the water and electricity, before fitting the front cover. Push the on/off button, to check water flow and if there is any leakage...
-
Page 16: Operating The Shower
OPERATING THE SHOWER 1. Switch on electrical supply - pull cord or wall mounted switch. 2. Press the ON / Off Button to start the flow of water. 3. Turn the divertor handle Temperature and Power Setting Indicator to select the showering In Winter Mode : Both Half Circles are Lights up function you require... -
Page 17: Troubleshooting
TROUBLESHOOTING Symptom Likely Cause/s Action / Remedy Turn off water supply, Water isolating valve in off position. Remove the outlet hose from the shower, Outlet hose mesh filter blocked. No water flow. remove mesh filter and clean. Power supply not on. Turn on. - Page 18 Limescale remover and rinse thoroughly before use. Your AQUAS Branded heaters are supplied by Aquabella Shower Co.,Ltd. in Thailand. For information or service assistance , please contact the installer or the local UK distributor from where the heater was purchased.


Need help?
Do you have a question about the AQUAS REVA FLEX and is the answer not in the manual?
Questions and answers