Advertisement
ObservAir Series
See the air we share
Quick Start Guide
1. Turning on your ObservAir
Hold down the interactive LED
button until it flashes
release. The LED turns solid
and then flashes red, green, and
blue
to signal successful boot up.
2. Menu Options/Selection
Hold down the LED button, and it will
slowly flash the sequence of colors
shown in the Menu Options table.
Release the button at the desired
option to select. For example: Hold
until the button flashes
release to turn off the unit.
3. LED display and error codes
During normal operation, the LED
slowly glows on and off to indicate
BC concentration: Color scales from
green
= 0 to
red
= > 5 µg/m
LED turns off after 30 minutes and is
reactivated with a button push. The
LED display will flash yellow or red to
indicate errors, as shown in table.
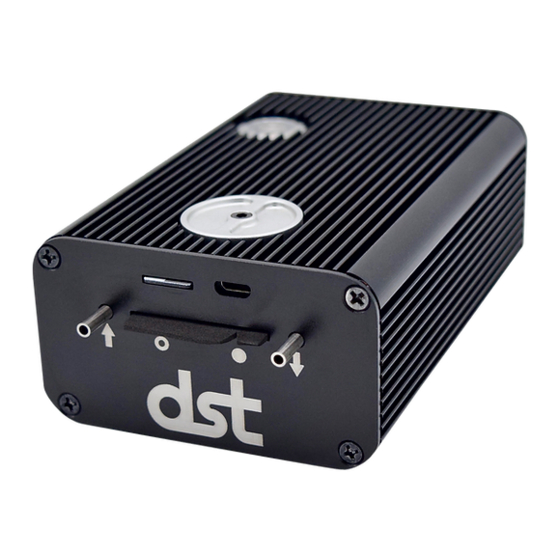
4. Onboard data collection
Data is always written to the SD card
whenever the unit is running. Press
on the SD card to eject it. Data files
are named for the time/date that
logging begins. Consult the Settings
file for data file index and ObservAir
configuration info. Details in Manual.
Distributed Sensing Technologies
Web: www.dstech.io Email: info@dstech.io
®
®
green,
then
yellow
,
red
once and
3
. The
®
ObservAir
Overview
Menu Options
Error Codes
Advertisement
Table of Contents

Related Manuals for DST ObservAir Series


Summary of Contents for DST ObservAir Series
- Page 1 ObservAir Series ® See the air we share Quick Start Guide ® ® ObservAir Overview 1. Turning on your ObservAir Hold down the interactive LED button until it flashes green, then release. The LED turns solid yellow and then flashes red, green, and blue to signal successful boot up.
- Page 2 ObservAir Series ® See the air we share Quick Start Guide 5. Filter changing The LED indicator will slowly flash yellow to indicate that the filter tab must be replaced. Follow the three step process illustrated below. Step 1: Loosen thumbscrew Step 2: Insert new tab.
Need help?
Do you have a question about the ObservAir Series and is the answer not in the manual?
Questions and answers