ASCO POWER TECHNOLOGIES 300 Series Installation Manual
Quick connect input and output power panels 2000 - 4000 amp pad mount
Hide thumbs
Also See for 300 Series:
- Operator's manual (19 pages) ,
- Installation & operation manual (8 pages)
Table of Contents
Advertisement
Quick Links
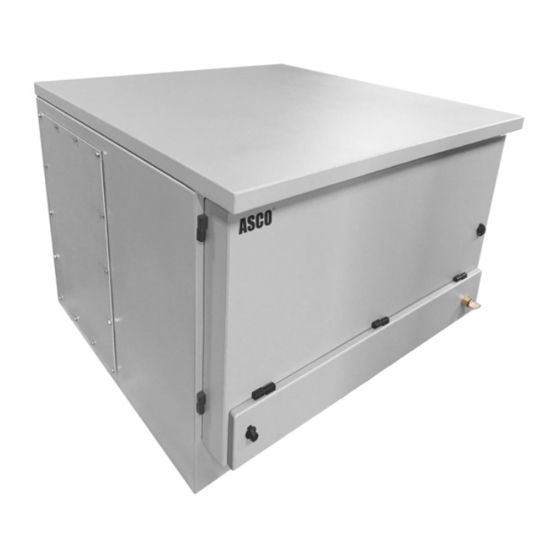
SERIES 300
Quick Connect Input and Output Power Panels
2000 - 4000 Amp Pad Mount
Installation Manual
381333-476 A
11/2020
DANGER is used in this manual to warn of a
hazard situation which, if not avoided, will result
in death or serious injury.
WARNING is used in this manual to warn of a
hazardous situation which, if not avoided, could
result in death or serious injury.
CAUTION is used in this manual to warn of a
hazardous situation which, if not avoided, could
result in minor or moderate injury.
Important:
This manual contains information critical to the proper
installation and operation of the ASCO SERIES 300 Quick
Connect Power Panels. Be certain to read and understand all
instructions prior to installation and operation.
The ASCO SERIES 300 Quick Connect Power
Panel must be installed in conjunction with a
transfer switch.
ASCO SERIES 300 Quick Connect Input Power panels
are ETL listed to UL1008 standards. ASCO SERIES 300
Quick Connect Output Panels are ETL listed to UL 891
Standards for Switchboards.
Limited Warranty
When this ASCO SERIES 300 Quick Connect Power Panel is
installed and operated according to the manual's instructions
ASCO Power Technologies will repair or replace any of its
mechanical or electrical parts if they are found to be defective in
material or workmanship within two year of the purchase date.
Maintenance
The ASCO SERIES 300 Quick Connect Power Panels will
require periodic maintenance. ASCO Power Technologies
recommends annual inspections to keep the panel in safe
operating condition. ASCO Power Technologies recommends
that the Pre-Operation and Maintenance Checklist under
Appendix A serve as a basis for annual inspection.
Technical Support
ASCO Power Services are available to assist in resolving
issues by calling 1-800-800 2726 (ASCO) or emailing
powerwarranty@ascopower.com. For any other information,
please refer to ascopower.com
Advertisement
Table of Contents

Related Manuals for ASCO POWER TECHNOLOGIES 300 Series


Summary of Contents for ASCO POWER TECHNOLOGIES 300 Series
-
Page 1: Limited Warranty
When this ASCO SERIES 300 Quick Connect Power Panel is installed and operated according to the manual’s instructions ASCO Power Technologies will repair or replace any of its mechanical or electrical parts if they are found to be defective in... -
Page 2: Table Of Contents
SERIES 300 Quick Connect Power Panel Installation Manual Table of Contents Limited Warranty ..............................1 Maintenance ................................1 Technical Support ..............................1 Prior to Installation ..............................Shipment: Unpacking and Inspection ........................Initial Installation (for Input and Output Panels) ..................... Step 1: Fasten the ASCO SERIES 300 Quick Connect Power Panel to secure base ..........4 Step 2: Installing the Conduit ............................ -
Page 3: Prior To Installation
Installation Manual SERIES 300 Quick Connect Power Panel Prior to Installation: Site Preparation Shipment: Unpacking and Inspection Prepare installation site according to local codes. The ASCO SERIES 300 Quick Connect Power Panels are to be Be careful in the use of sharp object when cutting set on an exterior pad and secured to a building or secured to packaging as damage to the outer enclosure may result. -
Page 4: Initial Installation (For Input And Output Panels)
SERIES 300 Quick Connect Power Panel Installation Manual Initial Installation Step 1: Fasten the ASCO SERIES 300 Quick Connect Power Panel to secure base 1. Base must be level and plumb to allow for proper drainage ASCO SERIES 300 Quick Connect Power Panels are from ASCO SERIES 300 Quick Connect Power Panel front heavy (See Figure 2). -
Page 5: Installation - Input Panels
Installation Manual SERIES 300 Quick Connect Power Panel Installation - Input Panels This section is for Installation of Input Panels. Three phase power systems consist of three phase or For Installation of Output Panels proceed to hot conductors that are shifted by 120 degrees. Three Page 9. -
Page 6: Step 5: Configuring The Phase Rotation Monitor
SERIES 300 Quick Connect Power Panel Installation Manual Step 5: Configuring the Phase Rotation Step 8: Conduct a safety test to ensure Monitor proper installation A phase rotation monitor comes standard on all 2000A -4000A 1. Do not attempt to use the ASCO SERIES 300 Quick Connect pad mount Input panels. -
Page 7: Step 10: Connect 2 Wire Auto Start Circuit
Installation Manual SERIES 300 Quick Connect Power Panel Set-up – Continued Step 10: Connect 2 wire auto start circuit 1. Connect 2 wire auto start circuit from transfer switch Continue with connections, beginning with the rear of to terminal post located in the upper right corner of the cabinet and working forward. -
Page 8: Step 12: Powering Up
SERIES 300 Quick Connect Power Panel Installation Manual Step 12: Powering Up 5. Disconnect the Neutral (white) connection, beginning with the closest to the front door. Proper disconnection (See Figure 9): Power MUST BE supplied from a single generator A. Grasp connector jacket firmly and rotate cam connector Start generator per manufacturer instructions clockwise until it stops Toggle the transfer switch, diverting power from utility to... -
Page 9: Installation - Output Panels
Installation Manual SERIES 300 Quick Connect Power Panel Installation – Output Panels Set-up Continued from page 4 Step 5: Review Pre-Operation Checklist Step 3: Wiring the Bus Bars under Appendix A prior to operation (pg. 8) Ensure circuit breakers are OFF and the transfer switch is DO NOT ATTEMPT CONNECTION WHILE CIRCUITS locked out from Source power prior to connection. -
Page 10: Step 7: Close And Lock Lower Chamber Door, Allowing Cables To Exit Through Smaller Cable Door
SERIES 300 Quick Connect Power Panel Installation Manual Set-up – Continued Complete the Phase (hot) connections Step 9: Disconnection Proper connection (See Figure 8): A. Grasp connector jacket and firmly insert cam connector into cam plug DO NOT ATTEMPT DISCONNECTING WHILE CIRCUITS ARE LIVE. -
Page 11: Pre-Operation And Maintenance Checklist
Do not use cables if any copper wiring is exposed ASCO Power Services are available to assist in resolving issues. If you have any questions or need technical advice or suggestions regarding this product, please contact ASCO Power Technologies at 1-800-800-2726(ASCO) or e-mail powerwarranty@ascopower.com 381333-476 A... -
Page 12: Index
7, 10 pre-operation checklist 6, 9, 11 ASCO Power Technologies 160 Park Avenue Florham Park, NJ 07932-1591 USA Phone: 1 800 800-2726 (ASCO) for sales or service www.ascopower.com ©2020 ASCO Power Technologies. All Rights Reserved Printed in U.S.A 381333-476 A...
Need help?
Do you have a question about the 300 Series and is the answer not in the manual?
Questions and answers