
Summary of Contents for i-team i-sense
- Page 1 ® Air quality monitor User manual i-team Professional b.v. Hoppenkuil 27b, 5626 DD Eindhoven, The Netherlands...
- Page 2 Original user manual, written in the English Language Future Cleaning Technologies B.V. Hoppenkuil 27b, 5626 DD Eindhoven, The Netherlands Telephone: +31402662400 Email: hello@i- teamglobal.com Internet: www.i- teamglobal.com Model: i-sense® Date: 15/09/2021 Product code: i-sense Version: v.1.0...
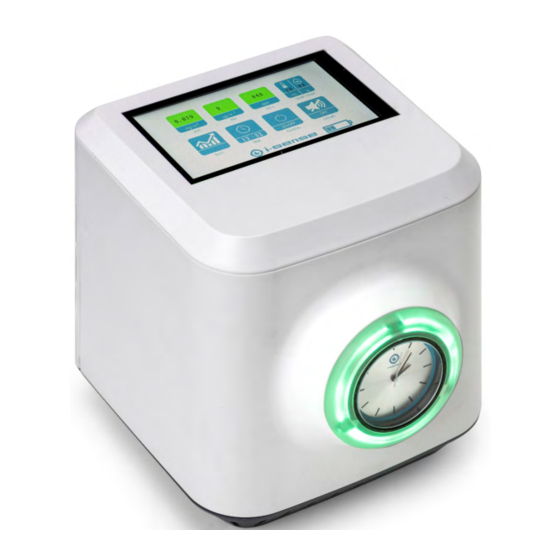
- Page 3 SAFER The i-sense measures the quality of the air in a space. If there is poor or even dangerous air quality, i-sense will let you know. With this information you ensure that you can take steps to improve air quality and be notified if it changes.
-
Page 4: Preface
Become familiar with the correct operation and maintenance procedures. Store the manual in a safe place. The manual is an essential part of the i-sense and must be handed over to the new owner upon resale or exchange. Each i-sense has a unique serial number that can be found on the bottom of the main body. -
Page 5: Target Audience
Target audience This user manual is intended for operators of the i-sense and their supervisors, as well as partners and importers. Operators of the i-sense The i-sense may only be operated by a person who has correctly read and understood the instructions in this manual or is trained by an experienced operator who has read and understood the instructions in this manual. -
Page 6: Table Of Contents
Unboxing................................... 14 Assembly USB plug ............................. 14 Installing the i-sense ............................15 Inserting and removing the battery (Optional for i-sense plus and pro) ......... 15 Adjusting/Replacing clock battery (applicable for i-sense plus and pro) ........16 Operation .................................... 16 General navigation ..............................16... - Page 7 Turning on the i-sense ............................17 Checking the chemical content in the air ..................... 17 Checking the dust particles in the air ......................18 Checking the air freshness ..........................19 Checking the air temperature or humidity ....................20 Checking the history ............................. 21 Checking and changing the date and time ....................
-
Page 8: Introduction
The battery should be fully charged before use. You can do this by plugging the i-sense in to a wall socket or by charging the i-power 8.7 battery separately in a battery charger (not included). -
Page 9: Specifications
The warranty period is 1 year. 1.7 Identification Each i-sense® has a unique serial number that can be found on the bottom of the main body. Your i-team partner needs this number when you order parts. -
Page 10: Description
Serial number: Distributer: i-team Professional Hoppenkuil 27 b NL-5626 DD Eindhoven Figure 1 2 Description The i-sense consists of: Figure 2 Legend A main body An AP power adapter An Allen key An EU power adapter A cable relief clamp... -
Page 11: Touch Screen Display
2.1 Touch screen display button TEMP/HUM button SOUND button Battery indicator ON/OFF button TIME button RATE button VOC button PM button Figure 3 2.2 Explanation of display buttons Button Function Technical details Checking the chemical content in the air mg/m Checking the dust particles in the air µg/m Checking the carbon dioxide in the air... -
Page 12: Safety
Service the i-sense before you continue the operation. WARNING DO NOT use the i-sense on damp or wet surfaces. This will cause damage to the i-sense and is dangerous to the user. The damage caused by the use on a wet surface is not covered under the warranty. -
Page 13: Health Hazards
• • if applicable, remove the battery in case the i-sense is stored for a longer period. See section 5.4; if applicable, fully charge the battery before using the i-sense again, see User Manual •... -
Page 14: Assembly And Installation
5 Assembly and installation The i-sense® does not require assembly. The i-sense plus and i-sense pro can be used with an i-power® 8.7 battery, the battery is not included and needs to be installed in the i-sense. 5.1 Unboxing The i-sense is packed in 1 box together with a USB cable and a wall plug. -
Page 15: Installing The I-Sense
5.4 Inserting and removing the battery (Optional for i-sense plus and pro) ATTENTION Fully charge the battery the first time you load the i-sense. Remove the four Allen screws (Figure 7, pos 3) using the Allen key (Figure 7, pos Remove backside (Figure 7., pos 4) of the... -
Page 16: Adjusting/Replacing Clock Battery (Applicable For I-Sense Plus And Pro)
To replace the battery, Open the back with a small flat screwdriver and replace the battery. Replace the back cover Replace the clock in the i-sense by taking off the Allen screw using the Allen key Replace the silicon ring around the clock. 6 Operation 6.1 General navigation... -
Page 17: Turning On The I-Sense
6.2 Turning on the i-sense Touch the touchscreen on the top of the i-sense (Figure 9, pos 1) with your finger. The Home screen lights up. Figure 9 6.3 Checking the chemical content in the air Touch the VOC button (Figure 10, pos 1) with your finger. -
Page 18: Checking The Dust Particles In The Air
In this overview you can read the chemical content in the air during the last 24 hours. Use the previous and next buttons to read the chemical content in the air of the past days. You can go back up to 5 days Touch the home button to go back to the main screen. -
Page 19: Checking The Air Freshness
In this overview you can read the dust particles in the air during the last 24 hours. Use the previous and next buttons to read the dust particles in the air of the past days. You can go back up to 5 days Touch the home button to go back to the main screen. -
Page 20: Checking The Air Temperature Or Humidity
In this overview you can read the carbon dioxide levels during the last 24 hours. Use the previous and next buttons to read the carbon dioxide levels in the air of the past days. You can go back up to 5 days Touch the home button to go back to the main screen. -
Page 21: Checking The History
In this overview you can read the temperature and air humidity content during the last 24 hours. Use the previous and next buttons to read the temperature and air humidity of the past days. You can go back up to 5 days Touch the home button to go back to the main screen. - Page 22 In this overview you can read the air freshness during the last 24 hours. Use the previous button (Figure 19, pos 7) and next button (Figure 19, pos 1) to check the readings of the past days. You can go back up to 5 days. Use the TEMP/HUM button (Figure 19, pos 3), CO button (Figure 19, pos 4), PM...
-
Page 23: Checking And Changing The Date And Time
6.8 Checking and changing the date and time Touch the TIME button (Figure 20, pos 1) with your finger. The date and time overview opens (Figure 21). Figure 20 In this overview you can check the: Time; touch the Time tab (Figure 21, pos Date;... -
Page 24: Turning Off The Screen
6.10 Turning the sound on or off Touch the SOUND button (Figure 23, pos 1) with your finger to turn the sound on or off. Figure 23 6.11 After operation Turn of the screen of the i-sense. See section 6.9. -
Page 25: Maintenance
The i-sense does not require much maintenance. However it is recommended to clean the machine after using it and before storing it. For a proper functioning and a long lifespan of the i-sense, it is important to follow the recommended maintenance intervals mentioned in this manual. -
Page 26: Trouble Shooting
8 Trouble shooting Problem Cause Solution i-sense® does not work No battery Insert battery. Empty battery Charge battery. ON/OFF switch off Turn on ON/OFF switch. Battery not charging Battery is end of life Replace battery. Battery charger is broken Replace charger. -
Page 27: Decommissioning And Disposal
It is the responsibility of the i-sense® owner to dispose of the product. At the end-of-life the i-sense still contains valuable resources and needs to be disposed of according to your local laws and regulations regarding recycling of electrical equipment. -
Page 28: Specifications
9.1 Specifications Model: I-sense basic I-sense plus I-sense pro Body size (L x W x H): 130 x 129 x 65 mm 145 x 130 x 145 mm 145 x 130 x 145 mm Weight (excl. battery): 0.36 kg 0.91 kg 0.91 kg... - Page 29 Made Blue simultaneously ensures someone else on the planet gets access to clean water. For every litre that the i-mop uses in operations, the i-team and Made Blue mirror clean drinking water in a developing country. The planet is a beautiful place with over 7 billion people.
- Page 30 Original user manual, written in the English Language Future Cleaning Technologies B.V. Hoppenkuil 27b, 5626 DD Eindhoven, The Netherlands Telephone: +31402662400 Email: hello@i- teamglobal.com Internet: www.i- teamglobal.com Model: i-sense® Date: 15/09/2021 Product code: i-sense Version: v.1.0...
Need help?
Do you have a question about the i-sense and is the answer not in the manual?
Questions and answers