Table of Contents
Advertisement
Advertisement
Table of Contents

Related Manuals for Vivitar IPC 112


Summary of Contents for Vivitar IPC 112
- Page 1 IPC 112 Capture Cam User Manual © 2009-2015 Sakar International, Inc. All rights reserved. Windows and the Windows logo are registered trademarks of Microsoft Corporation. All other trademarks are the property of their respective companies. This manual downloaded from http://www.manualowl.com...
-
Page 2: Table Of Contents
NDROID AND I YSTEM EQUIREMENTS .............................. 7 IVITAR APTURE APP INSTALL Connecting Your IP Camera with the Vivitar CaptureCam2 Mobile Application ......8 ..................................8 NTRODUCTION INITIAL SETUP: C ........................9 ONNECTING YOUR CAMERA TO THE APP Using CaptureCam2 ........................13 .................................. -
Page 3: Introduction
Everything you need to stream live video, record in HD and capture still images and videos remotely is included with your camera and the accompanying online application. Please read this manual carefully first in order to get the most out of your Vivitar Capture Cam. Note: Your Capture Cam requires a Class 4 or higher Micro SDHC memory card up to 32 GB. -
Page 4: What's Included
What’s Included 1. IP Camera 2. USB cable 3. AC Charger 4. Screws 5. Setup Tool Note: Micro SD Memory Card not included. This manual downloaded from http://www.manualowl.com... -
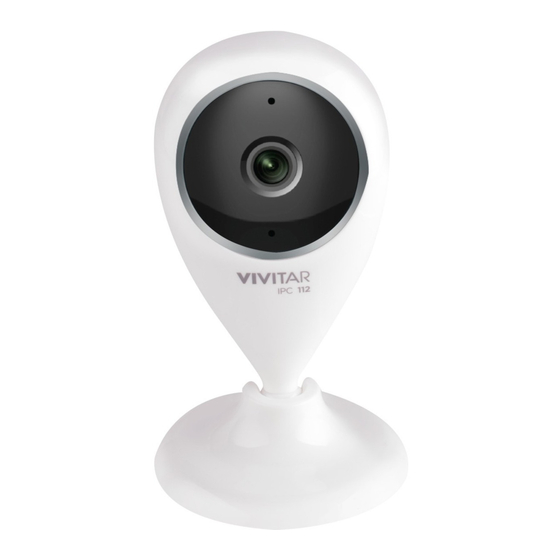
Page 5: Parts Of The Camera
Parts of the Camera Micro SD Memory Card Slot Ventilation Holes LED Status Light Indicator (Red/Blue) Speaker Lens (with built-in infrared lights) RESET Microphone Micro USB Port Column Spinner 10. Magnetic Base This manual downloaded from http://www.manualowl.com... -
Page 6: Initial Camera Setup
Initial Camera Setup INSTALLING THE MEMORY CARD Make sure a Micro SD Memory card (up to 32 GB) has been properly inserted into your Capture Cam. Micro SD Memory card not included. To properly insert the Micro SD Memory Card: Insert the Micro SD memory card into the Micro SD Card slot as shown in the illustration above. -
Page 7: Camera Restart
CAMERA RESTART If the blue indicator fails to flash or if you see a red light, you need to RESET the camera. To reset the IP Camera, use the Setup Tool to press the RESET button on the back of the camera. Hold for 5 seconds and then release. -
Page 8: Initial Mobile Device Setup
iOS 7 or higher VIVITAR CAPTURECAM2 APP INSTALL Use your mobile phone or tablet to search for Vivitar CaptureCam2 in Google Play (for Android OS) or the Apple App Store (for iOS). Alternatively, scan the QR codes below to find the application. -
Page 9: Connecting Your Ip Camera With The Vivitar Capturecam2 Mobile Application
Connecting Your IP Camera with the Vivitar CaptureCam2 Mobile Application INTRODUCTION The Vivitar CaptureCam2 application allows you to: Register and connect a new camera in minutes. Remotely monitor up to four cameras using the application from anywhere. Record videos automatically, as soon as the camera is connected. -
Page 10: Initial Setup: Connecting Your Camera To The App
ENABLE MOBILE DEVICE WI-FI Make sure to enable Wi-Fi on your smartphone or tablet via the settings of your mobile device. LAUNCH MOBILE APP Tap the Vivitar CaptureCam2 application icon on your smartphone or tablet to launch the installed app. WELCOME: SETUP WIZARD The Welcome screen appears with the ‘Setup Wizard’. - Page 11 The following options appear: Start: Tap Start to open the ‘Add new camera’ screen and continue the setup. Skip: Tap Skip to skip the setup for adding a new camera and go directly to the ‘Home’ screen. Tap Start to begin setting up your new camera. NEW CAMERA SETUP The ‘New Camera Setup/Connect to Camera’...
- Page 12 IMPORTANT: The camera’s Wi-Fi can only be found when the camera’s LED indicator light is blue and is flashing quickly. If you do not see the blue blinking LED light the camera will need to be reset. RESET THE CAMERA: If the blue light is not blinking pleases follow these instructions to RESET your camera.
- Page 13 or additional cameras. Camera password: The default password is admin. You can tap the default password to change it to a new password and then confirm the password. Camera name: Tap to enter the camera name. A name must be entered to continue the camera setup. ...
-
Page 14: Using Capturecam2
Using CaptureCam2 HOME SCREEN The ‘Home’ screen displays the Live Camera in the top section and the Camera List on the bottom section. Live Camera Connected Camera Camera List Add New Camera 1. CAMERA LIST The Camera List displays a list of up to four cameras. Cameras can be added or removed from the list at any time. - Page 15 A. CONNECTED CAMERA 2. Camera Live Video Stream Thumbnail 3. Camera Status (Off/On) 4. Camera Functions 1. Camera Name The connected camera displays the following: ITEM NAME FUNCTION Camera Name Displays the camera name you entered during the setup. NOTE: You can change the camera name at any time via the Camera Menu ‘Settings’...
- Page 16 Camera Functions Long tap on the camera thumbnail or tap on the Camera Menu button to open the camera functions menu options for the selected camera. The options include the following: Reconnect: Reconnects the camera to the app. Share Camera: Sends an email message with the QR code and camera UID that allows quick and easy remote connectivity from other handsets.
- Page 17 B. ADD NEW CAMERA (‘PLUS’ ICON) 1. New Camera Setup Add Camera 2. Connect to camera Tap ‘Add camera’ or the PLUS + icon to open the Add New Camera screen. The Add New Camera screen includes the following options: New camera setup and Connect to camera.
- Page 18 Connect to Tap Connect to camera to open the Connect camera screen. This allows you to connect to a camera that has already been Camera setup using that camera’s QR code or camera UID. The following options appear: Search for camera, Scan QR Code, Add camera UID ...
- Page 19 2. LIVE CAMERA 4. App Information 3. Date and Time 2. Live Camera Video Stream 1. Camera Name The Live Camera on the top section of the Home screen displays the large view of your selected camera’s streaming video from the Camera List. The following information appears on the Live Camera: ITEM NAME FUNCTION...
-
Page 20: Live Camera View - Full Screen
LIVE CAMERA VIEW - FULL SCREEN Tap on the Live Camera Video Stream from the Home screen to open the Live Camera Video Stream in Full Screen. You can rotate your mobile device to see the live streaming video in both in Portrait and Landscape views. - Page 21 1. Camera Name 2. Return 8. App Information 3. Captured Data 9. Camera Settings 4. Date and Time 5. Live Camera Video Stream – Full Screen 10. Speaker (ON/OFF) 6. Microphone (ON/OFF) 11. Snapshot 7. Record (Start/Stop) The following appears on the Live Camera Full Screen view: ITEM NAME FUNCTION Camera Name...
- Page 22 button to enable or disable this feature. Microphone disabled. Microphone enabled. Record Video (Manual) Tap the Record button to begin recording the live streaming video manually. REC When recording a blinking red record indicator appears on the screen. Tap the Record button again to stop recording. The videos are saved to your camera’s memory card.
-
Page 23: Captured Data
CAPTURED DATA You can view your recorded videos and captured snapshots in the Captured Data view. Tap the Captured Data button from the Camera Live Video view to access your saved images organized by: SNAPSHOTS and VIDEOS By default the Snapshots tab appears, showing the list of saved Snapshots. Tap the Videos tab to view the list of captured videos ... - Page 24 To select and view your saved photo, tap on a thumbnail. The following appears on the selected Photo Full Screen view: Image Counter: The number of the selected photo out of the total number of images saved is shown on the top of the screen. (selected photo/total amount of photos) ...
- Page 25 The videos are listed as per the type of captured video: Motion Record - Recording events taken from motion detection record capture. Auto Record - Recording events taken from auto or manual video capture. B. Selecting and Playing Your Videos To select and play your saved video in full screen, tap on a thumbnail.
-
Page 26: Settings
Make sure your IP Camera is unplugged from the power supply. Insert your Micro SD memory card into your camera. Plug in your IP Camera to a power supply. Launch the Vivitar CaptureCam2 application. SETTINGS Tap on the Settings button to open the Settings screen. - Page 27 The following information appears: Model: Displays the camera model name. Firmware Version: Displays the camera firmware. Vendor: Displays the vendor. Firmware Update: Allows you to check your camera version. If updates are available you will be able to update and install. ...
-
Page 28: Camera Technical Specifications
Motion Detection sensitivity settings. To stop video record either deselect this setting or tap the Stop button on the Live Camera screen. When Motion Detection is selected, the following options appear that allow you to select the level of motion detection for recording your video. Tap to select a setting. - Low - Medium - High... -
Page 29: Troubleshooting
Troubleshooting ISSUE SOLUTION Reconnecting to Camera: Verify that your camera is powered on and that Your camera disconnected for one of the your Wi-Fi network is working properly. Then, in the app, tap on “Connect to Camera” and following reasons 1. - Page 30 connected the camera to initially). 3. Launch the Capture Cam2 app on your phone. Your phone may reconnect automatically. If it did not, you will need to tap on the menu button by your camera name in the main screen and then tap on “re-connect”...
-
Page 31: Technical Support
Technical Support For technical support issues please visit our website at www.vivitar.com . You can find manuals, software and FAQ’s at the website. Can’t find what you are looking for? E-mail us at support@vivitar.com and one of our technical support team members will answer your questions.
Need help?
Do you have a question about the IPC 112 and is the answer not in the manual?
Questions and answers
Why is the sd card recording option greyed out on PC112N? It was formatted in the camera, the camera reads it. But it won't let me turn it on.
The SD card recording option on the Vivitar IPC 112 camera may be greyed out if the Micro SD memory card is not inserted correctly or not inserted at all. The card must be inserted before plugging in the device to enable SD recording features.
This answer is automatically generated
Bound device. Bought and trying to add to my account
To unbind a Vivitar IPC 112 device and remove it from an account, open the Camera Functions menu by long tapping the camera thumbnail or tapping the Camera Menu button. Then select "Remove camera." A confirmation window will appear. Select "Yes" to remove the camera from the app and the Cameras list.
This answer is automatically generated
Can I use a larger GB micro SD card for the IPC112 camera or is 32GB the maximum?
The Vivitar IPC 112 camera supports micro SD cards up to 16GB, as mentioned in the provided context. There is no mention of support for micro SD cards larger than 32GB.
This answer is automatically generated
IPC112N CAMER MAKING BUZZING SOUND NO LIGHT ON CAMERA
The Vivitar IPC 112 camera may not be turning on due to a failed connection or setup issue. A red flashing indicator light means the camera failed to connect to Wi-Fi. The buzzing or scratchy sound reported may be due to poor audio quality from the built-in microphone. To fix connection issues, press and hold the RESET button for 5 seconds to reset the camera. Then, set it up again using the Capture Cam2 app.
This answer is automatically generated