Table of Contents
Advertisement
Advertisement
Chapters
Table of Contents

Summary of Contents for Cuckoo CBT-I1030RW
- Page 1 ELECTRONIC TOILET SEAT...
- Page 2 Thank you for purchasing your CUCKOO Electronic Toilet Seat! This manual will detail operational instructions as well as any troubleshooting should any issues arise. Product Benefits Strong bidet It is a bidet made to be used for a long period without minor malfunctions.
-
Page 3: Table Of Contents
BEFORE USING Safety Warnings 4-15 Parts & Accessories WHEN USING Before Installation 18-22 How to Install After Installing Before Use Explanation of functions of Control Panel 25-26 How to Use How to Use Each Functions 28-30 How to Clean 31-32 How to Disassemble the Product &... - Page 6 CAUTIONS FOR SAFE USE...
- Page 7 CAUTIONS FOR SAFE USE...
-
Page 16: Parts & Accessories
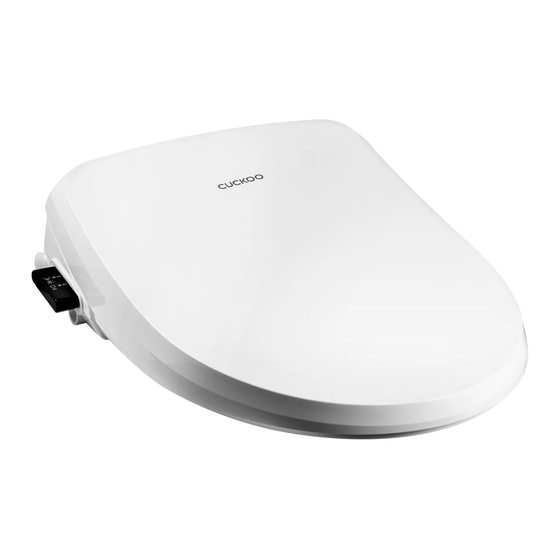
(CBT-IS1131REW, CBT-IS1131RRW) Water separation lever supply inlet TURBO nozzle Power cord Main frame fixing CLEAN nozzle plate assembly section BIDET/CHILD nozzle (CBT-I1030RW) Accessories Installation materials Materials to fix product Materials for piping Others (CBT-IS1131REW, CBT-IS1131RRW) User manual Fixing bolts (2) -
Page 17: Before Installation
BEFORE INSTALLATION Avoid contact with direct sunlight and electric heating appliances as they may cause fire, damage, or discoloration of the unit. Check the size of your toilet. This product may not be compatible with imported toilets due to ill-fitting sizes. Do not install where the product may be exposed to moisture, excessive dust, or splashing water as this may cause the product to malfunction. - Page 18 Use only with a properly grounded 120V AC power outlet with a rating of at least 15A. Do not plug in the power cord before and while installing. Turn the water supply valve clockwise to lock, then separate the toilet hose using a spanner. Set the old toilet lid and nuts aside for future re-installation.
-
Page 19: How To Install
HOW TO INSTALL Order of installation (CBT-IS1131REW, CBT-IS1131RRW) Use only with a properly grounded 120V AC power outlet with a rating of at least 15A. Do not plug in the power cord before and while installing. Separate the original seat from the toilet. Toilet seat Unfasten the fixing nuts (2) on left and right sides and then separate the... - Page 20 HOW TO INSTALL Install the main frame of the bidet. As shown in the image, place the Main Frame Fixing Plate on the toilet and affix the fixing bolts on the ▶ Main Frame Fixing Plate to fix it onto the toilet. At this time, secure it firmly by using a tool, etc.
- Page 21 HOW TO INSTALL How to Install the Remote Control Precautions for Installing the Remote Control Avoid direct sunlight during installation. If a fluorescent light is in the proximity of the remote control or the remote control reception panel on the main frame, be careful as transmission of signals may be interfered with due to the light.
- Page 22 HOW TO INSTALL How to Replace Remote Control Batteries If the remote control appears to have its signal weakened during operation, this signifies the batteries need to be replaced soon. The remote control requires two AA batteries. Always ensure they are placed correctly inside the remote.
-
Page 23: After Installing
AFTER INSTALLATION All parts throughout the manual need to be formatted the same--either Sentence Case or all lowercase ChECkliST bEfOrE uSE Plug in the power cord to an available power outlet. If the power supply lamp is not turned on after plugging in the power cord, press any button on the control panel found on the main frame. -
Page 24: Before Use
BEFORE USE Plug the power cord into an available 120V AC outlet. Replace the waterworks filter et on a regular basis. (CBT-IS1131REW, CBT-IS1131RRW) If the filter is blocked by foreign substances or the water penetration rate is reduced as it nears the replacement period, water supply into the product may not be active. -
Page 25: Explanation Of Functions Of Control Panel
EXPLANATION OF FUNCTIONS OF CONTROL PANEL Always unplug the power cord before attempting to clean the bidet. While cleaning, use a slightly damp cloth to wipe down. Do not use a dishwashing sponge, benzene, thinner or any other harmful substances that could cause damage to the product. Control panel <... - Page 26 Initiates hot air drying Turns off the mood lamp with a second press. • Automatically shuts off after 3 minute (CBT-I1030RW) (differentiated by sound) * Dries quicker if you wipe off the waterdrops with a tissue, etc. before drying.
-
Page 27: How To Use
HOW TO USE Basic method of use Sit on the seat. Sit in the center of the toilet Press the button. seat to activate the sensor. Press the desired button to initiate the cleaning function. If the button that was pressed during use is pressed one more time, MOVE CLEAN can be used. -
Page 28: How To Use Each Functions
HOW TO USE EACH FUNCTION MOVE CLEAN • If the button is pressed one more time while CLEAN, BIDET or TURBO is in use, the nozzle moves back and forth to perform MOVE CLEAN. • If the button is pressed one more time during MOVE CLEAN, the nozzle stops. WATER PRESSURE CONTROL •... - Page 29 HOW TO CONTROL AND USE EACH FUNCTION CHILD (CBT-I1030RW) • This is a convenient function for children. • It emits softer water streams than typical cleaning and is activated for 1 minute during w hich it executes automatic water pressure control and MOVE function.
- Page 30 HOW TO CONTROL AND USE EACH FUNCTION SELF-CLEANING • Before every use of cleaning, the nozzle comes out and cleaning water is emitted to clean the nozzle. • After every use of cleaning, the nozzle goes in and cleaning water is emitted to clean the nozzle.
-
Page 31: How To Clean
Pushing the nozzle in by force without pressing the STOP button may damage the nozzle. How to Clean & Replace Nozzle Cap (CBT-I1030RW) (Manual nozzle cleaning) If you press and hold the "NOZZLE CLEANING" button without sitting on the seat, the nozzle moves forward and stops for 2 minutes. - Page 32 HOW TO CLEAN How to Clean the Exterior • To prevent damage to the bidet, do not clean with a dishwashing sponge or harmful cleaning detergents. Do not use a thinner, benzene and other cleaners for bathrooms to clean the exterior of the bidet directly.
-
Page 33: How To Disassemble The Product & Store
HOW TO DISASSEMBLE THE PRODUCT & STORE Remove the power plug from the outlet. Close the water supply valve by turning it clockwise until loose. ② Pull forward ① Press the lever Replace the old toilet seat onto the toilet with the saved nuts. Plug the power cord into an available 120V AC outlet. -
Page 34: Troubleshooting
TROUBLESHOOTING If you're running into any issues while using your bidet, refer to the below troubleshooting chart to properly assess and correct the problem. If the problem perists, contact our Customer Service Center. Problem Possible Issues Corrective Action Water is not being sprayed •... - Page 35 Model name CBT-I1030RW CBT-IS1031REW CBT-IS1131RRW Seat type ELONGATED ELONGATED ROUND Rating 120V AC / 60Hz Maximum power consumption 660W 1,260W Power cord About 1.5m Water supply method Direct connection water supply CLEAN About 0.74L/min About 0.7L/min Water BIDET About 0.71L/min About 0.57L/min...
- Page 37 CONTENTS(목차) 사용하기전에 안전상의 경고 38~41 각 부분의 명칭 / 부속품 안내 사용할때 설치 전 확인 사항 설치방법 44~48 설치 후 필수 점검 사항 사용 전 확인 사항 조작부 기능 설명 51~52 기본적인 사용방법 각 기능조절 및 사용방법 54~56 세척 및 청소방법 57~58 제품...
-
Page 38: 안전상의
120V 교류 120 120V... -
Page 42: 각 부분의 명칭 / 부속품 안내
각 부분의 명칭 / 부속품 안내 (CBT-IS1131REW, CBT-IS1131RRW) (CBT-I1030RW) (CBT-IS1131REW, CBT-IS1131RRW) 고정와샤 (2) 고무너트 (2개) -
Page 43: 설치 전 확인사항
설치 전 확인사항 설치 전 확인사항 설치장소의 주의 직사광선이나 전열 기구를 피해 주십시오. ▶ 화재 및 제품 변색이 발생 할 수 있습니다. ▶ 직사광선으로 인해 리모컨 조작이 원활하지 않을 수 있습니다. 변기의 크기를 확인해 주십시오. 1) 변기 길이 490mm 이상 물탱크... -
Page 44: 설치방법 44~48
설치방법 설치순서(CBT-I1030RW) • 본 제품은 AC120V 전용 제품입니다. • 설치가 완료되지 않은 상태에서 절대로 전원을 연결하지 마십시오. 급수호수를 분리 하십시오. 급수밸브를 오른쪽으로 돌려서 잠그고 급수밸브에 변기쪽 급수 호스 연결된 변기쪽 호스를 분리 하십시오. 급수밸브 일반 변좌시트를 변기에서 분리하십시오. 좌, 우측 고정너트(2개)를 풀고 일반 변좌와... - Page 45 본 제품은 AC120V 전용 제품입니다. 급수 호스를 분리한 곳에 T밸브를 설치하십시오.
- Page 46 ▶ 그림과 같이 본체고정판을 양변기 위에 올려놓고, 본체고정판에 고정볼트를 결합하여 양변기에 고정시킵니다. 이때 본체고정판이 흔들리지 않도록 공구등을 이용하여 견고하게 고정하십시오. ▶ 본체고정판의 고정위치에 따라, 제품이 설치되는 위치가 결정됩니다. 제품과 양변기의 크기를 고려하여 본체 고정판을 적당한 위치로 고정하여 주십시오. 본체고정판의 위치가 적당하지 않으면 시트가 변기보다 앞으로...
-
Page 49: 설치 후 필수 점검 사항
설치 후 필수 점검 사항 설치 후 필수 점검 사항 비데 노즐의 포장 스티커를 제거하여 주십시오. ※ 비데 본체 중심부의 노즐 포장 스티커를 제거하여야 제품이 정상 동작합니다 급수밸브를 왼쪽으로 돌려 열어 주시고, 연결부위에서 노즐 포장 스티커 누수가 없는지 확인합니다. ※ 경고 : 정수필터가 과도하게 체결되거나 느슨하게 체결되어 있으면 누수의... -
Page 50: 사용 전 확인 사항
사용 전 확인 사항 비데 사용전 확인 사항 전원을 연결한 후, 급수밸브를 열어주십시오. 본 제품은 AC120V 전용 제품입니다. 전원플러그는 반드시 접지된 AC120V 전용 콘센트에 꽂아 주십시오. 전원이 연결되고 물이 공급되어야 비데가 정상적으로 작동합니다. 변좌에 걸터 앉지 말고 항상 중앙에 앉으십시오. 사용중... - Page 52 수압과 세정방식이 변화하여 다이나믹한 세정을 할 수 있습니다. (CBT-IS1131REW, CBT-IS1131RRW) 일반 세정보다 강력한 세정입니다. 버튼을 누르면 무드등이 ON 상태가 됩니다. 버튼을 다시 누르면 무드등이 OFF 상태가 됩니다. (소리 구분) 버튼을 짧게 눌러 절전 기능을 사용할 수 있습니다. 버튼을 3초간 길게 누르면 무드등 기능을 사용할...
- Page 55 어린이 기능(CBT-I1030RW) 어린이 기능(CBT-I1030RW)
-
Page 59: 제품 분리방법 및 보관방법/겨울철 비데 사용방법
제품 분리 방법 및 보관방법 / 겨울철 비데 사용방법 제품 분리 방법 및 보관방법 ※ 이사 및 청소등으로 제품을 변기에서 분리하실 때에는 다음과 같이 하십시오. 전원 플러그를 콘센트에서 뽑아 주십시오. 급수밸브를 시계방향으로 돌려 잠그어 주십시오. 비데용 급수호스의 정수필터와 T밸브측의 너트를 풀고 급수밸브... -
Page 61: 제품 규격
430.5 x 534 x 162 mm 430.5 x 493.9 x 162 mm... - Page 62 MEMO...
- Page 63 MEMO...
- Page 64 www.cuckooamerica.com / www.cuckoorental.com...
Need help?
Do you have a question about the CBT-I1030RW and is the answer not in the manual?
Questions and answers