Table of Contents
Advertisement
Quick Links
Advertisement
Table of Contents

Related Manuals for SMAR DF125

Summary of Contents for SMAR DF125
- Page 3 DF125 –PPP Router AVOIDING ELECTROSTATIC DISCHARGES ATTENTION Electrostatic discharges may damage semiconductor electronic components in printed circuit boards. They usually occur when touching components or connector pins from modules and racks, without wearing the appropriate equipment to prevent discharges. It is recommended to take the following precautions: •...
-
Page 4: Main Features
IP connectivity of the RTUs to the MTU (Main Terminal Unit). To accomplish this, via AT commands through the serial port, the DF125 configures and requests the MODEM to establish a PPP connection with a server in the MTU. From then on, all protocols used by Smar RTU can be encapsulated via serial PPP protocol and transmitted via telecommunications structure. -
Page 5: Installation And Configuration
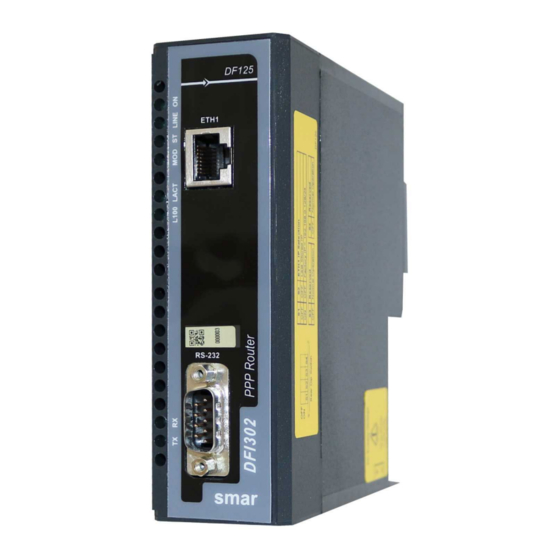
Smar racks. See Mounting the module in the rack topic for installation details. The DF125 can be installed on the DF9 (Individual Support for Module), fitted to the DIN rail. The DF125 module needs an external power supply, as it is not powered via rack. See the requirements for the power supply in the Technical Specifications topic. - Page 6 DF125 – User´s Manual Figure 3 – DF125 – Power supply connector NOTE Before installing the DF125 in the rack or DF9, it is necessary to configure the IP. Thus, the DIP switches will be accessible. Connection with controller and modem Connect the DF125 to the telecom system modem using a standard RS232 serial cable.
- Page 7 However, if it is the first time to configure the DF125, or if you do not know what the IP of ETH1 port is, the user can follow the steps below to start the configuration from the factory IP: Configure DF125 to force factory fixed IP on ETH1 port To do so, de-energize the DF125 and configure its DIP Switches in "Factory IP = 192.168.0.128/24"...
- Page 8 DF125 – User´s Manual Connect the ETH1 port of the DF125 to a PC on the same subnet Configure a PC ethernet port on the same subnet as the factory IP of the DF125's ETH1 port. Example: IP = 192.168.0.127 and Subnet mask = 255.255.255.0 (or 192.168.0.127/24) This PC ethernet port must be connected to the DF125's ETH1 port using an ethernet cable.
- Page 9 DF125 –PPP Router In Information, the equipment's general information is shown, for example, firmware version. In Setup →Network, the IP and network mask settings of the DF125 and the IP address of the RTU can be changed. See following figure: Enter the desired values in the appropriate fields and click Save.
- Page 10 DF125 – User´s Manual • If the DF125 starts with the DIP Switches in "Factory IP” mode = 192.168.0.128/24": The ETH1 port will assume the fixed IP 192.168.0.128/24. This mode is useful for configuration when the user does not know the last IP saved, as it allows accessing the module through that known IP and configuring a new desired IP via webserver, DFBatch or telnet.
- Page 11 DF125 –PPP Router In Setup → RS232, the RS232 serial port settings can be changed. It is advisable to consult the manual, or the manufacturer of the modem used before changing this setting. In Setup →Save & Restore it is possible to save the current configuration on the user's local machine through the option Save current configuration to disk.
- Page 12 FTP server. • Firmware Name: It is the name of the firmware file to be loaded on the DF125 and has a pkg extension. Firmware files will be provided by Smar. Check if there are specific instructions for the firmware version which will be loaded.
- Page 13 DF125 –PPP Router After connecting the PC to the local Ethernet port of the DF125 and having filled in the FTP server and firmware data, click Verify FTP Server. Then, click Update Firmware. In Setup →Restart the user can restart the DF125, just click the Restart button.
- Page 14 DF125 – User´s Manual In Internet →Account, the user can change the necessary settings so that the DF125 can establish a connection with the Modem and have access to the network/internet. • Phone number: Number that the DF125 must dial to connect to the network/internet.
- Page 15 DF125 –PPP Router In Diagnostics →Log the user can check the log information in the system. This LOG is recycled by the Linux operating system. In Diagnostics is also possible to check status information of the Network, Switch (DIP Switches),...
- Page 16 DF125 – User´s Manual...
-
Page 17: Technical Specifications
1500 Vdc *Protection against power supply with reversed polarity if the voltage is within the operating range. ELECTRICAL CERTIFICATION (PENDING) The DF125 is designed to meet the IEC 61326:2012 standard for electrical certification. ENCLOSE Electrostatic discharge (IEC61000-4-2) 4 kV/8 kV contact/air... - Page 18 UDP/TCP SNMP Trap 20000 DNP3 HMI Supervision *DF125 is already configured to support the ports and protocols in this table. ENVIRONMENTAL CONDITIONS Operating Temperature -40 ºC to 80 ºC (-22 ºF to 176 ºF) Storage Temperature -40 ºC to 85 ºC (-40 ºF to 185 ºF) Relative humidity 5 –...
-
Page 19: Dimensional Drawing
DF125 –PPP Router Dimensional Drawing Measurements are in millimeters and in inches in parentheses. - Page 20 DF125 – User´s Manual Installing Modules in the Rack Follow the steps below to install a module in the rack. Attach the top of the module (with a 45 inclination) to the module support located on the upper part of the rack.
-
Page 21: Srf - Service Request Form
Contact: _______________________________________________________________________________________________________ Section: _______________________________________________________________________________________________________ Title: ________________________________________________ Signature:_______________________________________________ Phone: _________ _________________________ _________ _________________________ Extension: ___________________ E-mail: ________________________________________________________________________ Date: ______/ ______/ _________ For warranty or non-warranty repair, please contact your representative. Further information about address and contacts can be found on https://www.smar.com/en/contact-us... - Page 22 DF125 – User´s Manual...
Need help?
Do you have a question about the DF125 and is the answer not in the manual?
Questions and answers