Advertisement
CONTENTS
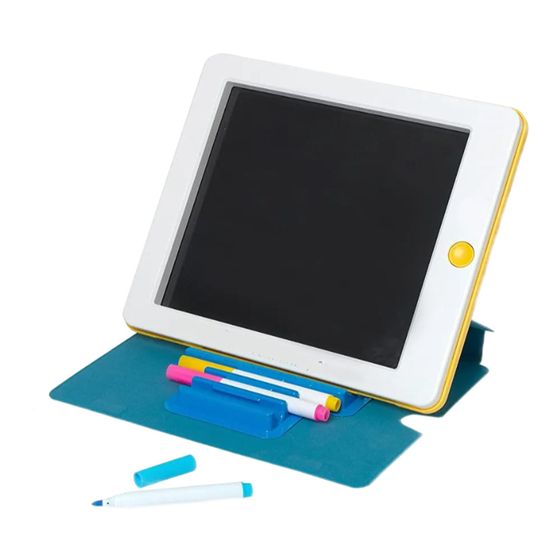
GLOWPAD Light up tablet
3 x Neon marker pens
8 x Pre-printed drawing sheets
Black/White screen insert
Wipe clean cloth
To clean your
GLOWPAD screen in
between drawings
- it is best to dampen
the cloth with a little
water first!
Installing or replacing batteries
Ask an adult to install or replace batteries- see back for Battery Information.
Before you start
• Draw or write on the GLOWPAD screen using the 3 marker pens included.
These marker pens are to be used on the GLOWPAD only.
• When not in use, firmly press the cap back onto each marker with a 'click'
to prevent the ink from drying out and store in the pen holder section.
• To keep the screen dust free it is best to keep the lid closed when not in use.
• If a marker pen is dry, gently rub pen tip on GLOWPAD's drawing surface,
recap and leave overnight.
• GLOWPAD markers can mark hands and surfaces but should wash off easily
with soap and water.
• GLOWPAD can be used flat or in the angled position.
Let's begin
Age
4+
• Peel off the thin plastic protective cover from the screen.
Turning On and Off the lights
Press
once to turn
GLOWPAD
ON
Colour changing
GLOWPAD Studio has 7 interchanging colours and patterns and a two-sided black
and white board. You can see different light effects on both sides.
Example of the lights changing when the black board is behind your picture.
1
CLICK
How to use GLOWPAD Studio
1. Draw freehand
•
Lay the screen flat (A)
or put it in the angled
position by sliding the
bottom of the screen into
the slot behind the pens
(B).
Press &
hold to turn
GLOWPAD
OFF
2
3
CLICKS
CLICKS
A: Flat
B: Angled
Advertisement
Table of Contents

Subscribe to Our Youtube Channel
Related Manuals for John Adams GLOWPAD Studio


Summary of Contents for John Adams GLOWPAD Studio
- Page 1 Black/White screen insert Wipe clean cloth Colour changing GLOWPAD Studio has 7 interchanging colours and patterns and a two-sided black and white board. You can see different light effects on both sides. To clean your Example of the lights changing when the black board is behind your picture.
- Page 2 MANUFACTURED BY DIAMANT TOYS LTD/AMAV ENTERPRISE LTD. ©2021 John Adams Leisure Limited. John Adams Leisure Ltd., Hercules House, Pierson Road, Enterprise Campus, Alconbury Weald, Huntingdon, Cambridgeshire. PE28 4YA, England. EU authorised representative: John Adams Leisure EU Ltd., 1 Castlewood Avenue, Rathmines, Dublin 6, D06 H685, Ireland.
Need help?
Do you have a question about the GLOWPAD Studio and is the answer not in the manual?
Questions and answers