
Related Manuals for Sequoia LISST-25X

Summary of Contents for Sequoia LISST-25X
- Page 1 LISST-25X Suspended Sediment Sensor Operating Manual Version 1.0 2700 Richards Road Bellevue, WA 98005 Tel: (425) 641-0944 Fax: (425) 643-0595...
- Page 2 -2.0 lbs (0.9 kg) in water • Depth Rating -300 meters This document is the property of SEQUOIA SCIENTIFIC, INC. It shall not be reproduced, disclosed, used in whole or part, for any purpose, without the specific written authorization of SEQUOIA SCIENTIFIC, INC.
-
Page 3: Table Of Contents
Appendix D : Alternate Terminal Software……..………..…………………..26 WARNING The LISST-25X contains a laser diode emitting a maximum of 5 mW of visible (red) light at a wavelength of 670nm. The laser beam under normal circumstances is not a threat. However, if objects are placed in the path of the laser beam, the light could be reflected into the eye causing permanent damage. - Page 4 Email: keir@sequoiasci.com Tel: (425) 641-0944 ext. 104...
-
Page 5: Introduction
The LISST-25X was developed to provide this specific measurement. The LISST-25X is based on the same principles of laser light scattering as the LISST-100. The Mie-theory of light scattering suggests that collimated laser light illuminating particles will scatter most of its energy at particular angles. - Page 6 LISST-25X. Figure 1: Schematic of the optical path of the LISST-25X. The laser is collimated by the small lens on the left. The collimated laser light passes through the water. Particles in the water scatter the light which is collected by the larger receive lens.
-
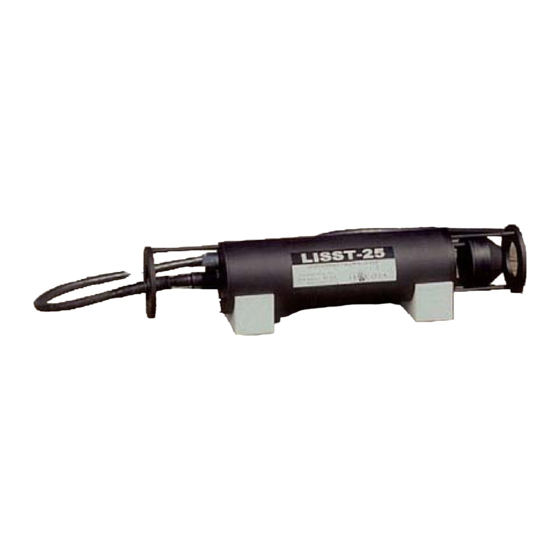
Page 7: Operation
Begin by removing the two white plastic instrument stands and set them Instrument from on a flat working surface. Remove the LISST-25X from its case and set it shipping case on the stands. The LISST-25X has two distinct ends that are referred to as the Optics endcap and the Connector endcap. - Page 8 Settings option of the File menu. Clicking on the Serial Port tab will display the current settings. “ The LISST-25X is shipped in its sleep mode or low power mode. Every 10 seconds “Deep Sleep…Enter ZZ to wake up” will be printed to the screen.
- Page 9 Step 10: Load a The LISST-25X is designed to be a self-contained instrument. One of the features that support this functionality is the ability to load and execute a Batch File list of commands.
- Page 10 display the results to the screen, and store them in the flash ram datafile. Line 3 will wait for 20 seconds before continuing to the next batch line. Line 4 will return to batch line 2. This batch file will take data continuously until the memory fills or a “CTRL-C”...
- Page 11 Open Raw Data File from the File menu. Select the file to be opened. A display similar to the one shown below will be displayed. Special Note: Because the LISST-25X has data for two size classes the plots of the data will not be displayed correctly. A new version of the software designed specifically for the LISST-25X will be available soon.
- Page 12 Step 15: Select The scales and appearance of the plots can be changed by selecting the display options for Settings option from the Display menu. A window similar to the one viewing the data. below will appear. Select the “Save values as Default” box to store the setting for future use. Step 16: Print Select Print Preview from the File menu to display a preview of the page to be printed.
-
Page 13: Field Deployment Procedure
This section is designed to introduce the procedures required for Introduction deploying the LISST-25X. It gives step-by-step instructions to setup and deploy the instrument in the field. The steps presented here assume that the user has learned the basic operating procedures covered in the preceding Getting Started section. - Page 14 Step 5: Record a Before deploying the instrument, a background scatter measurement background scatter must be recorded. Place a clean bag or the horizontal test chamber measurement over the instrument and execute the “ZS” command. Step 6: Program a Load the batch file with the desired commands using the “LB” Batch file command.
-
Page 15: Lisst-25 Command Summary
LISST-25X Command Summary Display Commands Display battery voltage Display memory remaining Display current status information Display time Display general help messages and command list Setup Commands Hard Reboot to restore factory defaults, time, and internal calibrations and constants. Reset to factory defaults settings... - Page 16 Batch File Commands Print batch file to screen Batch file Start command Clear Batch file from memory Exit Batch file GT x Goto batch command line x, x=1 to 25 LB xx cmd Load batch command line x with cmd string, x=01 to 25.
-
Page 17: Lisst-25 Command Details
Display memory remaining Syntax: DM or dm Description: The memory of the LISST-25X is non-volatile EEPROM. As data is written to memory, the amount of available memory can be accessed by the DM command. The amount of available memory is then displayed. The units will be in number of samples. - Page 18 Display general help messages and command list Syntax: HE or he Description: Displays the list of command to the screen. Example: input: HE output: LISST-25X Commands (followed by 30 lines of text) Cautions: None Setup Commands Reset to standard defaults Syntax: RS or rs Description: Returns all settings to startup defaults.
- Page 19 Set samples per average Syntax: SA x or sa x Where x = number of samples per average Description: Each recorded or displayed measurement is based on an average of samples. The number of samples per average is set using the SA command. Example: input: SA 10 Cautions: None Set communications baud rate...
- Page 20 If no values follow the “ST” or “st” command, prompts for entering the time and date will be displayed. Description: The LISST-25X has a built-in clock that must be reset after each power reset or power up. See Also: DT, Display Time command.
- Page 21 Grab sample and store Syntax: GS or gs Description: Acquires single averaged sample and stores it in memory. Example: Input: GS Output: (no response) Notes: Use “SA” command to set number of samples per average. Grab sample and transmit it Syntax: GX or gx Description: Acquires single averaged sample and displays the result to the screen.
- Page 22 Go into deep sleep mode (minimum power consumption) Syntax: ZZ or zz Description: Sends LISST-25X in to low power sleep mode. Instrument will wake up every 10 seconds and wait for a response. If there is no response with in 2 seconds, the instrument will return to sleep mode.
- Page 23 Exit Batch file Syntax: EB or eb Description: Batch file command: Enter as last line of a batch file. Example: Cautions: Only functions within batch files. Go to batch command line x, x=1 to 25 Syntax: GT x or gt x Description: Batch file command: Transfers control to batch file command specified by x.
- Page 24 Wait exactly x seconds from last WE command before returning Syntax: WE x or we x Description: Wait x seconds from end of last WE command before returning to batch file processing. WE 0 can be used to reset timer. Example: Batch file lines: WE 0 RP 5 GR 100...
-
Page 25: Appendix A: Data File
Appendix A: Data File Formats The raw data offloaded from the LISST-25X is in a binary format. This format is designed to be compatible with the earlier version LISST-25. Because the LISST-25X has two size classes two separate lines of data are stored in the LISST-25 format. This causes the strange plotting behaviour in the LISST-25.EXE program. -
Page 26: Appendix B : Lisst-25X Reset Procedure
Appenidix B: LISST-25X Reset Procedure 1. Confirm that a Hard Reset is required by eliminating all other possible sources of problems such as cable connections, dead main battery, or software conflicts. 2. Connect Communications cable and start TFTOOLS communication program. Verify that there is no response from the instrument. - Page 27 10. Open the LISST-25 Windows Program Terminal window. Enter DS and press the Send button to display the current status. The Time and Date will have been reset to Jan 1, 1980. To reset the date and time click on the Clock button to reset the instrument time to the PC time. Other parameters, such as samples per average, will also need to be reset to desired values.
-
Page 28: Appendix C: Warranty
Correction of Non-Compliances If any Product does not comply with the warranties set forth in 1(a) and 1(b) above, SEQUOIA will, at its option, either (a) repair the Product, (b) replace the Product, or (c) refund the purchase price paid by Customer to SEQUOIA for the Product; provided that Customer gives SEQUOIA written notice of the noncompliance within one (1) year after SEQUOIA's delivery of the Product (as the same may be extended for repaired or replacement Products as provided for herein, the "Warranty Period"). - Page 29 SEQUOIA's liability (whether in contract, tort, or otherwise; and notwithstanding any fault, negligence, strict liability or product liability) with regard to any Product (including, but not limited to, any breach of or default under the Order by SEQUOIA) will in no event exceed the purchase price paid by Customer to SEQUOIA for such Product.
-
Page 30: Appendix D : Alternate Terminal Software
Serial Port… from the CommPort menu. Select a baud rate of 19200 and the correct serial port. The LISST-25X should respond with a L25>> prompt each time Enter is pressed. The two letter commands for the instrument can be entered anytime this prompt is displayed.
Need help?
Do you have a question about the LISST-25X and is the answer not in the manual?
Questions and answers