Advertisement
Table of Contents
- 1 Outline and Dimensions
- 2 Safety Precautions
- 3 Installation Diagram
- 4 Installation of the Outdoor Unit
- 5 Installation of the Indoor Unit
- 6 Refrigerant Piping
- 7 Electrical Wiring Connection
- 8 Special Precautions When Dealing with R410A Unit
- 9 Additional Charge
- 10 Indicator Lights
- 11 Air Conditioner Unit Operation
- 12 Operating Range
- 13 Air Filter
- 14 Service and Maintenance
- 15 Troubleshooting
- Download this manual
INSTALLATION
MANUAL
R410A SPLIT SERIES
MODELS
FTXB50CV1B
FTXB60CV1B
RXB50CV1B
RXB60CV1B
Installation Manual
R410A Split Series
Manuel d'installation
Série split R410A
Installationsanleitung
Split-Baureihe R410A
Manuale d'installazione
Serie Multiambienti R410A
Manual de instalación
Serie Split R410A
Руководство по монтажу
Серия R410A с раздельной установкой
Montaj kılavuzu
R410A Split serisi
IM-5WMYJR-1114(0)-DAIKIN
Part Number.: R08019042114
English
Français
Deutsch
Italiano
Español
Русский
Türkçe
Advertisement
Table of Contents

Related Manuals for Daikin FTXB50CV1B


Summary of Contents for Daikin FTXB50CV1B
- Page 1 INSTALLATION MANUAL R410A SPLIT SERIES MODELS FTXB50CV1B RXB50CV1B Installation Manual English FTXB60CV1B RXB60CV1B R410A Split Series Manuel d’installation Français Série split R410A Installationsanleitung Deutsch Split-Baureihe R410A Manuale d’installazione Italiano Serie Multiambienti R410A Manual de instalación Español Serie Split R410A Руководство по монтажу...
-
Page 3: Outline And Dimensions
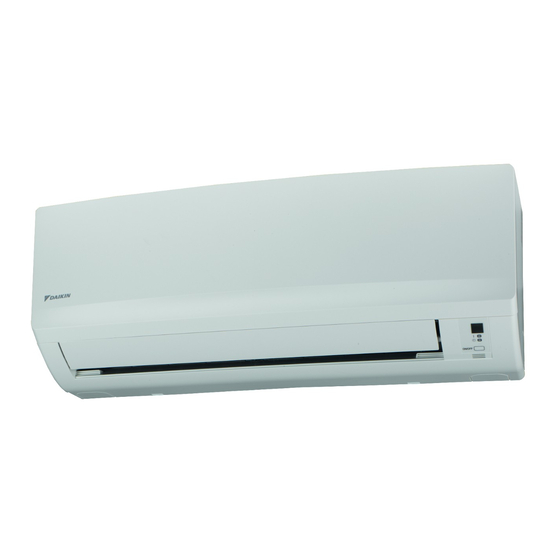
OUTLINE AND DIMENSIONS Indoor Unit THE MARK SHOWS PIPING DIRECTION REAR REAR LEFT RIGHT TOP VIEW NAME PLATE SIGNAL RECEIVER TERMINAL BLOCK WITH EARTH TERMINAL INDOOR UNIT SIDE VIEW ON/OFF SWITCH BOTTOM BOTTOM ROOM TEMPERATURE THERMISTOR (INSIDE) LOUVER FRONT GRILLE FIXED SCREWS (INSIDE) FRONT VIEW All dimensions are in mm... - Page 4 Outdoor Unit RXB50/60CV1B All dimensions are in mm Dimension Model RXB50/60CV1B Dimension Model RXB50/60CV1B...
-
Page 5: Safety Precautions
INSTALLATION MANUAL This manual provides the procedures of installation to ensure a safe and good standard of operation for the air conditioner unit. Special adjustment may be necessary to suit local requirement. Before using your air conditioner, please read this instruction manual carefully and keep it for future reference. This appliance is intended to be used by expert or trained users in shops, in light industry and on farms, or for commercial use by lay persons. - Page 6 IMPORTANT Important information regarding the refrigerant used This product contains fluorinated greenhouse gases. Do not vent gases into the atmosphere. Refrigerant type: R410A value: 2087.5 GWP = Global Warming Potential Please fill in with indelible ink, 1 the factory refrigerant charge of the product, ¢...
-
Page 7: Installation Diagram
INSTALLATION DIAGRAM Indoor Unit Caulk pipe hole gap 75mm or more from ceiling Cut thermal insulation pipe to an with putty. appropriate length and wrap it with tape, making sure that no gap is left Front panel in the insulation pipe’s cut line. Wrap the insulation pipe with the finishing tape 50mm or more from walls... -
Page 8: Installation Of The Indoor Unit
Condensed Water Disposal Of Outdoor Unit (Heat Pump Unit Only) • There are 2 holes on the base of Outdoor Unit for condensed PLUG water to flow out. Insert the drain elbow to one of the holes. • To install the drain elbow, first insert one portion of the hook to the base (portion A), then pull the drain elbow in the direction shown by the arrow while inserting the other BASE... - Page 9 Mounting Installation Plate Mount The Unit Onto The Installation Plate Hook the indoor unit onto the upper portion of the installation Ensure that the wall is strong enough to withstand the weight plate (Engage the two hooks at the rear top of the indoor unit of the unit.
-
Page 10: Refrigerant Piping
As a result, the compressor may become defective. Always choose the shortest path and follow the recommendations as tabulated below: Indoor unit Outdoor Unit Model FTXB50CV1B FTXB60CV1B Min. Allowable Length (L), m Max. Allowable Length (L), m Max. Allowable Elevation (E), m Gas Pipe Size, mm/(in) 12.70 (1/2") - Page 11 REFRIGERANT PIPING Piping Works And Flaring Technique Figure I Cutting Copper Tube • Do not use contaminated or damaged copper tubing. If any piping, evaporator or condenser had been exposed or 1/4t had been opened for 15 seconds or more, the system must be vacuumed.
-
Page 12: Electrical Wiring Connection
ELECTRICAL WIRING CONNECTION IMPORTANT : * The figures shown in the table are for information purpose only. They should be checked and selected to comply with the local/national codes of regulations. This is also subject to the type of installation and conductors used. -
Page 13: Special Precautions When Dealing With R410A Unit
SPECIAL PRECAUTIONS WHEN DEALING WITH R410A UNIT R410A is a new HFC refrigerant which does not damage the • Use tools and materials exclusively for refrigerant R410A. ozone layer. The working pressure of this new refrigerant is Tools exclusively for R410A are manifold valve, charging 1.6 times higher than conventional refrigerant (R22), thus hose, pressure gauge, gas leak detector, flare tools, torque proper installation/servicing is essential. -
Page 14: Additional Charge
Outdoor RXB50CV1B RXB60CV1B Additional charge [g/m] Example: FTXB50CV1B & RXB50CV1B with 12m piping length, additional piping length is 4.5m. Thus, Additional charge = 4.5[m] x 20[g/m] = 90.0[g] INDICATOR LIGHTS IR Signal Receiver When an infrared remote control operating signal has been transmitted, the signal receiver on the indoor unit will respond as below to confi... -
Page 15: Air Conditioner Unit Operation
AIR CONDITIONER UNIT OPERATION Dry Mode Fan Speed And Rated Cooling Capacity • When the air humidity is high, the unit can operate in dry • The rated cooling capacity is provided at the HIGH fan mode. Press <MODE> button and choose <DRY>. speed. -
Page 16: Air Filter
AIR FILTER Open the front panel. Clean or replace each filter. • Hold the panel at the recesses on the main unit See figure. (2 recesses on right and left sides) and lift it until it • When shaking off remaining water, do not wring the stops. -
Page 17: Service And Maintenance
SERVICE AND MAINTENANCE Note is valid for Turkey only: The lifetime of our products is ten (10) years Service Parts Maintenance Procedures Period Indoor air filter Remove any dust adhering to the filter by using a vacuum cleaner or At least once every wash in lukewarm water (below 40°C/104°F) with a neutral cleaning 2 weeks. -
Page 18: Troubleshooting
! CAUTION • Don’t touch the metal parts of the indoor unit. It may cause an injury. • When removing or attaching the front panel, support the panel securely with hand to prevent it from falling. • For cleaning, do not use hot water above 40°C, benzine, gasoline, thinner, nor other volatile oils, polishing compound, scrubbing brushes, nor other hand stuff.
Need help?
Do you have a question about the FTXB50CV1B and is the answer not in the manual?
Questions and answers