Table of Contents
Advertisement
Quick Links
Advertisement
Table of Contents

Subscribe to Our Youtube Channel
Related Manuals for ASUSTeK COMPUTER G Series

Summary of Contents for ASUSTeK COMPUTER G Series
- Page 1 E18448 First Edition / December 2021 More info:...
- Page 2 ERRORS OR INACCURACIES THAT MAY APPEAR IN THIS MANUAL, INCLUDING THE PRODUCTS AND SOFTWARE DESCRIBED IN IT. Copyright © 2021 ASUSTeK COMPUTER INC. All Rights Reserved. LIMITATION OF LIABILITY Circumstances may arise where because of a default on ASUS’ part or other liability, you are entitled to recover damages from ASUS.
-
Page 3: Table Of Contents
Table of Contents About this manual .....................7 Conventions used in this manual ................9 Icons ............................ 9 Typography ........................9 Safety precautions .....................10 Using your Notebook PC ....................10 Caring for your Notebook PC ..................11 Proper disposal ........................ 12 Battery safety information................... - Page 4 Chapter 3: Working with Windows Starting for the first time ..................48 Start menu ........................49 Windows apps ......................51 Working with Windows apps ..................52 Customizing Windows apps ..................52 Task view ........................55 Widgets .........................56 Snap feature ........................58 Snap hotspots ........................58 Action Center ......................60 Setting the OLED display ..................62 Setting the Dark Mode ....................
- Page 5 Chapter 4: Power-On Self-Test (POST) The Power-On Self-Test (POST) ................80 Using POST to access BIOS and Troubleshoot............80 BIOS ..........................80 Accessing BIOS ........................ 80 Recovering your system ..................81 Performing a recovery option ..................82 Chapter 5: Upgrading your Notebook PC Installing an M.2 card ....................86 Tips and FAQs Useful tips for your Notebook PC ................90...
- Page 6 TV Notices ......................... 105 Macrovision Corporation Product Notice .............. 105 Prevention of Hearing Loss ..................105 Nordic Lithium Cautions (for lithium-ion batteries) ........... 106 CTR 21 Approval (for Notebook PC with built-in Modem) ......107 Declaration of Compliance for Product Environmental Regulation..... 109 EU REACH and Article 33 ....................
-
Page 7: About This Manual
About this manual This manual provides information about the hardware and software features of your Notebook PC, organized through the following chapters: Chapter 1: Hardware Setup This chapter details the hardware components of your Notebook Chapter 2: Using your Notebook PC This chapter shows you how to use the different parts of your Notebook PC. - Page 8 Chapter 5: Upgrading your Notebook PC This chapter guides you through the process of replacing and upgrading parts of your Notebook PC. Tips and FAQs This section presents some recommended tips, hardware FAQs, and software FAQs you can refer to for maintaining and fixing common issues with your Notebook PC.
-
Page 9: Conventions Used In This Manual
Conventions used in this manual To highlight key information in this manual, some text are presented as follows: IMPORTANT! This message contains vital information that must be followed to complete a task. NOTE: This message contains additional information and tips that can help complete tasks. -
Page 10: Safety Precautions
Safety precautions Using your Notebook PC This Notebook PC should only be used in environments with ambient temperatures between 5°C (41°F) and 35°C (95°F). Refer to the rating label on the bottom of your Notebook PC and ensure that your power adapter complies with this rating. -
Page 11: Caring For Your Notebook Pc
Caring for your Notebook PC Disconnect the AC power and remove the battery pack (if applicable) before cleaning your Notebook PC. Use a clean cellulose sponge or chamois cloth dampened with a solution of nonabrasive detergent and a few drops of warm water. Remove any extra moisture from your Notebook PC using a dry cloth. -
Page 12: Proper Disposal
Do not use your Notebook PC near gas leaks. Do not place active electronic devices close to your Notebook PC to avoid electromagnetic wave interference to the display panel. Do not use this Notebook PC for cryptocurrency mining (consuming a vast amount of electricity and time to gain convertible virtual currency) and/or related activities. -
Page 13: Battery Safety Information
Battery safety information Battery protection • Frequently charging a battery under high voltage may shorten the battery life. To protect the battery, once the battery is fully charged, the system may stop charging when the battery power is between 90% and 100%. NOTE: The initiate battery power charging capacity is usually set between 90% and 99%. - Page 14 Standard battery care • If you are not using your device for a long period of time, ensure to charge the battery power to 50% then power off your device and disconnect the AC power adapter. Recharge the battery power to 50% every three months to avoid over-discharging and prevent damage to the battery.
-
Page 15: Chapter 1: Hardware Setup
Chapter 1: Hardware Setup Notebook PC E-Manual... -
Page 16: Getting To Know Your Notebook Pc
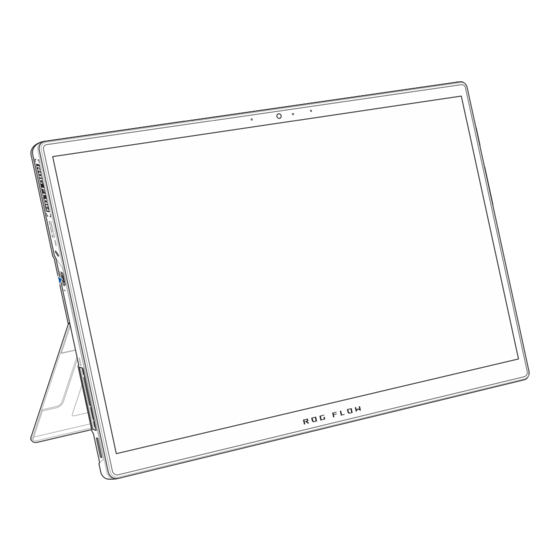
Getting to know your Notebook PC Front View Rear View Notebook PC E-Manual... - Page 17 Array microphones The array microphones feature echo canceling, noise suppression, and beam forming functions for better voice recognition and audio recording. Camera The built-in camera allows you to take pictures or record videos using your Notebook PC. Camera indicator The camera indicator lights up when the built-in camera is in use. NOTE: The indicator does not light up for the rear camera.
- Page 18 Air vents The air vents allow cool air to enter and warm air to exit the Notebook PC. WARNING! Ensure that paper, books, clothing, cables, or other objects do not block any of the air vents or else overheating may occur.
-
Page 19: Top View
Top View Air vents The air vents allow cool air to enter and warm air to exit the Notebook PC. WARNING! Ensure that paper, books, clothing, cables, or other objects do not block any of the air vents or else overheating may occur. -
Page 20: Bottom View
Bottom View Hinge holes Align and insert the latch hooks into these holes to securely attach your device to the keyboard. Docking port Connect your device to this port to support keyboard and touchpad functions. Notebook PC E-Manual... -
Page 21: Right View
Right View Power button Press the power button to turn your Notebook PC on or off. You can also use the power button to put your Notebook PC to sleep or hibernate mode and wake it up from sleep or hibernate mode. In the event that your Notebook PC becomes unresponsive, press and hold the power button for at least ten (10) seconds until your Notebook PC shuts down. - Page 22 Headphone/Headset/Microphone jack This port allows you to connect amplified speakers or headphones. You can also use this port to connect your headset or an external microphone. Audio speakers The built-in audio speakers allow you to hear audio straight from your Notebook PC. Audio features are software-controlled. Notebook PC E-Manual...
-
Page 23: Left View
Left View Audio speakers The built-in audio speakers allow you to hear audio straight from your Notebook PC. Audio features are software-controlled. Notebook PC E-Manual... - Page 24 USB 3.2 Gen 2 Type-C®/DisplayPort (on selected models)/ Power (DC) input combo port The USB 3.2 (Universal Serial Bus 3.2) Gen 2 Type-C® port provides a transfer rate of up to 10 Gbit/s and is backward compatible to USB 2.0. Use a USB Type-C® adapter to connect your Notebook PC to an external display.
- Page 25 ROG XG Mobile interface This port is for plugging in the ROG XG Mobile connector and provides a PCIe Gen3 x8 bandwidth for external graphics. Thunderbolt™ 4 port with Power Delivery The Thunderbolt™ 4 port is compatible with USB Type-C® standards, and provides a transfer rate of up to 40 Gbit/s for Thunderbolt™...
- Page 26 Two-color battery charge indicator The two-color LED provides a visual indication of the battery’s charge status. Refer to the following table for details: Color Status Solid White The Notebook PC is plugged to a power source and the battery power is between 95% and 100%.
-
Page 27: Keyboard
Keyboard NOTE: The keyboard's layout may vary per region or country. Latch hooks The latch hooks allow you to securely attach the device to the keyboard. Docking connector Securely attach the device to the keyboard by aligning the dock port on top of this connector. Notebook PC E-Manual... - Page 28 Keyboard The keyboard provides full-sized QWERTY keys with a comfortable travel depth for typing. It also enables you to use the function keys, allows quick access to Windows, and controls other multimedia functions. NOTE: The keyboard layout differs by model or territory. Capital lock indicator This indicator lights up when the capital lock function is activated.
-
Page 29: Chapter 2: Using Your Notebook Pc
Chapter 2: Using your Notebook PC Notebook PC E-Manual... -
Page 30: Getting Started
Getting started Attach the tablet to the keyboard Magnetic attachment WARNING! • Ensure your device and keyboard are attached in the orientation shown above. Incorrect orientation may cause damage to the device and the keyboard. • The device, keyboard and cover stand come with magnetic attachments. -
Page 31: Charge Your Notebook Pc
Charge your Notebook PC Connect the AC power cord to the AC/DC adapter. Connect the DC power connector into your Notebook PC’s power (DC) input port. Plug the AC power adapter into a 100V~240V power source. Charge the Notebook PC for 3 hours before using it in battery mode for the first time. - Page 32 IMPORTANT! AC/DC power adapter information: • Input voltage: 100-240Vac • Input frequency: 50-60Hz • Rating output current: 5A (100W) • Rating output voltage: 20V ROG XG Mobile power adapter* information: • Input voltage: 100-240Vac • Input frequency: 50-60Hz • Rating output current: 5A (100W) •...
- Page 33 IMPORTANT! • Locate the input/output rating label on your Notebook PC and ensure that it matches the input/output rating information on your power adapter. Some Notebook PC models may have multiple rating output currents based on the available SKU. • Ensure that your Notebook PC is connected to the power adapter before turning it on for the first time.
-
Page 34: Press The Power Button
Press the power button Notebook PC E-Manual... -
Page 35: Gestures For The Touch Screen Panel And Touchpad
Gestures for the touch screen panel and touchpad Gestures allow you to launch programs and access the settings of your Notebook PC. Refer to the following illustrations when using hand gestures on your touch screen panel and touchpad. NOTE: • The following screenshots are for reference only. - Page 36 Zoom in Zoom out Spread apart your two fingers on Bring together your two fingers the touch screen panel. on the touch screen panel. Finger slide Drag Slide your finger to scroll up and • Drag to create a selection down and slide your finger to pan box around multiple items.
-
Page 37: Using The Touchpad
Using the touchpad Moving the pointer You can tap anywhere on the touchpad to activate its pointer, then slide your finger on the touchpad to move the pointer onscreen. Slide horizontally Slide vertically Slide diagonally Notebook PC E-Manual... - Page 38 One-finger gestures Tap/Double-tap • Tap an app to select it. • Double-tap an app to launch it. Drag and drop Double-tap an item, then slide the same finger without lifting it off the touchpad. To drop the item to its new location, lift your finger from the touchpad.
- Page 39 Left-click Right-click • Click an app to select it. Click this button to open the right- click menu. • Double-click an app to launch it. NOTE: The areas inside the dotted line represent the locations of the left mouse button and the right mouse button on the touchpad. Two-finger gestures Tap two fingers on the touchpad to simulate the right-click function.
- Page 40 Two-finger scroll (up/down) Two-finger scroll (left/right) Slide two fingers to scroll up or Slide two fingers to scroll left or down. right. Zoom out Zoom in Bring together your two fingers Spread apart your two fingers on on the touchpad. the touchpad.
- Page 41 Drag and drop Select an item then press and hold the left button. Using your other finger, slide on the touchpad to drag the item, lift your finger off the button to drop the item. Three-finger gestures Tap three fingers on the touchpad to launch the function you selected in Settings.
- Page 42 Swipe left/Swipe right If you opened multiple apps, swipe three fingers left or right to switch between these apps. Swipe up Swipe down Swipe up to see an overview of all Swipe down to show the desktop. the apps currently opened. Notebook PC E-Manual...
- Page 43 Four-finger gestures Tap four fingers on the touchpad to launch the function you selected in Settings. Notebook PC E-Manual...
-
Page 44: Using The Keyboard
Using the keyboard Function keys The function keys on your Notebook PC’s keyboard can trigger the following commands: Turns the speaker on or off Turns the speaker volume down Turns the speaker volume up Turns the microphone on or off Toggles the fan mode Activates screen capture tool Decreases display brightness... - Page 45 Enables or disables the touchpad Adjusts brightness for the backlit keyboard Turns Airplane mode on or off NOTE: When enabled, the Airplane mode disables all wireless connectivity. Displays the drop-down menu Simulates the page up key Simulates the page down key Simulates the home key Simulates the end key Enables or disables the Windows key lock...
-
Page 46: Windows Keys
Windows keys There are two special Windows keys on your Notebook PC’s keyboard used as below: Launches the Start menu Displays the drop-down menu* * On selected models Notebook PC E-Manual... - Page 47 Chapter 3: Working with Windows Notebook PC E-Manual...
- Page 48 Starting for the first time When you start your Notebook PC for the first time, a series of screens appear to guide you in configuring your Windows operating system. To start your Notebook PC for the first time: Press the power button on your Notebook PC. Wait for a few minutes until the setup screen appears.
- Page 49 Start menu The Start menu is the main gateway to your Notebook PC’s programs, Windows apps, folders, and settings. Change account settings, lock, or Launch an app from the Start menu sign out from your account Launch the Start menu Shut down, restart, or put your Notebook PC to sleep Launch Search...
- Page 50 Launching the Start menu Tap the Start icon on your desktop. Position your mouse pointer over the Start icon your desktop then click it. Press the Windows logo key on your keyboard. Opening programs from the Start menu One of the most common uses of the Start menu is opening programs installed on your Notebook PC.
Need help?
Do you have a question about the G Series and is the answer not in the manual?
Questions and answers