
Related Manuals for Dumor 331

Summary of Contents for Dumor 331
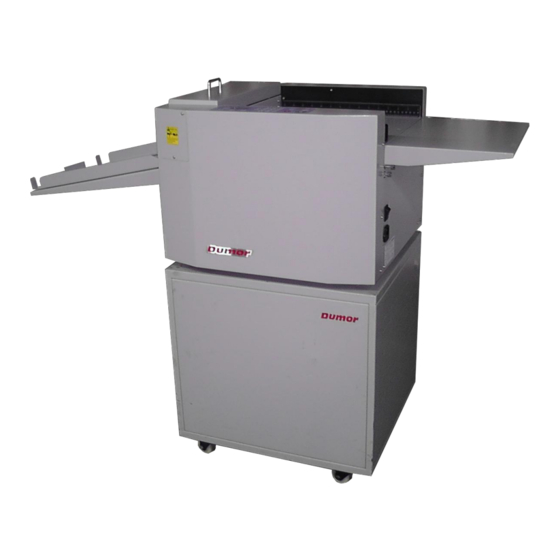
- Page 1 331 Gemini Auto Creaser Operation Manual Guangzhou Dumor Automation System Co.,Ltd www.dumor.cn 0086-755-2671-4393...
-
Page 2: Table Of Contents
7.1 Show warning C-1 ................23 7.2 Show warning C-2 ................24 7.3 Show warning C-3 ................25 7.4 Show Error E-1 ................. 26 Chapter 8 Maintenance .................. 27 8.1 User Maintenance ................27 8.2 Technician Maintenance ..............27 331 Auto Creaser... -
Page 3: Chapter 1 Introduction
Chapter 1 INTRODUCTION 1.1 Preface This manual only applies to 331 Gemini Auto Creaser machine. Before using the machine, please read the instruction manual carefully first. Please keep the manual properly so that consulting it at any time in the future. -
Page 4: Specification
CN/EN Linear perforating Option Linear scoring Option Stand Option Power 220V/50HZ/150W Fuse rating 3.15A Weight 42kg(NG) 47kg(GW) Note: The machine is keep upgrading, specification and information in this manual are updated as per the change without notice. 331 Auto Creaser... -
Page 5: Chapter 2 Safety
2. Remove the cord when you are installing components. Ground symbol. If you see this symbol in any place, please do not touch it anyhow, or uninstall it. If the ground is not well connected, it may cause human body injury. 331 Auto Creaser... -
Page 6: Environment
Don’t operating with wet hand, especially plug or unplug the cord. Don’t wear long hair, loose fitting clothes or put your fingers into the creasing unit nip, while the operation.. Don’t place any receptacles with any liquid on any surface of machine. 331 Auto Creaser... -
Page 7: Cautions
Don’t-put other pieces, especially tiny pieces on loading table. Don’t-alter or uninstall the machine, unless by Dumor authorized engineer. Don’t touch any running parts while running Don’t shut down the machine while running. Don’t put heavy matter on machine or shock it. -
Page 8: Chapter 3 Main Parts & Assies
Output the sheet and for mounting linear tools Control panel Input the data Safety cover Covering turning parts with interlock switch LCD screen Display Output tray To stack the finished products Side cover Interchange the crease die or perforate die 331 Auto Creaser... -
Page 9: Chapter 4 Installation
Install them as per following steps: 1: Loosen 3 screw, but not remove 2: Connect extension table, with each screw head through a hole, clip the extension table on. 3: Tighten 3 screws. 331 Auto Creaser... -
Page 10: Power Socket And Switch
Fuse under the socket is protect the system in case the current is over 3.15A, to replace the Fuse, we firstly clip the cartridge with a straight screw driver. Secondly remove the broken fuse from the cartridge and load a new one back. At last, we reload the cartridge. Fuse 331 Auto Creaser... -
Page 11: Chapter 5 Operation
”C-1 CR cover SAFETY COVER open” FORWARD/REVERSE When paper jams, press them to move rollers, so that the paper can be easily cleared. MODE Change the modes SCREEN Display information. ENTER After the data input, press it to confirm. 331 Auto Creaser... -
Page 12: Quick Start
6. Press Enter when line [4] is 0, screen will jump to screen 4 7. Press RUN, feed a sheet. Paper is creased at 10mm, 20mm, 30mm (crease line distance from the leading edge). 8. Press STOP if you want the job stopped 331 Auto Creaser... -
Page 13: Screen Introduction
If Press qty is 0, machine will never stop after “Running”, until STOP is pressed. Display First 2 crease data of 32 Note: Crease data can’t be input in this mode. Press ↓, goes to rest Page 2,3,4,5…8…: 331 Auto Creaser... -
Page 14: Crease Data Screen
If less than 6 line is needed, after we finish the last data (say, the 3rd line), Enter, Line [4] flash, press ENTER again when line[4] is 0, screen will jump to main operation mode, input finished. 331 Auto Creaser... -
Page 15: Cover Hinge Screen
2 parameters leads to 4 line, the other 2 is 8mm outside of 2 spine lines as hinge lines. Following drawing illustrates. 5.3.5 Progressive Screen MODE 4 Progressive crease If you want to shut down the function, press 1, enter, screen will jump to the Ready Screen. 331 Auto Creaser... - Page 16 If all the sheets creased on same position, the bounded book can not be turned over lay flat like this drawing. With 3 kinds of crease mode, even thick paper can be turned over very easily and lay flat after 331 Auto Creaser binding.
-
Page 17: Save A Job
The system at most saves 30 jobs. How to save a job? a. See MODE 2, Let’s input a job, say, 10, 20, 30, 0 , 0 ,0. b. Press 2 times, we go to Save job Mode. 331 Auto Creaser... -
Page 18: Recall A Job
Note: It is quite advisable for users to remember jobs of each number, because job will be overwritten without any notice. Press at Recall Job mode, It goes to MODE 7 5.3.8 Speed Screen MODE 7 Speed 331 Auto Creaser... -
Page 19: Recalibration Screen
Note: If the input date is more than 3% tolerant to the real length, it fails 5.4 Hardware Setting 5.4.1 Skew adjustment If it is found the crease is skewed (not vertical to the paper side), you need to adjust the feeding angle to get a satisfied performance. 331 Auto Creaser... -
Page 20: Crease Depth
The adjustment is also needed if the crease depth are not balance on both sides. Normal Too light Crack edge Not balanced Too heavy To adjust the Depth: Open the safety cover, you can see 3 Allen screws. Turn the screw un-clockwise will increase the depth, Vice versa. 331 Auto Creaser... -
Page 21: Crease Bar Installation
Insert bar as lock point at the arrow direction end. 5.4.3.2 Perforation Bar Installation Bar with black Bar with plastic foam must in pad must in lower position. lower position. Spare bar should be placed in tools storage. 331 Auto Creaser... -
Page 22: Chapter 6 Optional Parts
Note: Allen screws should be prepared by User, not provided by seller Before the installation, we should prepare tools and accessories. The user can install at most 4 set of perforating blade. Set screw Screw holes for perforating (upper) and counter (lower)blades 331 Auto Creaser... - Page 23 Install the blade one by one likewise the knives, with M3*6 screws. Step 5 Move the output lower roller, have the knife kiss the blade. Step 6 Move other 2 rollers on both sides toward perforating blade, make the rollers 331 Auto Creaser...
- Page 24 Step 7 Install the safety cover and install the deflect plate 331 Auto Creaser...
-
Page 25: Chapter 7 Trouble Shooting
Chapter 7 TROUBLE SHOOTING 7.1 Show warning C-1 C-1 Top Cover Open Please check top cover is closed well. 331 Auto Creaser... -
Page 26: Show Warning C-2
2. Check if the paper is out of the spec. (100gsm~350gsm). 3. Remove the gauge to check if there is paper piece covering the sensor. 4. Clean the paper dust by air gun on the sensor. 331 Auto Creaser... -
Page 27: Show Warning C-3
2. Check if the paper is out of the spec. (100gsm~350gsm). 3. Remove the gauge to check if there is paper piece covering the sensor. 4. Clean the paper dust by air gun on the sensor. 331 Auto Creaser... -
Page 28: Show Error E-1
3. Check if the paper is out of the spec. (100gsm~350gsm). As for crease die, the spec. is 100~300gsm. 4. Check if CR depth is too deep and adjust it referred to 5.4.2. More information for repairs referred to technician manual. 331 Auto Creaser... -
Page 29: Chapter 8 Maintenance
8.2 Technician Maintenance Do the technician maintenance regularly is also very important. It mainly finished by technician, including checking the wear and tear parts, replace the broken parts, adding lubricant and so on. More details referred to technician manual. 331 Auto Creaser...
Need help?
Do you have a question about the 331 and is the answer not in the manual?
Questions and answers