Advertisement
Installation Manual
Models: ASR1203-OO
Valve Rough-In
¾" - 3 Way - No Share - Thermostatic Shower Valve
Installation Manual
Please read notices on following page
PRODUCT SPECIFICATIONS ARE SUBJECT TO CHANGE WITHOUT NOTICE.
Dimensions of fixtures are approximate and may vary ± 6mm (1/4"). Structure measurements must be verified against the unit to ensure proper fit.
Advertisement
Table of Contents

Related Manuals for Aura ASR1203-OO

Summary of Contents for Aura ASR1203-OO
- Page 1 Installation Manual Models: ASR1203-OO Valve Rough-In ¾" - 3 Way - No Share - Thermostatic Shower Valve Installation Manual Please read notices on following page PRODUCT SPECIFICATIONS ARE SUBJECT TO CHANGE WITHOUT NOTICE. Dimensions of fixtures are approximate and may vary ± 6mm (1/4”). Structure measurements must be verified against the unit to ensure proper fit.
-
Page 2: General Instructions
• Keep receipts (proof of purchase and place of purchase) for this product. The receipt is required should it be necessary to request warranty parts. MAINTENANCE & CARE FOR YOUR AURA PRODUCTS • To clean your faucet or accessory, when necessary, wash with a nonabrasive wet soapy cloth. Then wipe dry with a soft towel or cloth. -
Page 3: Item Description
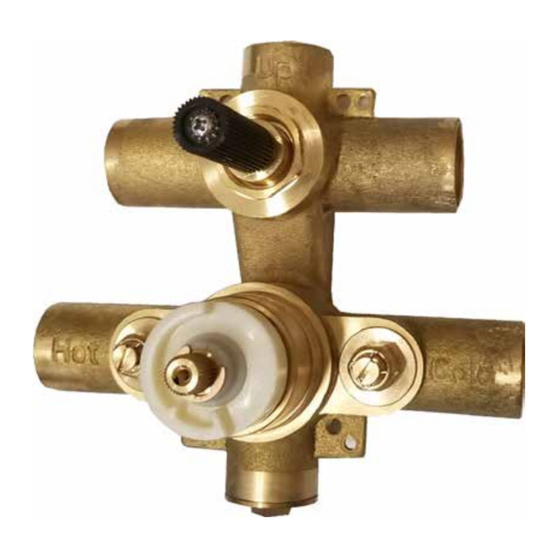
Installation Manual ASR1203-OO *** Valve Rough-In Parts List ITEM DESCRIPTION ITEM DESCRIPTION Protective Cover ------ Thermostatic Cartridge AP120-108 Screw AP120-200 Plug AP120-102 Valve Box ------ 3/4" - 1/2" Connector AP120-112 Hot Water Limiter AP120-204 Handle Extension AP120-201 Diverter Retaining Nut... - Page 4 Installation Manual ASR1203-OO *** Valve Rough-In ATT E N T IO N! Thermostatic Valve Installation REMOVE THE CARTRIDGE BEFORE INSTALLATION. FLUSH THE HOT AND COLD SUPPLY LINES WITHOUT THE CARTRIDGE AFTER INSTALLATION. (SEE PAGE 9) Insert the Valve to the Wall:...
- Page 5 Installation Manual ASR1203-OO *** Valve Rough-In Thermostatic Valve Cover Plate and Handle Installation Installing Cover Plate: Carefully install the Trim Plate (1), make sure to keep the Trim Plate (1) tight against the wall. Configuring the Cartridge: Before installing the handle and the rest of the trim, ensure the thermo cartridge is positioned correctly.
-
Page 6: Troubleshooting (Faq)
Installation Manual ASR1203-OO *** Valve Rough-In Removing and Installing Thermostatic Cartridges REMOVING DIVERTER CARTRIDGE: Rotate the Volume Control Escutcheon (1) counter clockwise. Using a wrench, unscrew the Locking Nut (6) counter clockwise. Pull the Thermostatic Cartridge (3) out of the valve. -
Page 7: Installation Examples
Installation Manual ASR1203-OO *** Valve Rough-In Installation Examples Open HOTC Open COLD Product images and specifications are for illustrative purposes only, product design may vary. Dimensions of fixtures are approximate and may vary ± 6mm (1/4”). Structure measurements must be verified against the unit to ensure proper fit.
Need help?
Do you have a question about the ASR1203-OO and is the answer not in the manual?
Questions and answers