Table of Contents
Advertisement
Quick Links
Advertisement
Table of Contents

Related Manuals for Rankin Basics CRY85

Summary of Contents for Rankin Basics CRY85
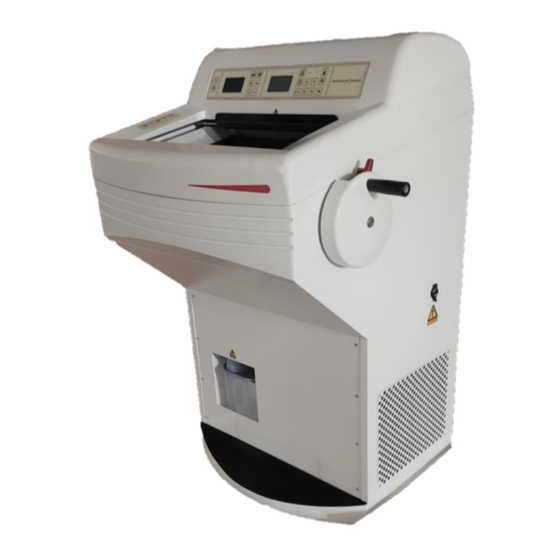
- Page 1 OPERATOR MANUAL Rankin Basics Cryostat CRY85 Attention: Before using the instrument, please read this Instruction carefully, and keep the Instruction for further reference. Please refer to the nameplate on the back of the instrument for the serial number and manufacturing date of the...
-
Page 2: Table Of Contents
Table of Contents 1. Overview ··················································································· 3 2. Technical Specifications ······························································· 4 3. Installation and Working Conditions ················································ 5 4. Operation ·················································································· 6 4.1 Central operation panel ·························································· 6 Left: Programming ON/OFF switch ······································ 6 Left: Fast defrost ······························································· 6 Middle: Peltier freezing ·······················································... - Page 3 Blade holder ································································· 11 Changing blade ····························································· 11 Adjusting the blade angle ················································ 11 Fit and adjust the anti-roll plate ········································· 11 Handwheel ··································································· 12 Specimen setup ···························································· 12 Sectioning procedures ···················································· 14 Tips for Successful Sectioning ··········································· 14 Recommended Temperature Ranges··································· 15 5.
-
Page 4: Overview
1. OVERVIEW This model has an ergonomic design and is manufactured using numerically - controlled machine tools. It is recommended for use in hospitals, medical schools, scientific research institutes, and food quarantine and inspection organizations. With its novel design, this instrument has a high precision, stable performance, and easy operation. -
Page 5: Technical Specifications
2. TECHNICAL SPECIFICATIONS Section thickness range: Adjustable range 1-100μm 1 – 20 μm Increment: 1 μm; 20 – 40 μm Increment: 2 μm; 40 – 100 μm Increment: 5 μm; Trimming thickness range: Adjustable range 10-400 μm 10-50 μm Increment: 5 μm; 50-100 μm Increment: 10 μm;... -
Page 6: Installation And Working Conditions
3. INSTALLATION AND WORKING CONDITIONS Package handling • Please inspect the package and contact the shipper if the package has serious damage. • Please place the instrument on a stable surface after taking it out from the wooden box. • Do not place the instrument in an environment near explosive or flammable material. •... -
Page 7: Operation
Working environmental conditions ● Temperature: +5℃ to +28℃ An ambient temperature below 26℃ is conducive to a longer lifetime of the cooling compressor ● Humidity: < 80% High temperature or humidity will affect refrigeration performance. 4. OPERATION 4.1 Central Operation Panel (Fig 1) Fig 1 After the power source is connected to the rear of the cryostat, turn on the power switch at the rear to allow it to enter the working mode. -
Page 8: Middle: Peltier Freezing
mode, as indicated by the indicator light. Fast defrost takes about 6 minutes. Press again to stop fast defrost, and meanwhile the indicator light goes off. Freezing recovers after 25 seconds. In the case where the system automatically enters the defrost mode and the indicator lights is on, user may press this button to stop the defrost process. -
Page 9: Right: Clock Setting
When both M and C buttons are pressed together, one “*” signal appears in front of “Retr” to indicate that user can now press “+” or “-“ to adjust the retraction value. “+” or “-“ is to increase or decrease the values for sectioning/trimming, or retraction (when “*”... -
Page 10: Right: Start-Of-Work Timer
Fast freezing can be stopped by the user, or automatically if the Peltier begins to freeze over. Press this button to activate/inactivate fast freezing, which is indicated by the right LED light and the running sound of both compressors. Programming start-of-work timer Press this timer setting button until the second line on the LED screen shows “T ”, then use the “D”... -
Page 11: Side Operation Panel
4.2 Side operation panel The panel on the left of the cryochamber controls the specimen head feeding, cryochamber illumination, and UV sterilizing. UV sterilization Press this UV sterilization button to turn on the UV lamp and sterilize the cryochamber, as indicated by the indicator light on the upper left corner of the button. -
Page 12: Identification And Operation Of Mechanical Parts
4.3 Identification and Operation of Mechanical Parts Blade holder Anti-Roll Plate Glass Fastening Screw Blade Clamping Lever Lateral Adjustment Lever Angle Adjustment Lever Anti-Roll Plate Adjusting Knob Clearance Angle Adjusting Screw Blade Holder Base Clamping Lever To move the entire blade holder forward or backward, release the base clamping lever (counterclockwise) on the left and then manually move the holder. -
Page 13: Changing Blade
Changing blade Release the blade clamping lever on the upper right to open the blade clearance, insert a new blade from left to right and then lock the clamp lever. Note: Microtome blades are extremely sharp and can cause severe Injuries - please always use good laboratory practice when handling them! Adjust the angle of the blade... -
Page 14: Handwheel
The anti-roll plate can be finely adjusted using the knurled screw. • Turn the screw counter clockwise to raise the height of the anti-roll plate. • Turn the screw clockwise to lower the height of the anti-roll plate. Note: Always adjust the height of the anti-roll plate in small increments. Handwheel The handwheel can be locked at any position. -
Page 15: Sectioning Procedures
Sectioning procedures • After the specimen orientation and the blade angle have been set, trimming can be carried out using the trimming function. • Place the anti-roll plate against the blade. • Turn the hand wheel in a clockwise direction to carry out sectioning. ▪... -
Page 16: Recommended Temperature Ranges
Recommended Temperature Ranges for Sectioning of Different Types of Fresh Specimen Specimen Type Blade Temperature Specimen Temperature Adipose Tissue -35°C to -40°C -30°C or below Bone Marrow -25°C to -30°C -20°C Brain -20°C -12°C Breast -35°C -25°C Breast with Fat -35°C to -40°C -30°C or below Cervix... -
Page 17: Troubleshooting
5. Troubleshooting Problem Possible Causes → Solution 1. Specimen is too warm → Lower specimen temperature 2. Blade holder too warm → Lower chamber temperature. Tip – use freezer spray on clamp plate and blade to confirm. Sections overlap or 3. -
Page 18: Cleaning And Maintenance
6. Cleaning and Maintenance Notes: • For the examination and re-adjustment of the microtome, a routine maintenance should be performed by trained service technician once per year. • Keep the glass window open to prevent the chamber from trapping moisture when the instrument is not in use. -
Page 19: Transportation
7. Transportation To guarantee trouble-free function of the instrument after transportation, please follow the instructions below for transportation: • Shutting down the instrument for transportation: turn off the instrument, unplug the unit. • Remove all section waste and movable parts out of the cryochamber, including the blade, brush shelf, blade holder, and all other accessories as well as tools •... - Page 20 when dealing with these chemicals, and consideration must be given to the potential for hazard when dealing with particular chemicals. • Do not remove any panels or covers. The instrument does not have any user serviceable parts. • The instrument must be properly connected to a grounded outlet via the Mains input supply. •...
-
Page 21: Accessory List
9. Accessory List Item Description Qty. Special Note Base Unit Disposable Blade Holder 2-in-1 low and high profile Handwheel Handle Specimen Disc Power Cord Brush Heated Glass Door Removable Operator Manual... -
Page 22: Limited Warranty
10. Limited Warranty What your warranty covers: • Defects in materials or workmanship that occur under normal use and care. For how long after your purchase: • Two years from the date of shipment. What we will do: • Repair or replace your product. How you get service: •...
Need help?
Do you have a question about the Basics CRY85 and is the answer not in the manual?
Questions and answers