Table of Contents
Advertisement
Quick Links
Advertisement
Table of Contents

Summary of Contents for ACE CAM A16
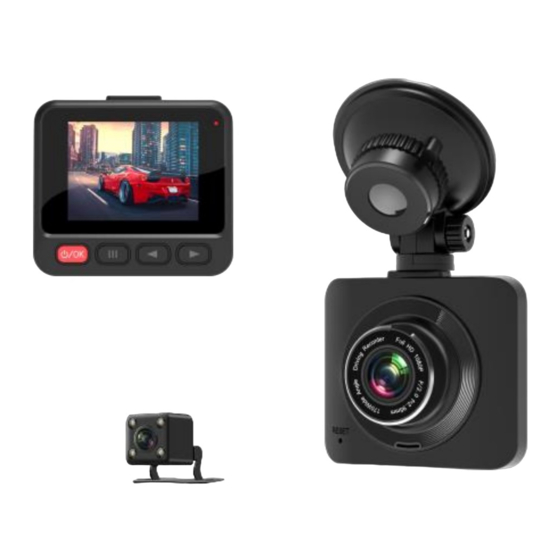
- Page 1 AceCam A16 User Manual Document Your Life...
-
Page 2: Table Of Contents
Contents Product Introduction Before Using Controls Function Operation Guide Recording Video Taking pictures Playback Settings... -
Page 3: Product Introduction
Product Introduction The AceCam A16 Dash Cam is a device that can record video and audio information while driving. With this dvr (Digital Video Recorder) camera, you can protect yourself and provide clear evidence from a car accident, vehicle damage (with motion activated recording after your car is parked), unscrupulous drivers and police officers, and/or other vehicle incidents. - Page 4 your car with a car charger. If your car is not on and the charger is not charging the device, the built-in battery is very small, and will only hold the charge for a very short period. Upon first use, the dash camera may need to be charged for up to 30 minutes for a base charge to build up.
-
Page 5: Controls
CONTROLS Short press →OK Long press →Power ON/OFF Short press →Mode Long press →Menu In the menu →Up Short press in recording→Switch front and rear image In the menu →Down Short press in recording →Record audio ON/OFF FUNCTION 1. Cycle (Loop) Recording Cycle recording usually has 1 min, 3 min, or 5 min loop settings. -
Page 6: Operation Guide
4. Parking Monitor When you park your vehicle, you can turn on the parking monitor function to make the dvr camera record while parked to avoid (or record and provide evidence) any damage to your car like attempted theft, scratching, or denting. Please note that there is only a limited charge in your camera for these recordings;... -
Page 7: Recording Video
8. Menu: In standby mode, quickly press the MENU button once to enter the main menu setting. Quickly press the UP/DOWN buttons to move within the options, then quickly press the OK button to select. When finished, quickly press the MENU button to exit. -
Page 8: Taking Pictures
Taking pictures 1. Press the MODE button. In the upper left corner of the screen, the icon will be dispalyed. 00000 12M 4032x3024 AUTO 2021/03/13 16:26:16 2. Press the OK button to take a picture. Note: Hold the camera steady when taking pictures, otherwise the pictures will come out blurry. -
Page 9: Settings
In playback mode, continually hold the MENU Menu button, select “Protection”to see protection (lock) options. Select“lock one” to protect the selected file, and“lock all” to protect all the files on the memory card. Select “unlock one” to unlock the selected files, and“unlock all” to unlock all the protected files on the memory card. - Page 10 Date/Time Set date and time Select the automatic power off delay Auto Power Off time Select the screen turning off delay Screensavers time Activate / Deactivate button pressing Beep ound sounds Browse settings using the UP/DOWN buttons and the OK button to edit and confirm a setting.
- Page 11 Video settings In video mode, press the MENU button. Select recording resolution Resolution Select recording split duration, or Loop Recording deactivate the cyclic recording function Activate / Deactivate WDR high dynamic range Exposure Adjust image exposure level...
- Page 12 Activate / Deactivate motion detection Motion Detection trigger recording Activate / Deactivate recording with Record Audio sound Activate / Deactivate date stamp on the Date Stamp recording Adjust sensitivity level for the gravity G-Sensor sensor Adjust sensitivity level for the parking Parking Monitoring mode Photo settings...
-
Page 13: Faq
Adjust sharpness level Sharpness Adjust the white balance according White Balance to the environment Select light sensitivity level Exposure Adjust image exposure level Activate / Deactivate date and time Date Stamp stamp on the photo FAQ: Q: Why does my dvr camera indicate “SD card Full”? A: 1) Please check if your memory card is an original brand high speed Class 10 memory card. - Page 14 2) Please check your dvr MENU settings if you have configured Loop Recording. You must select Loop Recording ‘ON’ for this function to enable overwriting of videos. 3) Please check your dvr MENU settings if you have turned OFF G-Sensor, Parking Monitor &...
- Page 15 Q: Why does my dvr freeze while recording? A: Please check if your memory card is an original brand high speed Class 10 memory card. If you use a lower class card like Class 4 or Class 6, it will indicate “SD card full”...
Need help?
Do you have a question about the A16 and is the answer not in the manual?
Questions and answers