
Related Manuals for VIP INTIPRDSG (GEN 3)

Summary of Contents for VIP INTIPRDSG (GEN 3)
- Page 1 Residential & Apartment Intercom Systems Installation Manual Supports models from: INT-Q1-22...
-
Page 2: Table Of Contents
4. Additional Configuration 4.1 Adding IP Cameras to an Indoor Monitor 4.2 Adding Your Door Station to a VIP Vision NVR 4.3 Issuing Cards (For Door Stations with a Built-In Card Reader) 4.4 Adding Entry Codes (For Door Stations with a Built-In Keypad) 4.5 Setting Time &... - Page 3 5. Mobile App 5.1 Remote Access for Residential Systems 5.2 Push Notifications 5.3 Apartment Intercom Remote Access 6. Using the Intercom System 6.1 Making and Answering Calls 6.2 Taking Videos / Snapshots from the Indoor Monitor 6.3 Viewing Your Videos/Snapshots from the Indoor Monitor 6.4 Calling Between Indoor Monitors 6.5 Create Favourites 7.
-
Page 4: Pre-Installation
Please note that only the Door Station has a web interface - the Indoor Monitor does not. • If this is your first time purchasing a VIP Residential IP Intercom, we recommend setting it up on the bench before installation, to familiarize yourself with the product. -
Page 5: Device Models & General Use
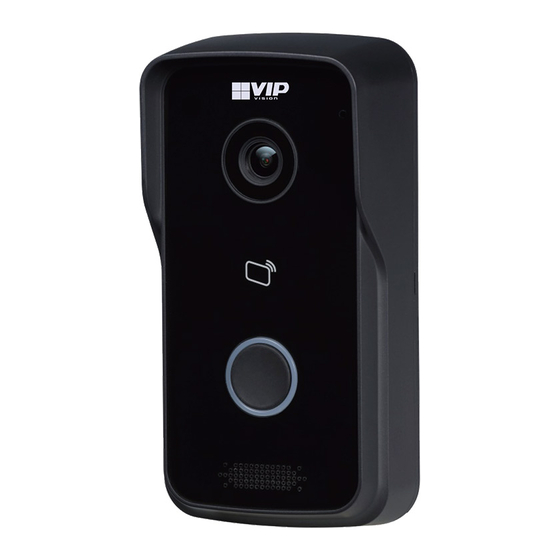
1.2 Device Models & General Use Single Call-button IP Door Stations Image Model INTIPRDSG (GEN 3) INTIPRDSG-P INTIPRDSJ INTIPRDSD IP Only 2-Wire & IP IP Only IP Only Card Reader Features 12V Out for Relay/INTIPDM 12V Out for Relay/INTIPDM Card Reader Keypad for Unlock 12V Out for Relay/INTIPDM Max Additional... - Page 6 12VDC / PoE 12VDC / PoE 12VDC INTIPMONPOE) GEN.3 2-Wire INTIPRDSG(GEN.3) INTIPMON2W2 INTIPPOE2W2 2-Wire & IP 2-Wire Network 7” 2-Wire Monitor 12V Out for Relay/INTIPDM Controller Power via INTIPPOE2W Power via INTIPPOE2W 48VDC VIP Vision Intercom Installation Manual - Version: INT-Q1-22...
-
Page 7: Wiring & Connections
2. Wiring & Connections 2.1 Connection Diagrams - Door Stations 2.1.1 INTIPRDSG, INTIPRDSG-P & INTIPRDSG (GEN.3) - G Series Residential Door Station INTIPRDSG-P INTIPRDSG(GEN.3) Name Description Ethernet Port Power over Ethernet & network connectivity Reset Button Reset configuration back to factory default settings Tamper Switch The Door Station will generate an alarm sound if it is being removed from the wall EOC1 (GND) - Page 8 Exit button dry contact input, triggers door relay when shorted to GND RS485A For use with the INTIPDM RS485B For use with the INTIPDM ALM_IN Alarm input contact ALM_NO Alarm normally open contact ALM_COM Alarm common contact VIP Vision Intercom Installation Manual - Version: INT-Q1-22...
- Page 9 2.1 Connection Diagrams - Door Stations (cont.) 2.1.3 INTIPRDSJ - J Series Residential Door Station Name Description Ethernet Port Power over Ethernet & network connectivity Reset Button Reset configuration back to factory default settings Tamper Switch The Door Station will generate an alarm sound if it is being removed from the wall 12V DC positive input 12V DC negative input Door relay normally open contact...
- Page 10 Weigand card reader D1 connection WG_D0 Weigand card reader D0 connection 8-Pin Connector WG_LED Weigand card reader LED connection Ground connection for 12V_OUT RS485B For use with the INTIPDM RS485A For use with the INTIPDM VIP Vision Intercom Installation Manual - Version: INT-Q1-22...
-
Page 11: Connection Diagrams - Indoor Monitors
2.2 Connection Diagrams - Indoor Monitors 2.2.1 INTIPMONGW / INTIPMONGB Indoor Monitor Note: Below is INTIPMONGW and INTIPMONGB Indoor Monitor, other models vary slightly. Name Description Power Input 12VDC Power Input Alarm Ports (For use with alarm sensors, 6 Alarm Inputs when using the Indoor Monitor as a basic 1 Alarm Output alarm) -
Page 12: Door Strike Wiring
If you require a push to exit button, ensure it is a NO button. Wire the latch as per one of the three above methods, then connect your button. For Door Station latch timing, see section 4.7. VIP Vision Intercom Installation Manual - Version: INT-Q1-22... -
Page 13: Intercom Wiring
2.4 Intercom Wiring 2.4.1 Selecting a Cable Type There are 2 different cable types that can be used for wiring the intercom system, network cabling (CAT5e/6) or 2-wire cabling. Configuration is the same for both network and 2-wire intercoms installations, but different hardware is required. - Page 14 2.4 Intercom Wiring (cont.) 2.4.3 IP Intercom Wiring for Network Connectivity Using a PoE Switch connected to a router OR using a DC power supply and an Ethernet switch connected to a modem. VIP Vision Intercom Installation Manual - Version: INT-Q1-22...
- Page 15 2.4 Intercom Wiring (cont.) 2.4.4 GEN.3 2-Wire Intercom Using the INTIPPOE2W2 connected to a router (optional) and 48VDC Power Supply. This wiring configuration is only suitable for use with the INTIPRDSG (GEN.3) Door Station and INTIPMON2W2 2-Wire Indoor Monitor. No other devices will work in this configuration, and will be permanently damaged if connected. 2-Wire Wiring 2-Wire plus IP Intercom Products Wiring Visit...
-
Page 16: Intercom Setup
Villa Fig 3.2: Installation Selection Config Mode 5. Select First-time Config, then select OK. (Fig 3.3) First-time Config Replace the Existing Main VTH Fig 3.3: First-time Config Continued on next page g VIP Vision Intercom Installation Manual - Version: INT-Q1-22... - Page 17 3.1 One Key Configuration (cont.) Device Init 6. The monitor will check to see if it can find a free IP address from your DHCP Static IP modem via DHCP. If successful it will select DHCP, else it will select Static Local IP 192.168.1.100 IP and prompt you to set one manually.
- Page 18 24-Hour configuration is complete, the devices Gateway 192.168.1.1 Date 01-01-2020 will reboot. Time 00:00:00 Video NTSC Standard Only one main VTO can be exist in the system Back Fig 3.9: VTO Config VIP Vision Intercom Installation Manual - Version: INT-Q1-22...
-
Page 19: Manual Configuration Of A Residential Intercom System
3.2 Manual Configuration of a Residential Intercom System This setup method is intended for configuring single call-button Door Stations to call one or more Monitors in a group. This method requires a Windows computer for configuration and has the advantage of allowing you to customize settings on the Door Station to suit your requirements, as you will be logged into the Door Station’s web interface. - Page 20 Gateway to suit your network. If no remote connection is required, use the example in Fig 3.10. Select Save. The Door Station will reboot. (Fig 3.13) Fig 3.13: Door Station Network Settings VIP Vision Intercom Installation Manual - Version: INT-Q1-22...
- Page 21 3.2 Manual Configuration of a Residential Intercom System (cont.) 3.2.2 Configuring the Main Monitor Follow the steps below to configure the Main Monitor. When the call button is pressed on the Door Station this Monitor Call Info 14:50 and any its extensions will ring. 1.
- Page 22 Status button OFF then ON to save User Name admin Factory Reset the settings. Ensure it is left in the ON Password position. (Fig. 3.18) Reset MSG Enable Status Fig 3.18: VTO Config VIP Vision Intercom Installation Manual - Version: INT-Q1-22...
- Page 23 3.2 Manual Configuration of a Residential Intercom System (cont.) 3.2.3 Configuring additional Door Stations Follow the steps below to add an additional Door Station to the system. Before starting, you will need to know the IP address, password and VTO Number of the existing Main Door Station. 1.
- Page 24 Door Station to test the VTO Config connection. Sub_VTO1 Name Front Door Search Device VTO IP Address 192.168.1.109 User Name admin Factory Reset Password ••••••••• Reset MSG Enable Status Fig 3.23: VTO Config VIP Vision Intercom Installation Manual - Version: INT-Q1-22...
- Page 25 3.2 Manual Configuration of a Residential Intercom System (cont.) 3.2.4 Configuring additional Monitors Follow the steps below to add an additional Monitor to the system. This monitor will act as an extension and will ring when the Call Info 14:50 Main Monitor is called.
-
Page 26: Manual Configuration Of An Apartment Intercom System
DST if you are in a location that has daylight savings. NOTE: Ensure the time & date is set correctly, otherwise you may be unable to add the device to the phone app. Continued on next page g VIP Vision Intercom Installation Manual - Version: INT-Q1-22... - Page 27 3.3 Manual Configuration of an Apartment Intercom System (cont.) 9. Select Network, then Basic. Set the IP Address, Subnet Mask and Default Gateway to suit your network. If no remote connection is required, use the example in Fig 3.1. Select Save. The Door Station will reboot. (Fig 3.28) 10.
- Page 28 11. In this example we are adding two Indoor Monitors, with Room numbers 1 & 2. Select the Add button and set Room No. to 1. Select Save. Repeat this step for the second monitor with Room No. 2. You should now have both monitors added to the list. VIP Vision Intercom Installation Manual - Version: INT-Q1-22...
- Page 29 3.3 Manual Configuration of an Apartment Intercom System (cont.) 3.3.3 Configuring the Main Monitor Follow the steps below to configure a Main Monitor. On a multiple call-button Door Station, you can assign a different Main Monitor to each button (Refer to Section 3.3.4). On an Apartment Door Station with a keypad you must type in the room number of the Main Monitor you are calling, then press the call button.
- Page 30 17. Allow up to 10 minutes for the Monitors to connect to the Door Station. Once the icon disappears, you can press the call button on the Door Station to test the connection. VIP Vision Intercom Installation Manual - Version: INT-Q1-22...
- Page 31 3.3 Manual Configuration of an Apartment Intercom System (cont.) 3.3.5 Assigning a Main Monitor to a Button on a multiple call-button Intercom Door Station When configuring a multiple call-button Intercom additional setup is required. For the call-buttons to call, they must be assigned to a Main Monitor.
-
Page 32: Re-Configuring An Existing Intercom For Use On The Network
12. If more then 1 Indoor Monitor and 1 Door Station need to be re-configured follow the steps above, then follow Section 3.2.3, Steps 6 to 17, and Section 3.2.4 Steps 4 to 9 Fig 4.13: Room List VIP Vision Intercom Installation Manual - Version: INT-Q1-22... -
Page 33: Additional Configuration
4. Additional Configuration 4.1 Adding IP Cameras to an Indoor Monitor You can add cameras that are connected to an NVR or to an external PoE switch to an Indoor Monitor for live viewing. We recommend using the Sub/Extra Stream rather than the Main Stream. Requirements: •... -
Page 34: Adding Your Door Station To A Vip Vision Nvr
Fig 4.1: Camera List (Device Search) 3. Tick the box next to the IP address, then select Add. The Door Station will now be added to your VIP Vision NVR. 4. If not found in a device search, press Manual Add and enter the IP address, username & password. (Fig 4.2) Fig 4.2: Camera List (Manual Add) -
Page 35: Issuing Cards (For Door Stations With A Built-In Card Reader)
4.3 Issuing Cards (For Door Stations with a Built-In Card Reader) Cards only need to be learnt into the master Door Station, any other Door Stations that are connected to the master, will also unlock when the card is swiped. 1. -
Page 36: Adding Entry Codes (For Door Stations With A Built-In Keypad)
Door Station, and Door 2 is the relay on the INTIPDM. (Fig 4.7) Fig 4.7: Add Password 5. Select Save. To unlock the door via keypad code, type # <User Code> # (E.g. #384167#) VIP Vision Intercom Installation Manual - Version: INT-Q1-22... -
Page 37: Setting Time & Date
4.5 Setting Time & Date The Master Door Station will push it’s time & date settings to each Indoor Monitor and Door Station connected to it. However, if you wish to set DST or an NTP server it must be set for each Door Station. 1. -
Page 38: Door Station Latch Timing
MIC Volume Talk Volume password (123456) Forward 2. In the Ring menu, you can adjust General volume settings to suit the installation Ring Mute environment. (Fig 4.11) Product Info Fig 4.11: Add Password VIP Vision Intercom Installation Manual - Version: INT-Q1-22... -
Page 39: Changing The Ip Address Of A Windows Computer
4.9 Changing the IP Address of a Windows Computer 1. Open Settings. 2. Select Network & Internet. (Fig 4.12) 3. Select Status. 4. Select Change Adapter Options. (Fig 4.13) Fig 4.12: Settings Fig 4.13: Status Continued on next page g Visit help.c5k.info for more information and support... - Page 40 9. Once finished configuring the intercom system, change the adapter settings back to normal by following steps 1-6 and clicking Obtain an IP address automatically. Fig 4.14: Network Connections Fig 4.16: IPv4 Properties Fig 4.15: Ethernet Properties VIP Vision Intercom Installation Manual - Version: INT-Q1-22...
-
Page 41: Finding Available Ip Addresses
4.10 Finding Available IP Addresses If you wish to connect your IP intercom to the network for remote access, you must give each Indoor Monitor and Door Station an IP address, within your network range. In this example, we will be using a Windows computer which is connected to a modem to find the IP address of the computer, and available IP addresses to use for the Intercom. -
Page 42: Using Config Tool To Find & Initialise Devices On A Windows Computer
4. An error may appear stating Automatic Detection Failed, ignore this and press Complete. (Fig 4.21) 5. Press the Refresh button. The device will now be initialised. Fig 4.20: Enter Details Fig 4.21: Initialisation Complete VIP Vision Intercom Installation Manual - Version: INT-Q1-22... -
Page 43: Modify Device Ip Addresses With Vdp Config Tool
4.13 Modify Device IP Addresses with VDP Config Tool When setting up multiple intercom devices, it is quicker to change the local IP address of the device with the Config Tool. 1. Press the Search Settings button and enter the password of the device(s) you wish to modify. (Fig 4.22) Fig 4.22: Device Search 2. -
Page 44: Mobile App
10. Once all your details have been entered correctly, select the Save icon in the top right corner. The display for your front door will be brought up. 11. You have now successfully connected your VIP Residential IP Intercom for remote access. Fig 5.2: SN/Scan Fig 5.3: Add Device... -
Page 45: Push Notifications
5.2 Push Notifications When the Door Station is pressed, you can get a notification to your phone using the DMSS application. Before beginning, follow the steps in Section 5.1. 1. Open the mobile application, then select the Home icon in the top left corner. 2. -
Page 46: Using The Intercom System
Message. Security Alarm Unread To view snapshots on the Indoor Monitor, Guest Message select Info then Video Pictures. Publish Info Video Pictures 2020-08-14 04:00 < > Edit Clear Fig 6.2: Guest Messages VIP Vision Intercom Installation Manual - Version: INT-Q1-22... -
Page 47: Calling Between Indoor Monitors
6.4 Calling Between Indoor Monitors If you have more than one Indoor Call User Monitor, you can make calls between the monitors. Recent Call On the Indoor Monitor select Call then Contact Call User. Call User If you are calling from the Master monitor to an Extension monitor, enter #1. -
Page 48: Troubleshooting
The Door Station will reboot, and it will be factory reset. The tamper alarm will trigger when the Door Station boots up, as it is not mounted to the wall. Fig 7.2: INTIPRDSG factory reset VIP Vision Intercom Installation Manual - Version: INT-Q1-22... - Page 49 7. Troubleshooting (cont.) INTIPADSD 1. Power up the Door Station and wait until it has booted. 2. Remove the Door Station from the wall by removing the 2 screws on the bottom, while leaving it powered on. The tamper alarm will trigger, wait until the sound stops.
- Page 50 Ensure the Time & Date is set correctly on the Door Station. Door Station makes an alarm sound • Check that the tamper switch is fully depressed when the Door Station is when it is turned on mounted. VIP Vision Intercom Installation Manual - Version: INT-Q1-22...
- Page 51 Notes Visit help.c5k.info for more information and support...
- Page 52 help.c5k.info For detailed technical support and software downloads, help.c5k.info visit our Help Centre at: All products, designs and software may be subject to change without prior written notice. Information, layout and graphics presented in this guide are the property of their respective owners. www.c5k.info for more information.
Need help?
Do you have a question about the INTIPRDSG (GEN 3) and is the answer not in the manual?
Questions and answers