Samsung SMH9151 User Manual
Samsung microwave oven user manual
Hide thumbs
Also See for SMH9151:
- User manual (36 pages) ,
- Troubleshooting manual (13 pages) ,
- User manual (36 pages)

Related Manuals for Samsung SMH9151


Summary of Contents for Samsung SMH9151
-
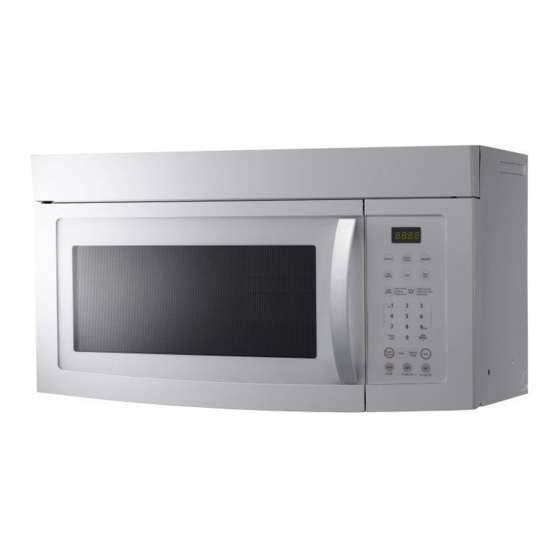
Page 1: Microwave Oven
SMH9151 Microwave Oven user manual imagine the possibilities Thank you for purchasing this Samsung product. Please register your product at www.samsung.com/global/register... - Page 2 The Child safety lock function of the new Over the Range (OTR) oven prevents children from playing with the oven and accidentally harming themselves or damaging the oven. • Cook-top Lighting Illuminate your cooking experience with Cook-top Lighting and even control the degree of lighting (High/Low/Off). 2_ features of your new microwave oven...
-
Page 3: Safety Information
safety information PRECAUTIONS TO AVOID POSSIBLE EXPOSURE TO EXCESSIVE MICROWAVE ENERGY A. Do not attempt to operate this oven with the door open since open-door operation can result in harmful exposure to microwave energy. It is important not to defeat or tamper with the safety interlocks. B. -
Page 4: What You Need To Know About Safety Instructions
Congratulations on your new Samsung microwave oven. This manual contains important information on the installation, use and care of your appliance. Please take time to read this manual to take full advantage of your microwave oven’s many benefits and features. -
Page 5: Important Safety Instructions
Stir the liquid both before and halfway through heating it. c. Do not use straight-sided containers with narrow necks. d. After heating, allow the container to stand in the microwave oven for a short time before removing the container. -
Page 6: Grounding Instructions
3. The longer cord should be arranged so that it will not drape over the counter top or tabletop where it can be pulled on by children or tripped over accidentally. If you use an extension cord, the interior light may flicker and the blower may vary when the microwave oven is on. Cooking times may be longer, too. - Page 7 SEVERE WARNING SIGNS FOR INSTALLATION WARNING The installation of this appliance must be performed by a qualified technician or service company. - Failing to do so may result in electric shock, fire, an explosion, problems with the product, or injury. Unpack oven, remove all packaging material and examine the oven for any damages such as dents on the interior or exterior of the oven, broken door latches, cracks in the door, or a door that is not lined up correctly.
- Page 8 - Unplug the power plug by holding the plug. - Failing to do so may result in electric shock or fire. When the power plug or power cord is damaged, contact your nearest service center. CAUTION SIGNS FOR INSTALLATION CAUTION This appliance should be positioned in such a way that it is accessible to the power plug. - Failing to do so may result in electric shock or fire due to electric leakage.
- Page 9 If any foreign substance such as water has entered the appliance, unplug the power plug and contact your nearest service center. - Failing to do so may result in electric shock or fire. Do not touch the power plug with wet hands. - This may result in electric shock.
- Page 10 Do not stand on top of the appliance or place objects (such as laundry, oven cover, lighted candles, lighted cigarettes, dishes, chemicals, metal objects, etc.) on the appliance. - Items, such as a cloth, may be caught in the door. - This may result in electric shock, fire, problems with the product, or injury.
-
Page 11: Table Of Contents
CookwAre guiDe Cooking guiDe Checking the parts Warranty and service information Setting up your microwave oven Checking the control panel Child lock Demonstration mode Setting the time Using the Kitchen Timer Button Using the One Minute+ Button... - Page 12 Cleaning the door and door seals Cleaning the turntable and roller rings Cleaning the grease filter Storing and repairing your microwave oven Replacing the Cooktop/Night light Replacing the oven light Replacing the charcoal filter Check these points if your microwave oven… AppenDix Specifications wArrAnty...
-
Page 13: Setting Up Your New Microwave Oven
Carefully unpack your microwave oven, and make sure you’ve received all the parts shown below. If your microwave oven was damaged during shipping, or if you do not have all the parts, contact Samsung Customer Service. (Refer to the “WARRANTY AND SERVICE INFORMATION” on page 14.) -
Page 14: Warranty And Service Information
WARRANTy ANd SERVICE INFORmATION To help us to serve you better, please complete the enclosed registration card and promptly return it by mail. If the registration card is missing, you can call Samsung Electronics, Inc., at 1-800-sAmsung (726-7864) or register online at www.samsung.com/global/register. -
Page 15: Checking The Control Panel
ChECkING ThE CONTROL PANEL setting up your new microwave oven _15... - Page 16 Button one minute+ Button Refer to “Using your microwave oven” below for detailed information on the buttons described in the table above. 16_ setting up your new microwave oven The display displays the time when the microwave is not being used, as well as your selected cook times and cooking functions.
-
Page 17: Child Lock
ChILd LOCk The Child Lock function allows you to lock the microwave buttons so that the microwave oven cannot be operated accidentally. The oven can be locked at any time. Activating/deactivating If you want to activate or deactivate the child lock function, press the start button for 3 seconds. -
Page 18: Using Your Microwave Oven
The following section describes everything you need to know about using your microwave oven. USING ThE kITChEN TImER BUTTON This microwave allows you to use your microwave oven as a timer. Use the Kitchen Timer for timing up to 99 minutes, 99 seconds. 1. Press the kitchen timer button. -
Page 19: Using The Auto Cook Buttons
The potato auto cook button is perfect for cooking potatoes at preset times and power levels. You can cook up to 4 potatoes. Example: Cooking 2 potatoes. Pierce the potatoes with a fork several times before putting them in the microwave oven. 1. Press the Baked potato button twice. 2. The oven will start automatically. - Page 20 2 potatoes 3 potatoes 4 potatoes Vegetables Fresh Vegetables once Frozen Vegetables Pizza Slice 1 slice 2 slice 3 slice 20_ using your microwave oven Category Beverage Bacon Frozen dinner will Frozen Breakfast times to instruCtions press once Use only one microwave popcorn bag at a time.
- Page 21 Follow package instructions for covering and standing. Use this pad for frozen sandwich, breakfast entree, etc. Let oven cool for at least 5 minutes before using again. Amount : 4 to 8 oz using your microwave oven _21...
-
Page 22: Using The Auto Defrost Button
You can use small pieces of aluminum foil to shield foods such as chicken wings, leg tips, and fish tails, but the foil must not touch the sides of the oven as foil causes arcing, which can damage the oven lining. 22_ using your microwave oven... -
Page 23: Using The Auto Reheat Button
DisplAy once rh-1 twice rh-2 three times rh-3 is displayed. using your microwave oven _23 stAnDArD Amount 2.5 - 6.0 lbs. 0.5 - 3.0 lbs. 0.5 - 3.0 lbs. 2.5 - 6.0 lbs. 0.5 - 3.0 lbs. 0.1 - 2.0 lbs. - Page 24 The ‘right’ temperature of the food varies from person to person. Use the more (9)/less (1) buttons to select your temperature preference. Allow food to stand 1 to 5 minutes before serving. 24_ using your microwave oven DireCtions Use only pre-cooked, refrigerated foods. Cover the plate with a vented plastic wrap or waxed paper tucked under the plate.
-
Page 25: Using The Soften/Melt Button
1. Use the number buttons to enter the cook time. 2. Press the stArt button. 3. When the cook time is over, four beeps will sound and If you do not enter a power level, the microwave oven cooks at the High Power Level by default. Cooking at lower power levels Cooking at high power does not always give you the best results with foods that require slower cooking, such as roasts, baked goods, or custards. - Page 26 The power levels are listed below with examples of foods and liquids best cooked at each level, and the amount of microwave power being used. power level 10 (high) 26_ using your microwave oven miCrowAve output Boiling water. Cooking ground beef.
-
Page 27: Cookware Guide
To cook food in the microwave oven, the microwaves must be able to penetrate the food without being reflected or absorbed by the dish. It is important to choose the correct cookware, therefore look for cookware that is marked microwave-safe. - Page 28 CookwAre Plates, cups, napkins and Kitchen paper Recycled paper Plastic Containers Cling film Freezer bags Wax or grease-proof paper Thermometer Straw, wicker, and wood : Recommended : Use Caution : Unsafe 28_ cookware guide miCrowAve-sAFe Comments For short cooking times and warming. Also to absorb excess moisture. Do not use recycled paper towels, which may contain metal and may catch fire or cause arcing.
-
Page 29: Cooking Guide
cooking guide mICROWAVES Microwave energy actually penetrates food, attracted and absorbed by the water, fat and sugar content. The microwaves cause the molecules in the food to move rapidly and the rapid movement of these molecules creates friction and the resulting heat cooks the food. Cooking meat Place the meat fat-side down on a microwave-safe roasting rack in a microwave-safe dish. - Page 30 Cooking poultry Place the poultry on a microwave-safe roasting rack in a microwave-safe dish and cover with wax paper to prevent spattering. Use aluminum foil to shield the bone tips, thin pieces of meat, or areas that are starting to overcook. Check the temperature in several places before letting the poultry stand the recommended time.
- Page 31 cooking guide Cooking eggs Never cook eggs in their shells, and never warm up hard-boiled eggs in their shells as they can explode. Always pierce whole eggs to keep them from bursting. wArning Cooking vegetables Vegetables should be washed prior to cooking. Usually no extra water is needed. If dense vegetables such as potatoes, carrots and green beans are being cooked, add about ¼...
-
Page 32: Cleaning The Exterior
CLEANING ThE ExTERIOR It’s best to clean spills on the outside of your microwave oven as they occur. Use a soft cloth and warm, soapy water. Rinse and dry. Do not get water into the vents. Never use abrasive products or chemical solvents. -
Page 33: Cleaning The Grease Filter
STORING ANd REPAIRING yOUR mICROWAVE OVEN If you need to store your microwave oven for a short or extended period of time, choose a dust-free, dry location. Dust and dampness may adversely affect the ability of the microwave parts. -
Page 34: Replacing The Cooktop/Night Light
8. Replace the bulb with a 40 watt appliance bulb. 9. Replace the bulb holder. 10. Replace the vent grille and the 3 screws. 11. Turn the power back on. 34_ cleaning and maintaining your microwave oven 1. push 2. put up... -
Page 35: Replacing The Charcoal Filter
If your oven is vented to the inside, the charcoal filter should be replaced every 6 to 12 months and more often if necessary. The charcoal filter cannot be cleaned. To order a new charcoal filter, contact the Parts Department at 1-800-627-4368 or your Samsung dealer.You can also order online at www.samsungparts. (Charcoal filter part no.: De63-00367e) 1. -
Page 36: Check These Points If Your Microwave Oven
troubleshooting ChECk ThESE POINTS IF yOUR mICROWAVE OVEN… proBlem display is not working. The display is working, but the power won’t come on. Is the power going off before the set time has elapsed? Cooks food too slowly. has sparks or arcing. The turntable makes noise or becomes stuck. Causes TV or radio interference. 36_ troubleshooting solution Make sure the plug is properly connected to a grounded outlet. If the wall outlet is controlled by a wall switch, make sure the wall switch is turned on. -
Page 37: Specifications
Power Source Power Consumption Power Output Oven Cavity dimensions Outside dimensions Shipping dimensions Net Weight Gross Weight smh9151 1.5 CuFt 10 power levels, including defrost 99 minutes, 99 seconds 120 VAC, 60 Hz 1580 Watts 1000 Watts 19 5/16”(W) X 9 5/8”(H) X 14 3/8”(D) 29 7/8”(W) X 16 1/2”(H) X 15 1/16”(D) 33 3/8”(W) X 19 15/16”(H) X 19 13/32”(D) - Page 38 SAMSUNG or SAMSUNG’s authorized service center. SAMSUNG will repair or replace this product, at our option and at no charge as stipulated herein, with new or reconditioned parts or products if found to be defective during the limited warranty period specified above. All replaced parts and products become the property of SAMSUNG and must be returned to SAMSUNG.
- Page 40 QUESTIONS OR COMMENTS Country CAll or visit us online At 1-800-SAMSUNG (7267864) www.samsung.com/us Code No.: DE68-03588C-01...