Table of Contents
Advertisement
Quick Links
Advertisement
Table of Contents

Summary of Contents for ABL POLEMH6
- Page 1 POLEMH6 Installation manual Article No.: 0301697_EN_a...
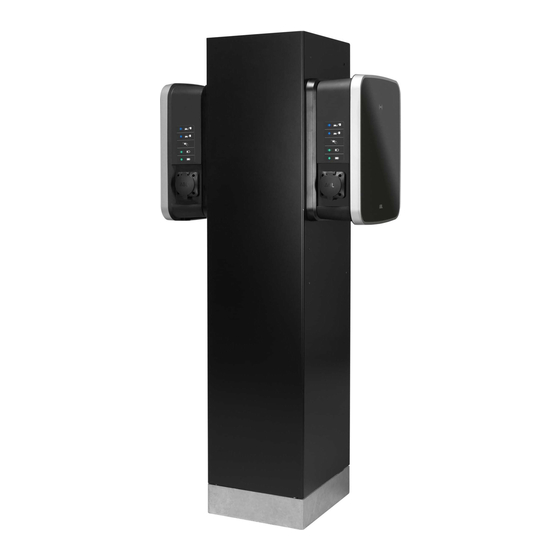
- Page 2 +49 (0) 9123 188-188 info@abl.de www.ablmobility.de Customer Service +49 (0) 9123 188-0 service@abl.de www.ablmobility.de/de/service/support/ NOTE Please note that the wallboxes shown on the cover sheet are not included with the POLEMH6, but can be ordered separately for a fee. Revision: 0301697_EN_a, version: 10/12/2021...
-
Page 3: Table Of Contents
Installing the POLEMH6 on the EMH9996 foundation Specifications for the mechanical and electrical installation of the wallboxes Installing the eMH3 Wallbox on the POLEMH6 Electrical connection of the POLEMH6 Note on the installation of a second eMH3 Wallbox Safety instructions for start-up and operation... -
Page 4: Additional Technical Information
Intended use The POLEMH6 mounting pole is designed for the outdoor installation of one or two eMH3 Wallboxes. In order to en- sure the necessary stability, the POLEMH6 can be installed on the optionally available EMH9996 concrete foundation or on a self-constructed concrete foundation. To protect the installed wallbox from the weather, ABL offers the com- patible WPR36 weather shield. -
Page 5: Important Information General
ƒ Please read this manual carefully. ƒ Heed all warnings and follow all instructions. ƒ Only use accessories intended and sold for the product by ABL. ƒ Do not install this device in close vicinity to running water, water jets or areas subject to flooding. -
Page 6: User Information
POLEMH6 for charging and can be connected to the charging cable without tension. ƒ Make sure that the POLEMH6 is always closed and locked when in use. All authorised users must be aware of the 'unlock' position of the key. - Page 7 Important information – User information ƒ An eMH3 Wallbox installed on the POLEMH6 may only be operated after it has been installed without any techni- cal faults and subsequently approved by a qualified specialist electrical company. NOTE Changes to functions and design features Please note that all technical details, specifications and design characteristics of the product may be changed without prior notice.
-
Page 8: Dimensional Drawings And Dimensions
Dimensional drawings and dimensions – POLEMH6 Dimensional drawings and dimensions The dimensions and mounting points of the POLEMH6 as well as the optional EMH9996 foundation are shown in the following dimensional drawings. POLEMH6 Mounting pole for installing up to two eMH3 Wallboxes, front and rear view as well as view from below... -
Page 9: Emh9996
EMH9996. ƒ If you wish to install and operate the POLEMH6 on a self-made foundation, a stable base and fault-free oper- ation outdoors cannot be guaranteed. - Page 10 Detailed view of the top side These four threaded anchors are used to mount the base of the POLEMH6 mounting pole using the washers and M10×35 hexagon socket screws supplied. The two empty conduits are used to feed the supply and data cables through the foundation into the POLEMH6.
-
Page 11: Introduction To The Polemh6
Thank you very much for choosing the POLEMH6 mounting pole from ABL! The POLEMH6 is designed for the outdoor installation of up to two ABL eMH3 Wallboxes. The internal small distribu- tion box with terminal block provides protection against contact and weather and allows virtually maintenance-free wiring of the wallbox(es) to the electricity grid. -
Page 12: Accessories
Introduction to the POLEMH6 – Accessories Accessories The following accessories for the POLEMH6 mounting poles are available separately: ƒ EMH9996 Precast concrete foundation for installing the mounting pole POLEMH6 h = 420 mm, w = 420 mm, d = 420 mm ƒ... -
Page 13: Installation
ƒ Suitable collision protection must be provided on site to provide the POLEMH6 with mechanical protection from collision with a vehicle. ƒ The minimum distance between the vehicle and the POLEMH6 should be no less than 50 cm and no more than 150 cm. -
Page 14: Laying The Emh9996 Foundation
The optional EMH9996 concrete foundation from ABL provides a level installation surface for the POLEMH6 mounting pole and ensures the necessary stability and support via factory-inserted screw anchors. Please note: these installation instructions only describe how to install the POLEMH6 on the EMH9996 concrete foun- dation, which is available as an accessory. - Page 15 Alignment of the foundation Please note the following instructions for aligning the EMH9996: ƒ The top of the EMH9996 can be identified by the recessed threaded anchors for screwing the POLEMH6 in place. ƒ As the POLEMH6 can be mounted on the foundation in any direction (0°/90°/180°/270°), the empty conduits on the side of the EMH9996 can be aligned with the supply and data cables in the ditch as required.
-
Page 16: Installing The Polemh6 On The Emh9996 Foundation
Smooth out the surface. Installing the POLEMH6 on the EMH9996 foundation After placing the foundation, you can install the POLEMH6 on the EMH9996. Proceed as follows: Unlock the double cylinder pivot lever of the POLEMH6. - Page 17 Installation – Installing the POLEMH6 on the EMH9996 foundation Lift the unlocked housing cover upwards, pull it off the housing and set it aside. y Using a vacuum lifting tool or similar tool will make it easier to lift off the housing cover.
- Page 18 Installation – Installing the POLEMH6 on the EMH9996 foundation Use the slotted screwdriver to loosen the eight screws in the upper part of the small distribution board and pull off the upper part. Run the power line through the lower PG cable gland into the case of the small distribution board and secure the cable gland.
-
Page 19: Specifications For The Mechanical And Electrical Installation Of The Wallboxes
Specifications for the mechanical and electrical installation of the wallboxes The mechanical and electrical installation of the wallbox on the POLEMH6 must be carried out by qualified electri- cians: It is recommended that the installation be carried out by two persons. -
Page 20: Installing The Emh3 Wallbox On The Polemh6
Installation instructions eMH3 Installing the eMH3 Wallbox on the POLEMH6 This section describes how to install an eMH3 wallbox on the POLEMH6. Proceed as follows: Screw the mounting plate of the eMH3 Wallbox to one side of the mounting pole using the hexagon screwdriver and four M8×25 rounded-head screws. - Page 21 Installation – Installing the eMH3 Wallbox on the POLEMH6 Insert a suitable supply cable with a length of about 1.8 m through the large grommet in the lower area of the rear shell into the housing. Insert the individual conductors into the termi- nals of the RCCB and tighten them using the Phil- lips-head screwdriver (torque: 2.5 to 3 Nm).
- Page 22 Installation – Installing the eMH3 Wallbox on the POLEMH6 Run the data cables through the small cable outlets of the mounting pole and into the housing of the wallbox. Connect the data cables to the Modbus interfaces on the inside of the wallbox housing cover.
-
Page 23: Electrical Connection Of The Polemh6
This completes the installation of the wallbox on the mounting pole. Electrical connection of the POLEMH6 The following section describes how to connect to the terminal block in the POLEMH6. DANGER! Dangerous electrical currents Always observe the 5 safety rules:... - Page 24 Installation – Electrical connection of the POLEMH6 Wallbox Insert the individual conductors of the two cables into the respective terminals and tighten them us- ing the Phillips-head screwdriver. y End ferrules must be fitted on flexible conductors. PE PE y Operate the spring-loaded mechanism of the PE terminal and attach the protective earth conductor.
-
Page 25: Note On The Installation Of A Second Emh3 Wallbox
Note on the installation of a second eMH3 Wallbox The POLEMH6 is designed for the installation and operation of two eMH3 Wallboxes. Please observe the following instructions when installing a second wallbox: ƒ Make sure the supply cable at the installation site is sufficiently dimensioned and fused for operating two eMH3 Wallboxes simultaneously. -
Page 26: Safety Instructions For Start-Up And Operation
ƒ Make sure the wallbox has been installed on the POLEMH6 and connected in accordance with the relevant instal- lation instructions and the information in this document. ƒ Ensure that the POLEMH6 is freely accessible and that an electric vehicle can be connected to the charging cable without tension. -
Page 27: Troubleshooting And Maintenance
Installation instructions eMH3 Maintenance The POLEMH6 is essentially maintenance-free. However, we still recommend the mounting pole is regularly cleaned and its function checked: ƒ Use a dry or slightly damp, well-wrung cloth to clean the POLEMH6. -
Page 28: Appendix
Appendix – Technical specifications Appendix Technical specifications Model code POLEMH6 Compatibility (wallbox) eMH3 (1 or 2 units) External power supply for supply cable sizes up to 35 mm² Rated voltage (power supply) 230/400 V Rated current (power supply) up to 125 A, 3-phase Rated frequency 50 Hz... -
Page 29: Trademarks
Appendix – Trademarks Trademarks All trademarks mentioned in this manual, including those that may be protected by third parties are, without restric- tion, subject to the regulations of the respectively applicable trademark law and the property rights of the respective registered owners. - Page 30 ABL SURSUM Albert-Büttner-Straße 11 91207 Lauf an der Pegnitz Germany +49 (0) 9123 188-0 +49 (0) 9123 188-188 info@abl.de www.ablmobility.de...
Need help?
Do you have a question about the POLEMH6 and is the answer not in the manual?
Questions and answers