Advertisement
Quick Links
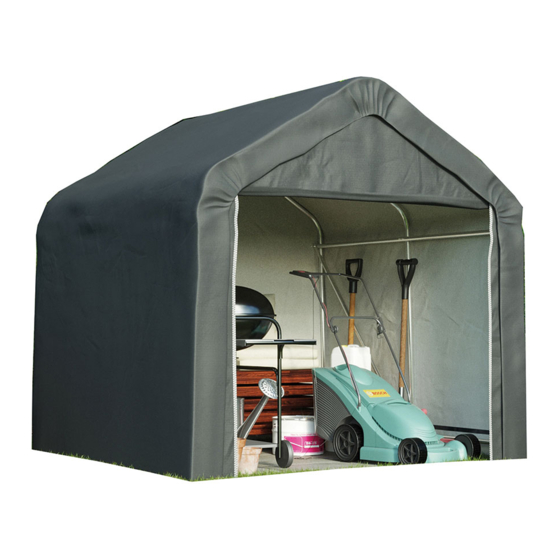
G4792 6 x 6 Foot PE Cover Shed Instruction Manual
For correct usage, please read these instructions carefully before use and keep in a
safe place for future reference.
General Information and Safety Warnings
•
Remove all packaging and make sure that the product is intact. Do not leave
packaging materials like bags and staples within the reach of children and
pets.
•
Only use the product for its intended purpose.
•
The manufacturer is not responsible for any eventual damages caused by
improper or faulty use.
•
Do not use any open flames inside or near the shelter.
•
Always check for overhead electric wires, tree branches or other structures
before installing the shed. Be aware of anything that could cause rainwater to
run off onto the shed.
•
Do not store any flammable liquids inside the shed.
•
Do not hang anything from the roof or supporting frame.
•
Always take the cover off and store away safely if severe weather is forecast.
•
Make sure that your shed is securely anchored to the ground, you are
responsible for the shed and ensuring it doesn't become unanchored.
Periodically check the anchoring is still sufficient.
•
The shed is not designed to be a permanent structure.
•
Remove any gathered snow or rainwater immediately from the cover, this will
help prolong the life of your shed.
•
Never used hard-edged tools (such as a shovel) to remove something from
the fabric of the shed.
•
Not suitable for commercial purposes.
•
At least two people are required to build this item and two sets of steps are
necessary.
•
Until the bracing pieces and purlins are fitted, make sure that the upper
section of the arches are held firmly together so that they do not detach.
Advertisement

Related Manuals for Garden Gear G4792

Summary of Contents for Garden Gear G4792
- Page 1 G4792 6 x 6 Foot PE Cover Shed Instruction Manual For correct usage, please read these instructions carefully before use and keep in a safe place for future reference. General Information and Safety Warnings • Remove all packaging and make sure that the product is intact. Do not leave packaging materials like bags and staples within the reach of children and pets.
- Page 2 Care and maintenance • Always make sure that the cover remains tight over the frame. • Remove any gathered snow or rainwater from the roof with a soft-bristled instrument (such as a mop). • Spot clean with a soft, damp cloth as needed. •...
- Page 3 Parts List...
- Page 4 Assembly • Remove all parts from box and dispose of all packaging correctly. • Check that you have all the parts listed before starting. • Assemble the shed on a flat level surface. • We recommend that 2 people assemble this shed. •...
- Page 5 Fit rear cover, part I2 and door, part 14 using the plastic marbles. Connect and fit parts 6 base tube to each leg, part 3. Secure with pegs F, see Figure...
- Page 6 TOP TIP: Place the four bottom corners of the front and rear doors under the base tube to prevent it from moving: Then secure the frame and cover by inserting the pegs to the holes on the base tubes, parts 6...
- Page 7 Step 5 Assembling the roof fastener 1. Press ‘D’ to open out the handle ‘B’, then insert the end of the roof rope through the central hole in the middle of the fastener, see ‘A’ below, and adjust ‘B’ by moving back and forth. Note: Do not pull the rope out of the cover completely 2.
- Page 8 To loosen the fastener, open the handle ‘B’ fully, by pressing ‘D’, so that it is in a straight line and press and hold position C, shown below; with the other hand, pull the end of the rope.
- Page 9 GUARANTEE IMPORTANT Please do not return this product without first calling the Customer Service number below: 0871 911 7031* Thank you for purchasing this product, which has been made to demanding high quality standards and is guaranteed for domestic use against manufacturing faults for a period of 12 months from the date of purchase.