Table of Contents
Advertisement
Quick Links
Advertisement
Table of Contents

Related Manuals for Exor X5


Summary of Contents for Exor X5
- Page 1 X5 Quickstart Guide...
- Page 2 Third-party brands and names are the property of their respective owners. www.exorint.com Software available in these products is based on OpenSource. Visit oss.exorint.net for more details. ptn0723 X5 Quickstart Guide ©2021 EXOR International S.p.A. - Subject to change without notice exorint.com...
-
Page 3: Table Of Contents
3.1 Client/Server Configuration (JMobile Client on Handheld) ........7 3.2 JMobile Runtime on Handheld ..................8 How to Set-up a Minimal X5 System for Demonstration Purposes ......... 9 4.1 Wiring the Base Station....................10 4.2 Configuring X5 Base Station ..................11 4.3 Configuring X5 Wireless Handheld ................ -
Page 5: Introduction
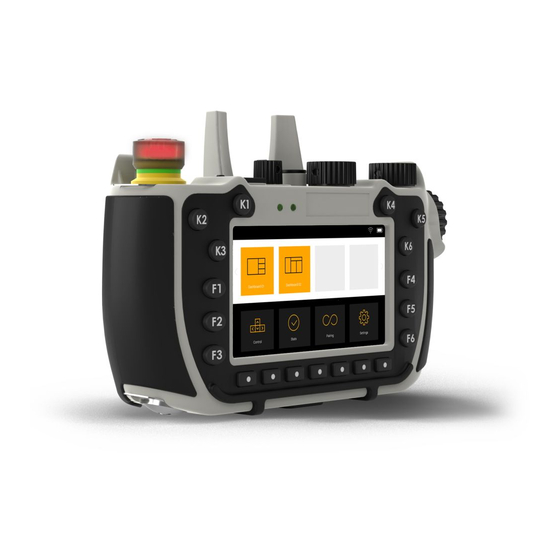
INFORMATION • X5 products cannot be programmed with JMobile version 4.0 or earlier. Key Shortcuts in X5 Handheld Keypad shortcuts have been defined for switching on/off the X5 handheld as well as for starting the pairing application. INFORMATION • You will need to press two keys at the same time on the device keypad to make these combinations. -
Page 6: Security Features
When entering passwords for the first time you will not be required to insert the old (default) password. Keep note of the passwords you have defined. If you forget them, you must restore X5 to factory default, wiping out the whole configuration. -
Page 7: Examples Of System Configuration
X5 supports two main system configurations. Each configuration has strength and weaknesses. Client/Server Configuration (JMobile Client on Handheld) JMobile runtime is running on Base Station. X5 Handheld runs JMobile client and connects to Base Station through the Wi-Fi network. Strengths: in case of configurations with multiple base stations and a single handheld, the handheld is automatically loading the HMI program when connecting to the Base Station. -
Page 8: Jmobile Runtime On Handheld
HMI program suitable for use with all machines. ptn0723 X5 Quickstart Guide ©2021 EXOR International S.p.A. - Subject to change without notice exorint.com... -
Page 9: How To Set-Up A Minimal X5 System For Demonstration Purposes
Objective of this chapter is setting-up a simple, fully operational, configuration for demonstration purpose. Despite its simplicity, it helps showing important features in X5, such as pairing status, safety devices' status. Additionally, it gives a good view of Device Publisher functionality and speed of update. -
Page 10: Wiring The Base Station
Wiring the Base Station To operate X5 Base Station some wiring is required. Refer to product Installation Guides and User Manual for details. INFORMATION • Pairing lamp is required to complete the pairing process. • 24 Vdc power must be applied to connector X7 in addition to powering the Base Station itself at connector X1. -
Page 11: Configuring X5 Base Station
Minimum wiring required for operation is shown in figure. Connect to the X5 connector a 24 Vdc light (0.5 A max) or a LED with a 2K7 resistor in series. Configuring X5 Base Station You must complete the configuration of Base Station first. You will use Base Station as the access point for the safety network. - Page 12 You may enter the first characters of the desired country to quickly locate the code. Settings/Network: Assign fixed IP Address, Netmask and Gateway to eth1 Enable Wi-Fi and “Safety WiFi Network” Select Wi-Fi channel. ptn0723 X5 Quickstart Guide ©2021 EXOR International S.p.A. - Subject to change without notice exorint.com...
-
Page 13: Configuring X5 Wireless Handheld
Define a NAT rule to prepare direct access to the X5 handheld Open Router/NAT/Port forwarding Device IP (that is the address of the X5 handheld in the Wi-Fi network) is fixed. Source IP is the address assigned to BS in the network where it is attached. Note that this corresponds to assigning a fixed IP address to X5 wireless handheld. - Page 14 Press button “Connect” to start. Wait for Wi-Fi connection to complete. 10 Start the pairing procedure and follow the sequence described in X5 Installation Guide. To carry out this process you must have a lamp connected to the pairing lamp output of the BS (connector X5, pin 3).
- Page 15 Auto connect at startup: checked Fit to screen size: checked 13 Now on X5 handheld screen you will see the project file that is running in Base Station. Normal interactivity with the HMI application is possible. 14 Connect a VNC client to the address of the handheld as defined in previous chapter. That will allow you to have simple monitoring/diagnostic access to the content of the screen in X5 handheld.
-
Page 16: Device Publisher
Device Publisher (DevPub) is a software application designed to provide fast transfer of device data from handheld to the PLC/controller connected to the Base Station. This is an important requirement for applications where X5 is used for direct interaction with machine. -
Page 17: Forwarding Device Publisher Information To Plc/Controller
The protocol in Device Publisher does not establish communication sessions and does not provide error information, even in case the server is not present. ptn0723 X5 Quickstart Guide ©2021 EXOR International S.p.A. - Subject to change without notice exorint.com... -
Page 18: How To Receive Data From Device Publisher
How to Receive Data from Device Publisher Device Publisher uses Modbus TCP protocol in UDP mode to send X5 device information. Port number 502, standard assignment to Modbus TCP and UDP, is used as default. The software application uses only one data packet to send information using Modbus Function Code 16, Write Multiple Registers. -
Page 19: More On Using X5
Pressing Multiple Keys in X5 Handheld Keypad handler in X5 handheld supports a maximum of 2 keys pressed at the same time. If you press more than 2 keys at the same time, the handler will return a no-key-pressed status. -
Page 20: Connect Base Station To A Controller/Plc
List Sorting Options in Pairing App X5 Pairing App shows a user-defined list of X5 devices, each with a unique UID number. There may be cases where the number of devices increases at a level that navigating the list with the handheld may be time-consuming and error prone. -
Page 21: Using Nfc As Pairing Selection Accelerator
Wi-Fi channels for the presence of X5 BS devices and measure the strength of the radio signal for each of them. When changes in the device configuration are going on, please allow about 5 seconds for the list to settle. -
Page 22: Importing/Exporting Base Station Lists
BS lists copying BS lists from one X5 wireless handheld to another. Managing BS lists require a USB Flash drive attached to one of the USB ports in the X5 Wireless handheld. Import and Export command buttons are available in the Pairing App settings page. -
Page 23: Import Base Station List
Copy a file “Import_List.txt” to the root folder of a USB Flash drive. Make sure format of the file is as described in previous chapter. Insert the USB Flash drive in one of the ports of the X5 handheld. Go to Pairing App settings and press the button “Import”. - Page 24 The haptic response is in the form of a vibration transferred from the device to the hands of the user. Haptic response can be programmed using dedicated System Variables. ptn0723 X5 Quickstart Guide ©2021 EXOR International S.p.A. - Subject to change without notice exorint.com...
Need help?
Do you have a question about the X5 and is the answer not in the manual?
Questions and answers