Table of Contents
Advertisement
Quick Links
PV700Operation Manual
Contents
Contents
Contents
Contents
···························································································
···························································································
···························································································
···························································································P1
Hardware
Hardware
Orientation
··················································································
··················································································
··················································································
··················································································P2
Main Unit
Remote Control
·····················································································
·····················································································
·····················································································
·····················································································P3
Accessories
Accessories
Accessories
Setting
Basic
Basic
Operation
How to turn on / off the DVR
How to stat a recording
Managing and play back Your Files
Connecting
Connecting External
Connecting
Type
Usage
·······················································································
·······················································································
·······················································································
·······················································································P19
Updating
the
Updating
Updating
Updating the
the
the DVR
DVR Firmware
DVR
DVR
DVR
DVR
Specifications
Specifications
All manuals and user guides at all-guides.com
Table
Table of of of of Contents
Contents
Table
Table
Contents
Contents
·····························································
·····························································
·····························································
·····························································P2
···············································································
···············································································
···············································································
···············································································P3
Modes
Modes
·······························································
·······························································
·······························································
·······························································P4
···································································
···································································
···································································
························································
························································
························································P4~P6
························································
·················································
·················································
·················································
················································· ············
············································
············································
············································P10~P12
············································
··························································
··························································
··························································
External
External
External Device
Device
Device
Device
Firmware
Firmware
Firmware
·····································································
·····································································
····································································· P20
·····································································
1
············
············P6~P10
············
·······················
·······················
·······················P16~P19
·······················
················································
················································
················································
················································P20
P1
P1
P1
Advertisement
Table of Contents

Subscribe to Our Youtube Channel
Summary of Contents for BEVRC PV700
-
Page 1: Table Of Contents
All manuals and user guides at all-guides.com PV700Operation Manual Table Table of of of of Contents Contents Table Table Contents Contents Contents Contents Contents Contents ··························································································· ··························································································· ··························································································· ···························································································P1 Hardware Hardware Orientation Orientation Hardware Hardware Orientation Orientation ····························································· ····························································· ····························································· ·····························································P2 ··················································································... -
Page 2: Hardware Hardware Orientation Orientation
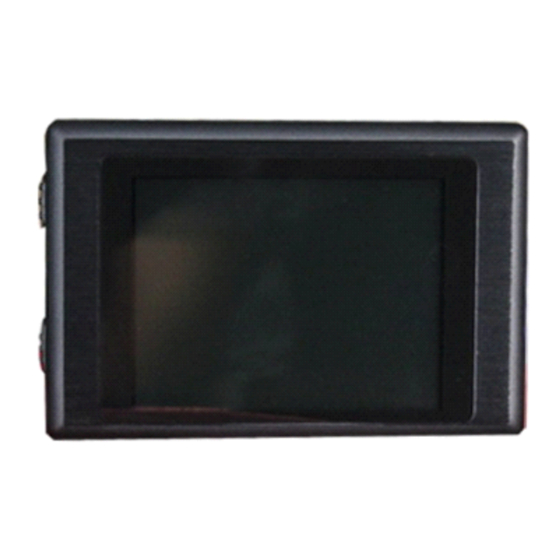
All manuals and user guides at all-guides.com Hardware Hardware Orientation Orientation Hardware Hardware Orientation Orientation Ⅰ. DVR 1. Power On/Off 2. Charge Led 3. Internal Microphone 4. AV Input & DC Out jack 5. Low Power LED 6.Record / Stop Button 7. -
Page 3: Accessories
All manuals and user guides at all-guides.com Ⅱ. Remote Remote Remote Remote Control Control Control Control 1. Record/Stop button 2. Up Button 3. Enter Button; 4. Down Button 5. LCD/TV Switch Button 6. Exit Button; 7. Menu Button 8. LCD Off Button; Ⅲ. -
Page 4: Setting Setting Record Record Record Modes Modes
All manuals and user guides at all-guides.com Setting Record Modes Setting Setting Setting Record Record Record Modes Modes Modes There are three work model for record : showed as the following Figure Figure 0 � Record Record Record Record ----- for video and audio record, the record data will be saved in AVI files under the “Record Files” folder;... - Page 5 All manuals and user guides at all-guides.com � One button for all tusk by the Alarm In Cable Press the red button to the DVR will power on to record, if the you want to stop the recording , please press the button the release the switch , the DVR will save all files and power down;...
- Page 6 All manuals and user guides at all-guides.com Figure 4 1. Image Size; 2.Resoluton ; 3.Overwite On/Off; 4.In/Out Microphone; 5. Vibration On; 6. SD card info..; 7.Battery Capacity; 8. Date and Time Stamped; 9.User ID; 10.Mode; Ⅱ..How How to to to to start start start...
- Page 7 All manuals and user guides at all-guides.com without additional power cord, the DVR can output DC5V @ 400mA for a external DC5V CCD or CMOS camera by the AV-In cable; � Prepare a high speed SD card to save your record data.; Figure 6 Figure 7 �...
- Page 8 All manuals and user guides at all-guides.com Figure 15 Ⅳ. Managing Managing Managing play play back back your your evidence evidence files files Managing and and play play back back your your evidence evidence files files 1. 1. 1. 1. Learning Learning Learning Learning to to to to use...
- Page 9 All manuals and user guides at all-guides.com select the speed of playback by holding the key up or down key is pressed over 3seconds, Figure 20 Figure 21 Browse Browse still still photos photos photos: Press the select button on the image Viewer item to browse the still photos, press Browse Browse still still photos...
- Page 10 All manuals and user guides at all-guides.com screen, , you can play back, copy, paste, delete the file, etc. Figure 22 Figure 24 Ⅲ. Recorder Recorder Setting Setting Recorder Recorder Setting Setting Press the recorder setting interface , showed as the following picture key to bring out the �...
- Page 11 All manuals and user guides at all-guides.com You can select the YES or NO to enable or disable the Motion detection record function, When the motion detect record function is on , and the Push the Record / Stop switch to “Rec”...
- Page 12 All manuals and user guides at all-guides.com � � � � Timestamp Timestamp Timestamp format: format: Timestamp and and format: format: The real timestamp will appear on right top of the video image when your selection Timestamp setting is On, otherwise the timestamp will not been shown; �...
- Page 13 All manuals and user guides at all-guides.com � Audio Audio Audio Audio Record Record Record Record Volume Volume Volume Volume : : : : You can adjust the volume level value for the audio input in 1 to 10;if there are some noise please adjust the volume to lower, otherwise you can select higher volume for audio recording.
-
Page 14: System Parameter Setting
All manuals and user guides at all-guides.com Ⅲ. System System System System Parameter Parameter Parameter Parameter Setting Setting Setting Setting � � � � Language Language Language : : : : For you select the OSD language for you can read Language �... - Page 15 All manuals and user guides at all-guides.com � Password Password Protedction: Protedction: Password Password Protedction: Protedction: you can set or cancel the password protection for USB or format SD Disc or files to prevent been deleted without your authorization. The default password is 000000 for all password. Password: Password: Password: You can set or enable or disable the USB password for accessing the DVR by USB.
- Page 16 All manuals and user guides at all-guides.com Format Format Password: Password: Format Format Password: Password: You can set or enable or disable the delete password for formatting the SD disc. � � � � Video Video Video Video Output: Output: Output: Output: You can select the video output signal format your external display devices, such as TV, monitor or LCD ,etc.
- Page 17 All manuals and user guides at all-guides.com � � � � Power Power Save: Save: Power Power Save: Save: In order to save more power, you can set the DVR turn off the LCD automatically after 3 seonds by setting the LCD off. The LCD will be turned on if you press any key. �...
- Page 18 All manuals and user guides at all-guides.com � � � � Format: Format: Format: Format: You can format the SD card, the default password is 000000. � � � � Firmware Update Firmware Firmware Firmware Update Update Update 1. 1. 1. 1. Copy the firmware update file to a SD card; 2.
- Page 19 All manuals and user guides at all-guides.com � SD Card Card Card Card Info: Info: Info: Info: You can check the information on the current SD card. � Default Default Default Default Setup: Setup: Setup: Setup: You can reset the DVR to default setting if it is necessary; select the YES then to press the select button to reset to default setting;...
-
Page 20: How To To To To Connecting
All manuals and user guides at all-guides.com How to to to to Connect Connect Connect Connect External External External External Devices Devices Devices Devices � � � � Connect Connect with with external external camera: camera: Connect Connect with with the the external external camera: camera:... - Page 21 All manuals and user guides at all-guides.com The UPS Battery Bank (7200mAH) can output DC 5V and DC12V voltage at the same time to power the DVR and a 12V Cameras for over 10 hours recording time, as shown in above Figure; �...
- Page 22 All manuals and user guides at all-guides.com The default password is 00000 for connecting to PC. The DVR will be power off automatically when you disconnect the USB from PC. � � � � Connecting Connecting Connecting Connecting with with with with wireless wireless...
-
Page 23: Type Usage Type Usage
All manuals and user guides at all-guides.com Type Usage Type Type Type Usage Usage Usage Specifications Specifications DVR Specifications Specifications � Video Video Video Video compressed compressed compressed compressed format: format: format: format: MPEG , files format:AVI � Photo Photo Photo Photo format: format:... - Page 24 All manuals and user guides at all-guides.com � � � � Real-time Real-time recordings recordings marked marked marked in in in in File; File; File; Real-time Real-time recordings recordings are are marked File; � Compute Compute transfer transfer screen: screen: screen: USB2.0;...
Need help?
Do you have a question about the PV700 and is the answer not in the manual?
Questions and answers