Centurion Smart GUARD Operating Instructions Manual
Hide thumbs
Also See for Smart GUARD:
- Operating instructions manual (12 pages) ,
- Operating instructions manual (11 pages) ,
- Operating instructions manual (42 pages)
Table of Contents
Advertisement
Quick Links
Advertisement
Table of Contents

Subscribe to Our Youtube Channel
Related Manuals for Centurion Smart GUARD


Summary of Contents for Centurion Smart GUARD
- Page 1 GUARD CENTURION THE AUTOMATIC CHOICE OPERATING INSTRUCTIONS...
- Page 2 In a hurry? In a hurry? The following KwikLearn procedure and connection diagram will enable you to start using your SmartGUARD system right away. Additional procedures are explained later in this manual. KwikLearn Adds a new access code at a specified address. The code will operate the relay output only.
- Page 3 Quick Reference Connection Diagram: IMPORTANT IF YOUR SUPPLY VOLTAGE TO THE SMART GUARD EXCEEDS 24V AC OR 30V DC, FIT THE SUPPLIED 150R RESISTOR IN SERIES WITH THE SUPPLY WIRE AS SHOWN. DO NOT USE THIS PRODUCT WITH SUPPLY VOLTAGES GREATER THAN...
- Page 4 If you intend using the DURESS security parameter (Page 16), ensure that no consecutive numbers are assigned as codes. Ensure that the desired code has not been allocated already. © Centurion Systems (Pty) Ltd 2003 Document Ref: 1029.D.01.0001_3 Last Revised 29.11.2004...
-
Page 5: Table Of Contents
Table of contents Overview ....... 2 Specifications: ......4 Changing the Master Code . -
Page 6: Overview
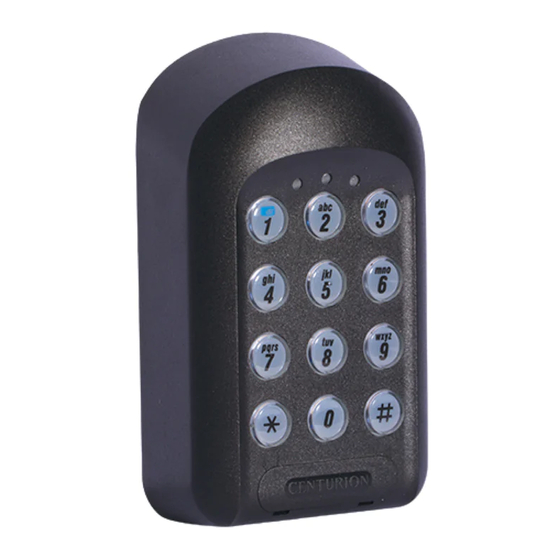
Overview The Centurion SmartGUARD is a durable, quality keypad designed to provide high security access control to restricted areas. The unit is weatherproof, and the keys are backlit for ease of use at night. Access is granted by the keying in of a valid access code. - Page 7 be used as an alarm channel, triggered by various panic or alarm conditions. The relay output can be activated by an external pushbutton, giving free exit capability. Once programmed, the system can be backed up onto the optional CP108 backup module. This allows the system to be easily restored if required.
-
Page 8: Specifications
Specifications Physical: Supply voltage: 12V-24V AC/DC Standby current: 32mA Maximum current: 180mA Operating temperature: -15C to +55C Operating humidity: 0-90% Output relay rating: 1 x 3A @ 50V Open collector rating: 2 x 50mA @ 24V Housing material: Polycarbonate Degree of protection: IP55 Functional: Code length:... -
Page 9: Changing The Master Code
Changing the Master Code Replaces the default or currently stored master code with a new master code. The master code may also be learned by following the procedure on page 6, Adding a New User. Notes: The master code must always be stored at address 0. The master code can be used as a normal access code. -
Page 10: Adding A New User
Adding a new user Adds a new access code at a specified address, assigns which outputs the code must activate, and how many accesses are allowed before the code becomes invalid. Enter the following keystrokes: INDICATOR LED's 1. Enter Program mode Master Code 2. - Page 11 output 2. Code is valid forever. (Master code = 1234) INDICATOR LED's Enter Program mode 1 2 3 4 Select Add menu Enter user address 1 0 # Enter access code 5 2 7 # Select outputs Assign outputs Enter access limit Exit Add menu Exit Program mode Example:...
-
Page 12: Deleting A User
Deleting a user Deletes an access code at a specified address. Enter the following keystrokes: INDICATOR LED's 1. Enter program mode Master Code 2. Select Delete menu 3. Enter user address Address # † 4. Exit Delete menu 5. Exit Program mode †... - Page 13 Example: Delete all access codes. (Master code = 1234) INDICATOR LED's Enter Program mode 1 2 3 4 Select Delete menu Enter user address Exit Delete menu Exit Program mode Example: Delete access code at address 54 and 87. (Master code = 1234) INDICATOR LED's Enter Program mode...
-
Page 14: Setting The Output Timers
Setting the output timers Sets the output pulse time of the output channels. Default setting is 1 second pulse. Enter the following keystrokes: INDICATOR LED's 1. Enter Program mode Master Code 2. Select Output menu 3 # 3. Enter Output channel Channel # 4. - Page 15 Enter pulse time Exit Output menu Exit Program mode Example: Set Output 1 to latch, Output 2 to 5s pulse, and Output 3 to 1s pulse. (Master code = 1234) INDICATOR LED's Enter Program mode 1 2 3 4 Select Output menu Enter Output channel Enter pulse time Enter Output channel...
-
Page 16: Setting The Anti-Hack Parameters
Setting the anti-hack parameters Sets the number of wrong access codes the unit will accept before becoming inactive, and the time for which the unit will remain inactive. Default number of wrong codes = 3. Default reset time = 60 seconds. Enter the following keystrokes: INDICATOR LED's 1. - Page 17 Select Lockout menu Enter No. Of codes Enter Reset time 3 0 # Exit Program mode Example: Disable the Wrong Codes alarm feature. (Master code = 1234) INDICATOR LED's Enter Program mode 1 2 3 4 Select Lockout menu Enter No. Of codes Enter Reset time Exit Program mode...
-
Page 18: Setting The Key Wipeout Timer
Setting the key wipeout timer Sets the number of seconds for which keystrokes remain valid. This ensures that if a partial code has been entered, it is wiped out of the keypad buffer after a preset time, and must be re- entered in its entirety. - Page 19 Example: Set the Key wipeout time to 15 seconds. (Master code = 1234) INDICATOR LED's Enter Program mode 1 2 3 4 Select Wipeout menu Enter Wipeout time 1 5 # Exit Program mode Example: Disable the key wipeout time: (Master code = 1234) INDICATOR LED's Enter Program mode...
-
Page 20: Setting The Security Parameters
Setting the security parameters Sets the conditions under which the Alarm channel (Output 3) will activate. Also sets the anti-default and tone mute features. The following alarm conditions can be set: Duress (Code + 1)(Default = off): Adding 1 to the last digit of an access code activates the unit as normal, but also activates the alarm channel. - Page 21 entering a code. This prevents an eavesdropper from determining the number of digits in the code. Tones will still be present in programming mode. Enter the following keystrokes: INDICATOR LED's Enter Program mode Master Code Select Alarm menu Set (Code + 1) [ 0 or 1 ] Set (* + #) [ 0 or 1 ]...
- Page 22 Clear (* + #) Clear (Wrong Codes) Clear Anti Default Clear Tone Mute Exit Program mode Example: Set Alarm on Wrong Codes. Set Tone Mute. Leave all other functions unchanged. (Master code = 1234) INDICATOR LED's Enter Program mode Master Code Select Alarm menu Skip (Code + 1) Skip (* + #)
-
Page 23: Backing Up The Unit
Backing up the unit Backs up all the user access codes as well as system settings to the optional CP108 Backup Memory Module. This allows the system to be easily restored in the unlikely event of system failure. Procedure for backing up the unit: Remove power. -
Page 24: Restoring The Unit
Restoring the unit Restores all the user access codes as well as system settings from the optional CP108 Backup Memory Module. Procedure for restoring the unit: Remove power. Plug the CP108 into the socket provided. Reapply power. All three LEDs will now be on. Press 3 on the keypad. -
Page 25: Defaulting The Unit
Defaulting the unit Both the master code and the system parameters (timers, alarm functions etc.) can be reset to factory defaults. This is useful when the master code has been forgotten, or the system parameters are in an unknown state. Defaulting the Master Code: Remove power. -
Page 26: Typical Mounting Instructions
Typical Mounting Instructions: 1. Remove retaining screw cover and screws. 2. Insert screwdriver blade into groove provided between the cover and back panel. Lever screwdriver forward to separate cover and back panel. 3. Fix the self adhesive rubber pads into the recesses provided on the rear panel. - Page 27 INTERNAL WIRING EXTERNAL WIRING CABLE ROUTE CABLE ROUTE 1. In the case of the wiring being mounted externally, knock out the tab in the base of the cover (1) to allow the cable to pass through. 2. If the keypad is to be mounted on a gooseneck, or if the cable must pass through the centre of the back panel, knock out...
-
Page 28: Fitting The Optional Anti-Tamper Switch
Fitting the optional anti-tamper switch 1. Solder the wires from an alarm system to the relevant contacts on the anti-tamper switch. 2. Slide the anti-tamper switch into the switch carrier. Ensure that the retaining pins in the switch carrier pass through the matching holes in the switch. -
Page 29: Typical Connection Diagram
Typical Connection Diagram: IMPORTANT IF YOUR SUPPLY VOLTAGE TO THE SMART GUARD EXCEEDS 24V AC OR 30V DC, FIT THE SUPPLIED 150R RESISTOR IN SERIES WITH THE SUPPLY WIRE AS SHOWN. DO NOT USE THIS PRODUCT WITH SUPPLY VOLTAGES GREATER THAN... -
Page 30: Glossary
Glossary ACCESS CODE The code number the user will enter to gain access. It can range in length from 1 to 10 digits. ADDRESS / USER ADDRESS The location where the user's code is stored in the keypad memory. It can be any number between 1 and 999. It should be recorded, allowing the user code to be removed from the memory later if necessary. -
Page 31: Installation Information
The supplied Address Register will record the first 500 addresses, from 0 to 499. Should you require a second Address Register to record the next 500 addresses, i.e. address 500 to 999, please contact your nearest CENTURION SYSTEMS branch or distributor. - Page 32 THE AUTOMATIC CHOICE CENTURION SYSTEMS 148 Epsom Avenue, North Riding, Randburg, SOUTH AFRICA. Tel: +27(0)11 699-2400 Fax: +27(0)11 704-3412 www.centsys.co.za email: sales@centsys.co.za info@centsys.co.za Represented in your area by: Centurion Systems reserves the right to change any product without prior notice.
Need help?
Do you have a question about the Smart GUARD and is the answer not in the manual?
Questions and answers