Table of Contents
Advertisement
Quick Links
Advertisement
Table of Contents

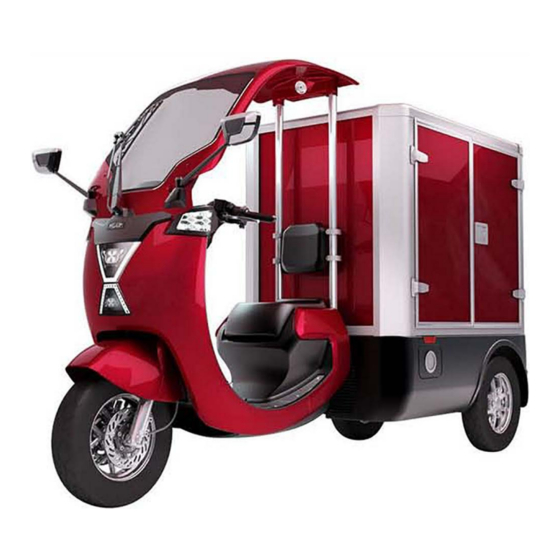
Summary of Contents for Emos RAP CT KARGO Bange
- Page 1 [i�P] RAP INTELLIGENT VEHICLE OPERATION MANUAL Bange CT KARGO...
-
Page 2: Introduction
Introduction Thank you very much for purchasing RAP intelligent vehicle. It is our responsibility to provide you with high safety products. In addition, in order to enable you to get familiar with the functions of the vehicle more quickly and ensure safe and comfortable driving, we have compiled this manual. -
Page 3: Notes To Users
Notes to Users Notes to users In this manual, you will see warnings about personal safety or possible damage to the vehicle.Please follow the instructions in the warnings when operating the vehicle to avoid personal injury or damage to the vehicle. Unless otherwise stated, the instructions in this manual regarding the vehicle orientation (front, rear, left and right) are subject to the driving direction of the vehicle. -
Page 4: Table Of Contents
Table of Contents Introduction ......1 Driving computer ....21 Keys and doors....25 Notes to users ..... 2 Mechanical key .......25 1 Charging Device Anti-theft system .....25 Wiper and light....27 Charging instructions ... 6 Wiper switch ......27 Charging precautions ....6 Light distribution view .....28 On-board charging device ..7 Light switch ......30... - Page 5 Table of Contents Horn ........44 Reflective vest ......63 RAP sound simulation ....44 Basic hand tools .....64 Start driving ....... 45 Contingency processing ..65 Ignition switch ......45 Unable to start ......65 Shifting system .......46 If the vehicle is trapped ..65 Manual brake ......47 Vehicle traction .......66 Parking brake ......47...
-
Page 6: Charging Device
1 Charging device This chapter will introduce information o n c h a r g i n g m e t h o d s a n d c h a r g i n g precautions to ensure that your vehicle has good maneuverability at all times. -
Page 7: Charging Instructions
Charging instructions Charging precautions Please charge with the dedicated charging device provided by RAP ◆ Intelligent Vehicle: » Do not modify, disassemble or repair the charging device. » Do not use extra wires or adapters to avoid the risk of fire or electric shock. -
Page 8: On-Board Charging Device
Charging instructions » When charging, the water near the charging port should be cleaned to prevent the water from entering the charging port. When plugging or unplugging the charging connector, be sure to cover it with rainproof equipment to prevent rainwater from splashing into the charging connector and charging port. - Page 9 Charging instructions Note Do not use the charging device in the sun or in a closed environment. ◆ Do not modify the charging device without permission, otherwise it will ◆ be prone to danger. Please wait for the vehicle to enter the normal charging state before ◆...
-
Page 10: Charging Method
Charging method Household single-phase AC charging Note When using household single-phase AC charging, use a special ◆ ◆ socket with safety protection devices such as leakage protection devices and air switches, and avoid sharing the line with other household appliances. The household single-phase AC charging method is as follows: 1. -
Page 11: Charging Pile Single-Phase Ac Charging
Charging method 5. Lift up the dust cover of the charging port and connect the charging plug to the charging port. The instrument lights up the charging connection indicator, and the electricity meter switches to the charging a n i m a t i o n s t a t e ( t h e l e a d acid version has no charging animation, and the lithium version has charging animation). - Page 12 Charging method 7. Confirm that the dust cover of the charging port is properly closed and close the charging port cover of the vehicle. 8. Disconnect the power plug of the power supply end, arrange the charging device, and place it properly to complete charging. Note The above charging method is a general charging method, which may ◆...
-
Page 13: Battery
Battery Power battery The main power source of the RAP intelligent vehicle is the power ◆ battery, which can be recharged repeatedly. However, when the power battery is less than 25%, it needs to be charged as soon as possible to prolong the battery life. - Page 14 Battery Warning The power battery is a high-voltage component. Non-factory personnel ◆ should not open or repair the power battery without permission. Environmental protection The recovery of the power battery must be carried out by a qualified unit ◆ to avoid environmental pollution and injury to the operator. Power battery recovery requirements and procedures The power battery is a high-voltage component that is easy to cause environmental pollution.
-
Page 16: Operation Guide
2 Operation Guide This chapter will introduce you to all the equipment related to driving safety and comfort, so that you can get familiar with your vehicle quickly to reduce the driving safety hazards. -
Page 17: Instrumentation
Instrumentation Combination meter view Tachometer Gear display Speedometer Mileage display Indicator light / warning light Current display Clock display Voltage display Multimedia display interface SOC electricity meter Call status display... -
Page 18: Soc Electricity Meter
Instrumentation SOC electricity meter The SOC electricity meter displays the current battery level. ◆ The display range of the SOC electricity meter is 0 ~ 100% and its ◆ display refreshes once every 10s. The digital and columnar double display battery capacity. When SOC is between 0 and 24%, the columnar display is red, and the voice indicates "low battery capacity". -
Page 19: Mileage Display
Instrumentation km/h (kilometers per hour). The display range is 0~99km/h, the speed unit and speed limit can be set ◆ in the menu. When the speed is invalid, the normal color (white) figure shows the speed is 0. When the speed is effective, the normal color figure displays the speed;... -
Page 20: Clock Display
Instrumentation and sensor, the information of reverse image and sensor will be displayed by the instrument first. Clock display It is used to display the current time, the clock can be set in the menu ◆ settings. Combination meter indicator / warning light Left/right turn indicator Position light indicator High beam indicator... - Page 21 Instrumentation side are extinguished simultaneously. Turn on the hazard warning light switch, all the turn signals and the turn ◆ indicators flash at the same time; Turn off the hazard warning light switch, all the turn signals and the turn indicators go out simultaneously. High beam indicator Turn the ignition switch to the “ON”...
-
Page 22: Driving Computer
Instrumentation Low battery indicator If this light is on, it indicates that the power battery is less than 25% and ◆ needs to be charged as soon as possible. Motor fault indicator If this light is on, it indicates that the motor system has failed. It is ◆... - Page 23 Instrumentation Previous button Volume down button Next button Menu settings In the ODO interface, press and hold the setting button for 3s to enter the menu setting interface. After entering, press the SET button shortly to select the menu setting options.
- Page 24 Instrumentation Mileage unit ◆ » When setting the mileage unit, press and hold for 3s, the metric system flashes, short press the English system to flash, and press and hold for 3s again to save. The range is metric, imperial, and the default is metric.
- Page 25 Instrumentation after other voice prompts are withdrawn, multimedia will automatically restore the volume. Charging interface Charging connection ◆ » When charging is connected, t h e c h a r g i n g c o n n e c t i o n symbol is displayed and the charging connection screen is automatically displayed.
-
Page 26: Keys And Doors
Key and door Mechanical key The mechanical key can be used ◆ to start the vehicle. Anti-theft system The anti-theft system is a system designed to prevent theft of vehicles. ◆ There is a vibration sensor on the vehicle. After the vehicle is powered off and locked, the vehicle vibration will alarm, the turn signal will flash and the horn will whistle. - Page 27 Key and door Note Please confirm that the vehicle enters the anti-theft state before leaving ◆ the vehicle. Car search function ◆ » When the vehicle is in anti-theft state, press the search button, the turn signal flashes and the horn whistles. Use this feature to find the specific location of the vehicle when the location of the vehicle cannot be confirmed.
-
Page 28: Wiper And Light
Wiper and light Wiper switch When the ignition switch is in the ◆ “ON” position, the windscreen wiper and washer can work. Move the wiper switch up from ◆ the initial position, in order: » • :Initial position, closed position »... -
Page 29: Light Distribution View
Wiper and light Headlight distribution view Turn signal High beam Low beam light Retroreflector D a y t i m e r u n n i n g l i g h t / position light... - Page 30 Wiper and light High brake lights Rear fog light License plate light Position light Turn signal Brake light Reversing light Retroreflector...
-
Page 31: Light Switch
Wiper and light Light switch The ignition switch is in the “ON” ◆ position, and the light switch adjustment button is toggled from top to bottom: » :High beam position » :Low beam position » :OFF position » :Position light position Note Do not use the high beam when meeting other vehicles. - Page 32 Wiper and light Rear fog light When the ignition switch is in the ◆ “ON” position, the low beam or high beam lights up, press the rear fog light switch, and the rear fog light lights up. Note The vehicle fog lights, the sides of the vehicle and the rear lights are ◆...
- Page 33 Wiper and light Reversing light When the ignition switch is in ◆ "ON" position, push the gear to "R" position, hang in reverse, and the reversing light will light up. Exit the reverse gear and the ◆ reverse light goes out. Overtaking signal When the ignition switch is in ◆...
-
Page 34: Seat
Seat Seat cushion After the storage box under the ◆ seat is opened, make sure that the seat cushion is firmly locked to avoid affecting the use during driving. Backrest The height of the backrest can be ◆ adjusted according to the size of the driver. -
Page 35: Driving Aid
Driving aid Rearview mirror Before driving the vehicle, be ◆ sure to adjust the angle of the mirror so that you can see the side of the car. Move the edge of the mirror ◆ body by hand to rotate the mirror around the center to adjust it to the proper position. - Page 36 Driving aid reversing radar stops working. Obstacle detection and alarm function When the obstacle approaches probe from the 150cm outward, the ◆ reversing radar controller will alarm according to the distance of the obstacle. The alarm mode is buzzer alarm, which is divided into the following: Obstacle distance from sensor (cm) Buzzer frequency (Hz)
-
Page 37: Reversing Image
Driving aid Reversing image When the gear is pushed to ◆ the “R” position, namely the reverse gear is entered, the reversing camera at the rear of the vehicle will start to work. While the reversing camera is ◆ working, the combination meter displays the reversing image to facilitate the driver to grasp the situation behind the vehicle. -
Page 38: Swing System
Driving aid Note Reversing radar is used to assist the driver in parking and reversing, ◆ and cannot replace your personal judgment. Be sure to operate the vehicle on an observation basis and do not rely solely on the parking radar system. -
Page 39: Storage Device
Storage device Storage box under the seat T u r n t h e i g n i t i o n s w i t c h ◆ f r o m t h e “ O F F ” p o s i t i o n counterclockwise to the “OPEN”... -
Page 40: Other Devices
Other devices Storage hook The vehicle storage hook is ◆ located on the central control knee pad. Note The maximum load capacity of the vehicle storage hook is 3kg, please ◆ use it reasonably. USB interface T h i s U S B i n t e r f a c e c a n b e ◆... -
Page 41: 12V Power Supply
Other devices 12V power supply 12V power supply can supply ◆ power to other powered devices. When using a 12V power supply, ◆ open the 12V power supply cover and the ignition switch must be in the “ON” position Note Turn off the 12V power supply cover when not using a 12V power ◆... -
Page 42: Driving Guide
3 Driving Guide The chapter will provide the driving instructions under certain driving conditions or special operation modes for you, so that you can better experience the driving pleasure that your vehicle brings to you. -
Page 43: Preparation
Preparation Running-in period In order to ensure the service life, the vehicle should be run in initial stage of using. After starting, do not run the motor at high speed. Warm up slowly and ◆ start gently. Do not accelerate quickly. Do not maintain the same speed for a long time. -
Page 44: Directional Handle
Preparation » Check whether basic hand tools are complete. » When starting the vehicle, check whether the indicator of combination instrument is normal. » Check whether brake fluid and windshield washer fluid are sufficient. Directional handle Handle Handle / acceleration handle Handle ◆... -
Page 45: Horn
Preparation Horn The horn is used to give early ◆ warning in special road sections o r e m e r g e n c y s i t u a t i o n s t o ensure traffic safety. The power supply of the whole vehicle is in "ON", and the horn will sound after pressing the horn. -
Page 46: Start Driving
Start driving Ignition switch Power gear LOCK:The position where the key is inserted into and pulled out, stop the directional handle, and turn off the power supply system. OFF:Stop the directional handle, and turn off the power supply system. ON:Switch on power supplies of all electrical equipment of the vehicle, such as combination instrument indicator and ignition circuit, the vehicle will start self - inspection. -
Page 47: Shifting System
Start driving Shifting system Toggle the shifting lever,the ◆ sequence from right to left is: R:Reverse gear N:Neutral D:Forward gear "R" gear (reverse gear), which is ◆ used when backing up. Before entering "R" gear, make sure the vehicle has stopped completely. Turn off the swing system when backing "N"... -
Page 48: Manual Brake
Start driving Manual brake Rear brake Front brake The front brake controls the front ◆ wheel and the rear brake controls the rear wheel. P l e a s e h o l d f r o n t a n d r e a r ◆... -
Page 49: Starting Vehicle
Start vehicle Starting 1. Hold the manual brake firmly to ensure that the shift lever is placed in "N" gear. 2. Rotate the ignition switch to the "ON" position to start vehicle. 3. Check whether the alarm lamp / indicator lamp inside the combination instrument is normal, and check the battery power. - Page 50 Start vehicle Emergency stop If you have to stop in an emergency, you should choose a section without blind spots, turn on the danger warning lights immediately after stopping, prompt drivers nearby to pay attention to safety, and make sure the passengers get off as quickly as possible,and get off after ensuring that there are no vehicles travelling in the rear.
-
Page 51: Driving And Environment
Driving and environment Driving essentials Drive slowly against the wind so that it is easy to control the vehicle. ◆ Do not drive into the curb and avoid driving on objects with high and ◆ sharp edges or other obstacles, otherwise the tires will be seriously damaged. - Page 52 Driving and environment When there is too much rain or thunder and lightning,the vehicle ◆ is unable to continually driving, stop it at a position without water accumulation to prevent the vehicle from being soaked, and turn on the danger warning light to attract the attention of the rear vehicle. After wading in rainy days, wash the vehicle in time to prevent the acidic ◆...
- Page 53 Driving and environment Drive in cold weather Before driving in cold weather, the safety equipment of vehicle must be ◆ carefully checked: steering, braking, lamp, instrument, horn, wiper, etc. must be complete and effective. When the parking brake may freeze, it is recommended not to drive the ◆...
-
Page 54: Maintenance
4 Maintenance The chapter lists important contents about maintenance, adding fuel and fluid and tires so that to extend the service life of your vehicle. -
Page 55: Daily Maintenance
Daily maintenance Vehicle corrosion protection Correct maintenance can prevent corrosion of vehicle. The most common causes of vehicle corrosion are as follows: Saline - alkali, dust and moisture are accumulated in hard-to-reach areas ◆ under the vehicle. Lacerate the paint layer or bottom layer due to slight collision or due to ◆... -
Page 56: Vehicle Cleaning
Daily maintenance Use the fender. ◆ » If driving in saline-alkali areas or gravel roads, the fender can protect vehicle. It is better to use big fender and make it close to the ground as far as possible. Park the vehicle in a good ventilated garage or a place with a roof. Do ◆... - Page 57 Daily maintenance immediately. Combination lamp ◆ » Carefully clean the combination lamp to prevent scratching or crushing the mask. Note When cleaning the combination lamp, do not use chemical solvents ◆ such as gasoline and alcohol to wipe the surface of the combination lamp, otherwise the combination lamp mask will crack.
-
Page 58: Additional Maintenance
Additional maintenance Brake fluid Use the brake fluid of the correct specification. ◆ When purchasing brake fluid, check the specifications indicated on ◆ the package, and the noted specifications must conform to the usage regulations of the vehicle. If the brake fluid level in the ◆... -
Page 59: Cleaning Solution
Additional maintenance Cleaning solution Check the cleaning solution in the ◆ washing kettle. If there is too little quantity, add cleaning solution or a mixture of cleaning solution and water. Pure water can hardly wash the windshield completely. Warning Do not add any additives to windshield cleaning solution. Otherwise, ◆... -
Page 60: Tire
Additional maintenance Tire In order to drive the vehicle safely, the model and size of the tire must be ◆ suitable for the type of your vehicle and the tires should have a tire tread in good condition and standard tire pressure. The following contents will describe in detail how to check the tire ◆... - Page 61 Additional maintenance Note The recommended tire pressure label plate (affixed on the inner panel ◆ beating of the charging port cover) indicates the recommended tire pressure in cold state. Check When checking the inflation state ◆ of tires, injury, foreign objects piercing and abrasion shall also checked.
- Page 62 5 Emergency processing This chapter lists important information about how to deal with accidents and vehicle fuses, so that you can easily deal with possible accidents.
-
Page 63: Important Information
Important information Hazard warning lamp If the vehicle breaks down or ◆ traffic accident occurs, use the hazard warning lamp. After pressing the hazard warning lamp switch, all turn signals and turn indicators will flash. Press the hazard warning lamp switch again, they will go out. -
Page 64: Reflective Vest
Important information Note When parking and maintaining vehicle on public road, please bear it in ◆ mind that the red side of the warning triangle faces the driving direction of the vehicle and place in the position where is 50 to 150m away from rear of the vehicle to warn the vehicles behind so as to avoid danger. -
Page 65: Basic Hand Tools
Important information Basic hand tools The basic hand tools are placed ◆ in the seat storage box. They mainly include maintenance tools and fire extinguishers. Non-adjustable wrench8~10mm Non-adjustable wrench10~12mm Phillips screwdriver Plier Note In order to deal with various emergency situations, you should be ◆... -
Page 66: Contingency Processing
Contingency processing Unable to start If the correct starting procedure is followed, but the vehicle is still not ◆ started, please consider the following reasons: » The power battery has run out of power. » The drive motor has failed. If the powertrain has no power output during driving, the following ◆... -
Page 67: Vehicle Traction
Contingency processing Note When pushing the vehicle, pay attention to the situation around. Do not ◆ move forward or backward suddenly after the vehicle getting out of pit, to avoid causing injury or damage to people or objects around. Vehicle traction If traction is needed, it should be carried out by the corresponding RAP's ◆... -
Page 68: Tire Burst
Contingency processing Tire burst W h e n a t i r e b u r s t o c c u r s ◆ during driving, stop the vehicle according to the following tips. Replace tires as needed after parking. -
Page 69: Fire Emergency Processing Plan
Contingency processing Fire emergency processing plan After the vehicle is on fire, please pull over at the first time, turn off ◆ all power supply systems of the vehicle, check the fire area, use fire extinguishers and quickly organize fire suppression, correctly judge the fire, abandon the vehicle and leave and keep a safe distance if necessary. - Page 70 Contingency processing » Install other electrical appliances (such as high-power audio, xenon headlights, etc.) will cause excessive load of circuit and the wiring harness will easily heat up and cause fire. » It is strictly prohibited to replace fuses with the fuses or other wires that exceed the rated specifications.
-
Page 71: High Pressure Component
Contingency processing High pressure component Do not expose the battery under any circumstances. In rainy and snowy ◆ weather, if the battery is exposed due to the failure, use waterproof cloth and other equipment to cover up the battery quickly to prevent the battery from getting wet, and contact the service center to ask the professional maintenance personnel for repair. -
Page 72: Fuse
Contingency processing Fuse A l l c i r c u i t s o n y o u r v e h i c l e ◆ a r e e q u i p p e d w i t h f u s e s t o prevent the wiring harness from damaging caused by short circuit or overload. - Page 73 Contingency processing Sticker of fuse box Amperage (A) Protected components or electrical device 12V power supply Terminal Simulate Reserved Lighting Washing Instrument Key ON...
- Page 74 Contingency processing Amperage (A) Protected components or electrical device Reserved Reserved Standby Standby Standby Standby Standby Electric door lock control relay Electronic control signal relay Brake Forward Back...
-
Page 76: Technical Data
6 Technical data T h i s c h a p t e r i n c l u d e s t e c h n i c a l parameters, stickers and other technical data, which can help you when necessary. -
Page 77: Information
Information Vehicle parameters Bange Product model name Lithium battery Lead acid battery version version Length of entire 2920 vehicle Outline Width of entire dimension vehicle (mm) Height of entire 1850 vehicle Wheelbase (mm) 2240 Track width (mm) Unladen mass (kg) Loading mass (kg) Full mass (kg) Length of packing... - Page 78 Information Bange Product model name Lithium battery Lead acid battery version version Type of front tires 110/90-12 Type of tire Type of Rear tires 110/90-12 Front tire Tire pressure ( kPa ) Rear tire Top speed(km/h) Reverse speed (km/h) ≤5 Maximum climb capacity (%) Minimum turn radius (m) Battery type...
- Page 79 Information Bange Product model name Lithium battery Lead acid battery version version Front brake Double plate Front brake Rear brake Single plate Front fork Telescopic Suspension system Swing-arm double double-acting Rear suspension damper Transmission Driving model Central motor bridge driver system Driving model Rear-wheel drive...
-
Page 80: Prompting Message
Prompting message Vehicle identification code The vehicle identification code is ◆ under the front lower guard plate of the body. Nameplate of entire vehicle The nameplate of the entire ◆ v e h i c l e i s o n t h e b o t t o m panel beating of the frame. -
Page 81: Motor Model And Serial Number
Prompting message Motor model and serial number The model and serial number of ◆ drive motor are on the nameplate of the drive motor housing. The model and serial number of ◆ drive motor are marked on the drive motor housing. Warning sticker The tire pressure indicator is ◆... - Page 82 Prompting message Brake fluid addition warning is on ◆ the cover the brake fluid addition port. Washing liquid addition warning ◆ is in the interior of the cover plate of washing liquid.
- Page 84 Index (Instrumentation) ......17 Anti-theft system (Keys and doors) ......25 Directional handle (Preparation)........43 Drive in special weather (Driving and environment) ...50 Backrest(Seat) ......33 Driving computer Basic hand tools (Instrumentation) ......21 (Important information) ....64 Driving essentials Brake fluid (Driving and environment) ...50 (Additional maintenance) .....57 File bag(Storage device) .....38 Charging pile single-phase...
- Page 85 Index Household single-phase AC charging(Charging method) ..9 On-board charging device (Charging instructions) ....7 If the vehicle is trapped (Contingency processing) ....65 Ignition switch(Start driving) ..45 Parking brake(Start driving) ..47 Parking(Starting vehicle) .....48 Power battery(Battery)....12 Preparation before driving Light distribution view (Preparation)........42 (Wiper and light) ......28 12V power supply...
- Page 86 Index SOC electricity meter Vehicle corrosion protection (Instrumentation) ......17 (Daily maintenance).....54 Speedometer(Instrumentation) ..17 Vehicle cleaning Starting(Starting vehicle) .....48 (Daily maintenance).....55 Storage box under the seat Vehicle identification code (Storage device) ......38 (Prompting message) ....79 Storage hook Vehicle parameters (Other devices) ......39 (Information) ........76 Swing system(Driving aid) ...37 Vehicle traction...
Need help?
Do you have a question about the RAP CT KARGO Bange and is the answer not in the manual?
Questions and answers