Advertisement
Quick Links
Quick Start Guide
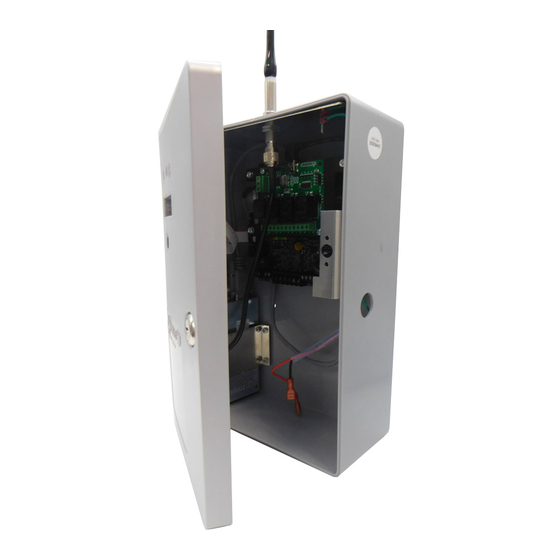
The 7007P-RB4 Environmental Monitoring Communicator with
4-Channel USB Relay Board provides the ability to remotely
control devices compatible with relay contact control.
Installation, Configuration and Programming
See these resources for detailed information about installing,
configuring, and programming the 7007P-RB4:
AES 7007P-RB4 Environmental Monitoring
Communicator with 4-Channel USB Relay Board
Installation, Operation & Programming Manual (Part#
40-7007P-RB4)
Connect to 7007
A web browser enabled device using an Ethernet or Wi-Fi
connection must be used to configure the 7007P-RB4.
Ethernet Connection: Connect an Ethernet cable to the 7007
and the other end directly into a PC/Laptop or router. Enter
the IP address displayed on the 7007P-RB4 LCD on the web
browser of your PC/Laptop and log in with credentials
admin/admin for username/password.
Wi-Fi Connection: Plug an approved Wi-Fi module into one of
the 7007P-RB4 USB ports. On your Wi-Fi device, connect to
SSID "AES2.0-XXX" using password "7007burg" where XXX are
the last 3 digits of the serial number of the 7007P-RB4. The
Captive Portal will automatically redirect to the web browser
login screen where you can log in with credentials
admin/admin for username/password. Alternatively, you can
also enter the IP address displayed on the 7007P-RB4 LCD on
the web browser of Wi-Fi smartphone or tablet.
Set ID and Cipher Code
1.
Navigate to the Configuration tab. Under the Subscriber ID
panel, enter a unique hex (0001-FFFF) Subscriber ID and
click on Save Change.
2.
Under the Radio Configuration panel, enter the Cipher
Code and click on Save Change.
Note: You will need to have the system cipher code for the
subscriber to enroll in the network. The Subscriber ID must
be unique from any other subscriber on the network.
Configure Relays
1.
In the Burg Subscriber panel, under Status tab, the Relay
State status message will show Connected when the relay
board is physically installed and powered.
2.
Navigate to the Accessories tab. Under the USB Relay
Setting panel are setting controls for Relays 1 to 4.
3.
Enter a relay name for each relay.
4.
To configure a zone, click the Disabled button. The button
will change to Enabled. Enter a name in the zone name box.
AES Corporation
Overview
To view the complete Installation Manual refer to website:
AES Model 7007P-RB4
5.
Under the Trigger control settings, select the zone action
that will cause the relay to operate.
6.
Under the Restore control settings, select the zone action
that will cause the relay to stop operating.
7.
Repeat steps 4 to 6 for all relays that require configuration.
8.
When completed configuration, click on Save Changes
button.
1.
Navigate to the Accessories tab. Under the Zones panel set
the input types.
2.
Set the zone input to either Normally Open, Normally
Closed, or Inverted.
3.
Set zone input restoral to either Yes or No for each zone.
4.
Repeat these steps for the remaining 3 zone inputs and
1
click on Save Change.
Note: Zones 5 and 6 are the Bell Output (Siren) zones and
are programmed differently.
Important
Navigate to the Configuration tab. Under the Flexible Power
Option panel, select the power option that matches the
subscriber installation and click on Save Changes button.
Click on the Update button to apply all the settings you saved.
After configuring the 7007P-RB4, remove the Ethernet cable
and/or the W-Fi module from the 7007P-RB4.
2
If a change to default settings is required, navigate to the
System tab. Under the Reset to Default Configuration panel,
select the components to reset to factory configuration and
click on Reset Configuration.
3
Set Zone Inputs
! Set unused zone inputs to Bypass.
Set Flexible Power Options
Apply the settings
Disconnect from 7007P-RB4
Reset to Default Configuration
Scan code to watch how to program
http://aes-corp.com
Page 1 of 2
4
5
6
7
40-7007P-RB4-QSG Rev A5
Advertisement

Summary of Contents for AES 7007P-RB4
- Page 1 SSID “AES2.0-XXX” using password “7007burg” where XXX are Apply the settings the last 3 digits of the serial number of the 7007P-RB4. The Captive Portal will automatically redirect to the web browser Click on the Update button to apply all the settings you saved.
- Page 2 AES’s sole responsibility is to repair or replace, at AES’s sole option, the AES product that is judged defected by AES during the limited warranty period under the terms of its Limited Warranty.
Need help?
Do you have a question about the 7007P-RB4 and is the answer not in the manual?
Questions and answers