
Summary of Contents for Rowe CD-100K LASERSTAR STARGLO
- Page 1 CD-100K LASERSTAR ® STARGLO FIELD SERVICE MANUAL & PARTS CATALOG VOLUME 1 of 2 INSTALLATION, PROGRAMMING, ROUTINE SERVICE Part No. 21822666 Rev. C...
- Page 2 CD-100K LASERSTAR ® STARGLO FIELD SERVICE MANUAL & PARTS CATALOG VOLUME 1 Rowe International, Inc. 1500 Union SE • Grand Rapids, MI 49507-1884 (616) 243-3633 Printed in USA...
- Page 3 This page intentionally left blank. 21822666...
- Page 4 Rowe phonographs or not, pay special attention to the pricing and programming. Programming and pricing have been set at the factory, so you may not wish to change any of the CD-100K options. After you load the titles and the discs, the CD-100K is ready to play.
-
Page 5: Table Of Contents
Visual Inspection ... 1-6 Phonograph Leveling ... 1-6 Handy Case ... 1-6 Warranty Registration Card ... 1-6 Major Components of the CD-100K ... 1-6 CD Selection System ... 1-7 Keyboard ... 1-7 Central Control Computer ... 1-7 Memorec ... 1-7 Autoplay ... - Page 6 Setting Title Page Limits for the First Time ... 2-7 Pricing ... 2-7 To Set Disc Prices ... 2-8 How CD-100K Pricing Works ... 2-8 Sample Price Changes ... 2-8 Checking the Pricing ... 2-10 Sound System Setup ... 2-10 Extension Speaker Operation ...
- Page 7 Timed Free Play and Timed Lockout Scheduling Tutorial ... 2-78 What Multiple Lockout On/Off Times Do ... 2-78 What Multiple Freeplay On/Off Times Do ... 2-78 Rowe Phonograph Message Center ... 2-81 Inserting or Changing Messages ... 2-82 Setting the Daily Message Display Time(s) ... 2-86 Setting the Master On/Off Date ...
- Page 8 Changing Discs ... 3-4 Complete Audit Command List ... 3-6 Collecting Money ... 3-10 Preventive Maintenance ... 3-10 CD Player Laser Lens ... 3-11 Coin Acceptors (Optional) ... 3-12 Coin Mech (Optional) ... 3-12 FREQUENTLY USED FIGURES AND TABLES Volume 1 Extension Speaker Worksheet (Table 2-1) ...
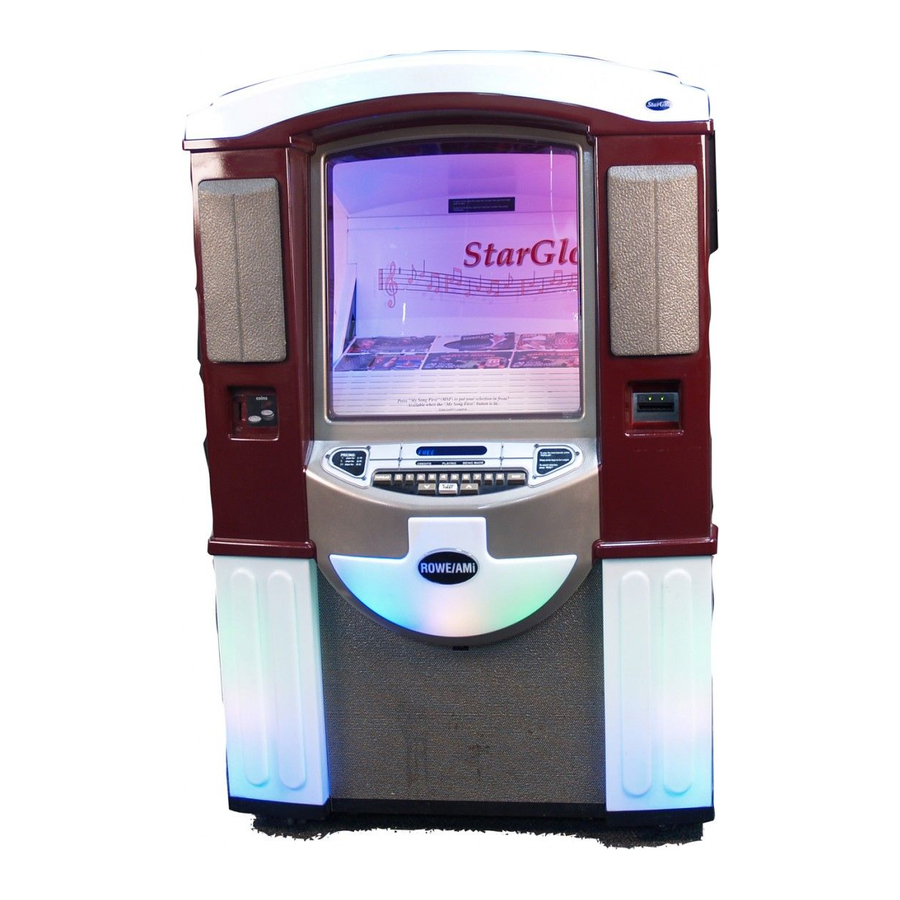
- Page 9 Digital Display Shows the Selection Playing, Selection Being Made, Selections Remaining, the Message Center, and Service Mode Display Selector Keyboard Enters Numbers Contains the POPULAR, RESET, MY SONG FIRST, and Page Turning Keys Figure 1-1. CD-100K Major Components viii 21822666...
-
Page 11: Important Safety Instructions
IMPORTANT SAFETY INSTRUCTIONS Read these instructions. Keep these instructions. Heed all warnings. Follow all instructions. Do not use this apparatus near water. Clean only with a dry cloth. Do not block any ventilation openings. Install in accordance with the manufacturer’s instructions. Do not install near any heat sources such as radiators, heat registers, stoves, or other apparatus (including amplifiers) that produce heat. - Page 12 Do not plug the phonograph in until you verify it is configured for the proper mains voltage. BLACK WHITE WHITE BLACK VOLTAGE SELECTOR WARNING 120~ MAINS SUPPLY BLUE BLUE 240~ MAINS SUPPLY VOLTAGE SELECTOR...
- Page 13 CAUTION RISK OF ELECTRIC SHOCK DO NOT OPEN CAUTION: TO REDUCE THE RISK OF ELECTRIC SHOCK, FIRE HAZARD, AND PERSONAL INJURY; NO OBJECTS FILLED WITH LIQUID, SUCH AS VASES, SHALL BE PLACED ON THE APPARATUS. DO NOT REMOVE ANY COVERS, GUARDS, OR SHIELDS. NO USER SERVICEABLE PARTS ARE INSIDE THIS PHONOGRAPH.
-
Page 14: Section 1 - Installation And System Description
Section 1: Installation & System Description INTRODUCTION The CD-100K plays compact discs exclusively. The reliable CD mechanism holds up to 100 compact discs. These discs are played through a 1000 watt stereo amplifier. Before you begin to unpack and use this phonograph, please pay special attention to the following:... -
Page 15: Features
CD-100K Phonograph FEATURES The major CD-100K features are: General Features: • All lighting done with LED’s. No fluorescent or incandescent lamps used. • LED lighting controllable by IR remote • Sturdy construction and reliable design • Conveniently located customer, operator, and service controls •... -
Page 16: Unpacking Instructions
UNPACKING INSTRUCTIONS This section contains information for unpacking the phonograph and installing it on location. The phonograph is shipped with all major components in place. Save all tie-down hardware in case the CD-100K must be moved to another location. Exterior 1. -
Page 17: Title Page Assembly
CD-100K Phonograph WARNING: Do not attempt to turn the CD title pages by hand. Use the handwheel on the back of the title page assembly (see Figure 1-2). Title rack will not operate without the two Shipping Screws being removed. Trying to force movement in the Title rack can result in broken parts. -
Page 18: Mechanism
Save all shipping hardware that you remove in the following six steps: Mechanism CD UNPACKING 1. Remove the CD changer mechanism shipping bolt from the back of the phonograph cabinet (see Figure 1-3). 2. Remove the shipping tape from the front ends of the mechanism tie-down levers on the side of the mechanism frame (see Figure 1-4). -
Page 19: Visual Inspection
Rowe. MAJOR COMPONENTS OF THE CD-100K Figure 1-1 shows the major components of the CD-100K Phonograph. Take a minute to familiarize yourself with these components. Table 8-1 (Volume 2, Section 8) lists the accessories that you may have in addition to the standard phonograph. -
Page 20: Cd Selection System
CD Selection System CD selections are made by entering the four-digit selection number on the selector keyboard (see Figure 1-5). POPULAR Keyboard The keyboard consists of 15 keys: Ten digit keys and five special keys. The two PAGE CHANGE keys move the title pages electrically. -
Page 21: Autoplay
STEREO PREAMP (Figure 1-6) The preamp increases the signal from the CD player, corrects for varying recording levels (automatic volume control or AVC), allows the volume to be adjusted manually, and modifies the CD tone (tone changes are made through a 7-band graphic equalizer). -
Page 22: Two-Wire Volume Control
Section 1: Installation & System Description Two-Wire Volume Control A Rowe innovation, the two-wire volume control simplifies complex installations and reduces cost. A special preamplifier design permits volume control wiring using any unshielded two-wire cable. OUTPUT TRANSFORMERS The output transformers (Figure 1-7) “step up” the power amplifier’s output voltage for 70-volt extension speakers. -
Page 23: Cd Changer Mechanism
CD-100K Phonograph CD Changer Mechanism The CD changer mechanism, also referred to as the “mechanism” or “mech”, is located in the center of the cabinet’s interior. It is the primary mechanical component of the phonograph. The mechanism holds 100 CD’s and plays selections on command from the selection system. -
Page 24: Cam Switch And Motor Assembly
SPRAG ASSEMBLY This assembly locks the CD magazine in position. CD MODULES The CD player plays the CD’s after they are positioned on the turntable by the disk transfer arm. OUTER CAM SWITCH Actuated in Disc Playing Position 221822666... -
Page 25: Mechanism Control Unit
CD-100K Phonograph Mechanism Control Unit This solid-state switching unit controls the scan and transfer. Main Power Supply The main power supply (Figure 1-10) distributes unregulated +24 VDC, +12 VDC, and regulated +9 VDC to the phonograph. The mains voltage (120 VAC or 240 VAC) to the main power supply is controlled by the power switch on the back of the phonograph cabinet. -
Page 26: Section 2: Installation & Programming
Section 2: Installation & Programming INTRODUCTION This section describes the installation and programming process. This information begins with a summary of what happens when the phonograph is powered up and continues with detailed instructions on how to load the titles and discs, modify the pricing, and set up the sound system. -
Page 27: Loading Cd's And Titles
CD-100K Phonograph The following steps are a summary of the detailed Power On Process that is described in Section 5 of Volume 2. Step 1. Power switch on rear of phonograph is turned on, main power supply +9 VDC, +12 VDC, and +24 VDC LED’s light, and all modules and components receive power. -
Page 28: Loading The Title Holder
Loading the Title Holder All of the titles on the title strip sheet can be used for either right- or left-hand titles. If your title strips have not been preprinted, you may want to type the titles before you tear the individual title strips off the title strip sheet. Refer to the sample in Figure 2-1 for an illustration of where to tear the title strips off the title strip sheets. -
Page 29: Procedures For Loading The Title Page Holder
CD-100K Phonograph PROCEDURES FOR LOADING THE TITLE PAGE HOLDER 1. Tear each title strip from the title sheet so the perforated column appears on the side of the title strip. (The shaded portion of the title strip in Figure 2-1 represents a title strip that has been removed from the title sheet). -
Page 30: Procedures For Loading Discs
PROCEDURES FOR LOADING DISCS Load discs as follows: 1. Unlock and open the top door. 2. Pull the SERVICE button out to the SERVICE position (refer to Figure 2-4). The SERVICE switch is located in the upper right-hand corner of the cabinet. 3. - Page 31 CD-100K Phonograph NOTE: When loading discs, be sure to keep the magazine disc load approximately balanced. If the magazine is partially loaded with all discs on one side, the sprag wheel may lock and the magazine will not turn. 5. Check title strips and disc sequence to ensure that the titles and discs correspond.
-
Page 32: Setting Title Page Limits For The First Time
NOTE: 1. The initialization process will stop whenever the phonograph is in the SERVICE mode, and will resume when the phonograph is returned to the NORMAL mode if the phonograph is in Standby (i.e., no selections are in memory). 2. During full initialization, all disc limits are initially set to 99. As each disc is scanned, the proper limits for that disc are stored in memory allowing only valid selections to be made. -
Page 33: To Set Disc Prices
To set the pricing, follow the steps to complete the Price Card and enter the prices. Also, for your records, fill in the Pricing section of the Rowe CD Phono Operator’s Set Up Sheet at the end of this section. Before making the actual pricing changes, go through the sample pricing that follows. - Page 34 NOTE: This example will not give the correct dollar amounts for U.S. money unless PRICING OPTION 3 is set to 5. (This is the factory setting for U.S. phonographs and you should not have to change it.) Use the prices in the example that follows to help yourself better understand the phonograph’s pricing. If You Have a Problem in a Menu: 1.
-
Page 35: Checking The Pricing
CD-100K Phonograph 11. Move down to the next play option (LEVEL 2 PLAYS) by pressing and holding RESET and then pressing 1 (enter 009 and press POPULAR). 12. Move down to the next play option (LEVEL 3 PLAYS) by pressing and holding RESET and then pressing 1 (enter 025 and press POPULAR). -
Page 36: 70-Volt Speakers
70-Volt Speakers To avoid prohibitive cable losses on long speaker lines (over 100 feet), use 70 V speakers. The power level in the 70 V speakers is set at each speaker. 250 watts of the 1000 watts is provided for 70 V speakers by A1, A2 connections on the audio output transformer assembly. -
Page 37: Selecting Speaker Power
CD-100K Phonograph Table 2-1 Extension Speaker Worksheet SELECTING SPEAKER POWER General Instructions This section will lead you through the power and speaker selection process. This process consists of four major steps and several smaller steps. The major steps are: 1. Identifying the extension speakers and computing the extension speaker power. - Page 38 Table 2-1. Extension Speaker Worksheet 4-OHM SPEAKERS CONNECTED TO TRANSFORMER TAPS Place the quantity of speakers in the blank under QTY and multiply the quantity times the power consumption (show stereo speakers as 2 speakers). Place your results in the blank under TOTAL. 4-Ohm Stereo Speakers connected to transformer taps Speakers for the 1 watt taps: Speakers for the 4 watt taps:...
-
Page 39: 70-Volt Speakers
CD-100K Phonograph Table 2-1. Extension Speaker Worksheet 8-OHM SPEAKERS CONNECTED TO TRANSFORMER TAPS Place the quantity of speakers in the blank under QTY and multiply the quantity times the power consumption (show stereo speakers as 2 speakers). Place your results in the blank under TOTAL. - Page 40 Table 2-1. Extension Speaker Worksheet Combine consumptions of all speakers: Connected to E1 - E7 Tapped 4-Ohm: Tapped 8-Ohm 70-Volt A1, A2 70-Volt E7 to E7 Totals: Subtract the Grand Total from 1000 and write the 21822666 Sheet 4 Stereo ______ ______ ______...
- Page 41 CD-100K Phonograph Table 2-1 Extension Speaker Worksheet 3. The phonograph wires to change are the Violet (channel 1) and the Pink (channel 2) on the output transformer assembly (see Table 3-2A). Use Table 3-2A as a guide to select the power used by the phonograph. This power should roughly match the amount indicated in "Power Available for the Phonograph"...
- Page 42 Section 2: Installation & Programming This page intentionally left blank. 21822666 2-17...
- Page 43 CD-100K Phonograph 500 WATTS PER CH 1000 WATT POWER AMP 500 WATTS PER CH 2-18 AUDIO OUTPUT TRANSFORMER ASSEMBLY 31.63 V 24 V 16 V 16 V 24 V 31.63 V GREEN WOOFER BLACK JUKEBOX SPEAKERS WOOFER SLATE LT = CHANNEL 1...
- Page 44 W/BL JUKEBOX DOOR SPEAKERS 21822666 HIGH FREQUENCY MID RANGE HIGH FREQUENCY MID RANGE Section 2: Installation & Programming 2-19...
-
Page 45: Transformer Wiring Diagram
CD-100K Phonograph 40832108 TRANSFORMER WIRING DIAGRAM 2-20 BR/W CHANNEL 1 OR 3 BL/W BL/W CHANNEL 2 OR 4 BR/W 21822666... - Page 46 Section 2: Installation & Programming This page intentionally left blank. 21822666 2-21...
-
Page 47: Speaker Synopsis
CD-100K Phonograph SPEAKER SYNOPSIS 1000 WATTS OF RMS POWER PER AMPLIFIER OR 500 WATTS PER CHANNEL. The generic speaker wiring diagrams cover 4 to 32 speakers. Diagram 1 has a 4 speaker layout. If you only want the four speaker layout, then the maximum output of each speaker would have to be rated 4 ohms and capable of 300 watts. - Page 48 Section 2: Installation & Programming 21822666 2-23...
- Page 49 CD-100K Phonograph 2-24 21822666...
- Page 50 Section 2: Installation & Programming 21822666 2-25...
- Page 51 CD-100K Phonograph 2-26 21822666...
- Page 52 Section 2: Installation & Programming This page intentionally left blank. 21822666 2-27...
- Page 53 CD-100K Phonograph Dual Remote Volume & Cancel Control 30632209 Dual Remote Volume & Cancel Contro 30632201 Figure 2-8A. Remote Volume Control Diagrams 2-28 21822666...
-
Page 54: Ir Volume Control 2Ch Preamp
IR VOLUME CONTROL 2CH PREAMP Volume can be controlled by a 21958307 IR transmitter and a single- or dual-wired remote control. When the wired volume control is moved, the volume will quickly fade up or down to match its position. When moving a wired remote control, it is best to quickly turn the volume off then turn it up to the desired volume. -
Page 55: Sound System
CD-100K Phonograph SOUND SYSTEM Acoustical Compensation (Equalizer Tone Controls) The preamplifier contains seven tone controls on each channel to compensate for room acoustics in various locations. These controls are on the amplifier chassis. The sound level at which the phonograph will be operated and the room furnishings determine the settings of these controls. -
Page 56: If The Room Or Speaker System Requires A Trade-Off
If the Room or Speaker System Requires a Trade-Off The equalizer limits the volume of all of the audio frequencies. Therefore, to achieve the best sound for a specific room or set of speakers, you may find that most of the graphic equalizer controls need to be turned down. In this situation, the overall phonograph volume may not be adequate. -
Page 57: Average Or Moderately-Absorbent Rooms
CD-100K Phonograph Average or Moderately Absorbent Rooms These are the factory settings. 1. Turn all seven right channel and seven left channel graphic equalizer controls fully counterclockwise. 2. The graphic equalizer’s controls should now be set as shown to the right. -
Page 58: Paging
Paging Paging circuitry is part of the Preamplifier. The Microphone cable plugs directly into the preamplifier. CHANGING THE NUMBER OF CREDITS REMAINING Use these steps to increase or decrease the number of CREDITS REMAINING on the phonograph. 1. Enter the SERVICE mode by pulling the SERVICE button out to the SERVICE position. 2. -
Page 59: If You "Get Lost" In The Menus
( * SERVICE MODE * ). USING CD-100K COMMANDS CD-100K commands are formed by combining the numbers that appear on the left side of the menus in Figure 2-10. To construct and use CD-100K commands, refer to Figure 2-10 or Table 2-4. - Page 60 Section 2: Installation & Programming This page intentionally left blank. 21822666 2-35...
-
Page 61: Key Functions
CD-100K Phonograph CD SERIES SERVICE MODE *SECURITY* ENTER CODE ---- SECURITY LEVEL - LVL 2 CODE ---- LVL 3 CODE ---- PHONO ID ---- VOID SRVC SW --- SECURITY IS MODEM ----------> *ATTRACT* ATTRACT MODE ---- PAGE MODE --- CHANGE TIME --... - Page 62 *OPTIONS* LOCKOUTS -- ---- PRIORITY -- ---- PREMIUMS -- ---- KEEP CREDIT --- KEEP MONEY --- ALBUM SELECT --- PRIORITY PLY --- TRKS IN A ROW -- KARAOKE MORE OPTIONS 1 ---> *REPORTS* CASH REPORT PLAY REPORT POPULAR REPORT NON RESET REPORT ALL AUDIT REPORT SETUP REPORT ERR HIST REPORT...
-
Page 63: Service Mode Menu
This menu contains the general title for each submenu. Some of the submenus contain commands only. Other submenus contain both commands and further submenu names. Refer to Figure 2-10, the CD-100K Service Mode Map, for an illustration of the following menu descriptions: Security Menu This menu contains all of the command options that must be executed to display or change a phonograph security code or enter a security level. -
Page 64: Autoplay
NOTE: The phonograph will automatically adjust the disc limits whenever a disc is played. This form of initialization is not recommended as a substitute for the selections in this menu. To enter this menu from the MAIN menu: Type 3. Autoplay Autoplay is the function that plays CD’s when no customers have made selections. -
Page 65: More Options 1 Menu
CD-100K Phonograph More Options 1 Menu This menu is a collection of options that allows you to: • Select FIFO or random playback of selections • Automatically lockout defective discs (Lockout Count) • Cancel Autoplay when a paid selection is made •... -
Page 66: How To Make Programming Changes
HOW TO MAKE PROGRAMMING CHANGES The CD-100K allows you to perform programming activities in two ways. The primary or MENU mode uses menus to move through the choices until you find the desired function. This method of selecting the function you want is more time consuming than the Command mode, but it does not require you to remember any commands. -
Page 67: Security Levels
CD-100K Phonograph Security Levels The CD-100K uses security levels to protect audit and programmable information. • Level 1 allows you to view all of the phonograph information, except the security codes, but does not allow you to change any of the information. - Page 68 Table 2-5A. Menu & Command Descriptions Code * SERVICE MODE * - Is the title of the MAIN menu. This menu is the beginning menu for all the other menus. All of the options in this menu are names for other menus. The table that follows contains descriptions of all of the menu options.
- Page 69 CD-100K Phonograph Table 2-5A. Menu & Command Descriptions Code Security On/Off - If set to OFF, Security Level 3 is automatically established when entering the SERVICE MODE. When security is set to ON, Level 1 is established when SERVICE MODE is entered and the proper four-digit security code must be entered to access Security Level 2 or 3.
- Page 70 Table 2-5A. Menu & Command Descriptions Code 089 MODEM SPECIAL - Modem Special is a continuation of the MODEM menu. 0890 Modem Post Reports to a PC - If set to ON, the modem will call the office and send reports on the days that are active in menu item 0891.
- Page 71 CD-100K Phonograph Table 2-5A. Menu & Command Descriptions Code 1 AUDITS - Are the functions and menus that allow you to display and reset the various accumulated figures for money, popularity, number of plays, and credits. 10 CASH AUDITS - Is the menu that allows you to display, but not change, cash totals, number of coins through the coin switches, and the total number of bills.
- Page 72 Section 2: Installation & Programming...
- Page 73 CD-100K Phonograph Table 2-5A. Menu & Command Descriptions Code 1041 Current Number of Type 2 Coins - Displays the total number of Type 2 coins (10¢) collected since the last time the CLEAR CASH command (Selection 4 in the AUDITS menu) was used.
- Page 74 Table 2-5A. Menu & Command Descriptions Code 117 Overplay Counter - Displays the number of overplays selected since the last time the CLEAR PLAYS command (Selection 5 in the AUDITS menu) was used. The overplay counter is part of the CCC’s memory, which keeps track of how many duplicate selections were made.
- Page 75 271 1 ON 01 01 1980 - Allows you to display a message for one or several days. See Programming the Rowe Message Center. 272 Msg 1 Edt Del Vu - Allows you to create, edit, or delete messages. See Programming the Rowe Message Center.
- Page 76 273 Scroll Message - Message editor for the 2nd scrolling line of a 2 line display. See Programming the Rowe Message Center. (Not used in this model phonograph.) 274 4-Hour Clear - Displays and toggles the 4-Hour Clear option ON or OFF. When 4-Hour Clear is ON, all selections remaining to be played will be cleared (if the phonograph is turned OFF for more than 4 consecutive hours, or the number of minutes entered by COMMAND 692).
- Page 77 CD-100K Phonograph Table 2-5A. Menu & Command Descriptions Code 33 Cancel Initialization - Cancels initializations that have been started with either of the previous options (30 or 31). Press POPULAR to perform this function. The display will blink when the command is executed.
- Page 78 Table 2-5A. Menu & Command Descriptions Code 41 Delay Time - Displays and sets the time between Autoplay selections or displays and sets the time between giving a Credit. Type the number in minutes then press POPULAR. This command is used only in STANDARD and CREDIT Autoplay.
- Page 79 CD-100K Phonograph Table 2-5A. Menu & Command Descriptions Code 48 XX Cat - Assigns categories to discs in Enhanced Autoplay. 49 Schedule SMTWTFS - The active days, time(s), categories, and delay(s) between Autoplay selections in Enhanced Autoplay. 5 PRICING - This menu allows the operator to change CD pricing, coin switch values, credit levels, credit values, credit multiplier, Free Play value, and “My Song First”...
- Page 80 Table 2-5A. Menu & Command Descriptions Code 502 Coin SW2 = XX - Displays and sets the #2 COIN SWITCH VALUE. Type the new value and then press POPULAR. 503 Coin SW3 = XX - Displays and sets the #3 COIN SWITCH VALUE. Type the new value and then press POPULAR.
- Page 81 CD-100K Phonograph Table 2-5A. Menu & Command Descriptions Code 52 PLAYS @ LEVEL: - Displays and edits # of plays or alternate plays at a given level, and sets alternate price times. 520 Not Used 521 Level 1 Plays = XX - Displays and sets the number of plays given for this credit level. Type the new value and then press POPULAR.
- Page 82 Table 2-5A. Menu & Command Descriptions Code 62 Premiums - Displays and sets premium selections. These selections (100 maximum) will be priced at 2 to 99 times the regular price (see Programming Autoplay, Premiums, Priorities, Lockouts, Pairs, and Menu Code 6995). 63 Keep Credit - Displays and toggles the KEEP CREDIT option ON or OFF to allow retaining or canceling credit upon Power up.
- Page 83 CD-100K Phonograph Table 2-5A. Menu & Command Descriptions Code 693 Lockout Count - Adds the selection to the LOCKOUT LIST (60) when the DISC CONDITIONS NUMBER OF SKIP OCCURRENCES reaches the programmed value. To change the LOCKOUT COUNT, type the new number and then press POPULAR.
- Page 84 Table 2-5A. Menu & Command Descriptions Code 6992 Free Album - Allows entire albums to be selected if FREE PLAY (55) and ALBUM BUY (65) are ON. Hold RESET and press 9 to toggle this command ON and OFF. Press POPULAR to save your choice. 6993 Thank You On/Off - If set to ON, the “Thank You”...
- Page 85 CD-100K Phonograph Table 2-5A. Menu & Command Descriptions Code 74 All Audit Report - Starts all 4 audit reports. 75 Setup Report - Starts the phonograph Setup Report. 76 Error History Report - Starts the Accumulated Phonograph Errors Report. 77 Disc Condition Report - Starts the Disc Condition Report.
- Page 86 Table 2-5A. Menu & Command Descriptions Code 89 ON/OFF Cycles - Displays and changes the number of ON/OFF cycles. 9 DEVICE SETUP - The DEVICE SETUP menu activates and defines the AMPLIFIER, VOLUME CONTROL, and IR REMOTE options. 90 AMPLIFIER - The AMPLIFIER menu activates and defines the AMPLIFIER options. (4-channel preamplifier only) 91 IR REMOTE - The IR REMOTE menu activates and defines IR REMOTE options.
- Page 87 CD-100K Phonograph Table 2-5A. Menu & Command Descriptions Code 3 means CH3 volume up/down switch controls AMP CH3 volume. Any of CH1, CH2, or CH4 switches will adjust AMP CH1, CH2, and CH4 volumes (those 3-amp volumes are locked together).
- Page 88 Table 2-5A. Menu & Command Descriptions Code 904 Mic 1 Routing - Sets MIC 1 to route to any or all of the 6 different PREAMP output channels (left to right: AUX R, AUX L, CH1, CH2, CH3, CH4). If 0 on the display for the channel, the MIC will not route to that channel.
- Page 89 90995 Mic Input Select - Sets the input to the preamp when MIC is keyed. Set for one of following: (Mono C = 1, Stereo B = 3, Stereo A = 4, CD player = 5, input unchanged = 6). Type in 1, 3, 4, 5, or 6 and push POPULAR.
- Page 90 Table 2-5A. Menu & Command Descriptions Code 90996 Playing Audio Muting - Sets the muting to the amp when playing an audio selection. Set any or all of the 8 different amp mute devices (left to right: AUDIO/VIDEO CONTROLLER OUT CH3&4, AUDIO/VIDEO CONTROLLER OUT CH1&2, FRONT END INPUT, AVC, POWER AMP OUT CH4, POWER AMP OUT CH3, POWER AMP OUT CH2, POWER AMP OUT CH1).
- Page 91 CD-100K Phonograph Table 2-5A. Menu & Command Descriptions Code 909993 Playing Audio Output Select Ch 1,2 - Sets the output select for channel pairs 1&2 of the amp when playing audio. Set for one of following: (mono/mono = 1, aux/aux = 2, mono/aux = 3, aux /mono = 4, stereo/stereo = 5).
- Page 92 Section 2: Installation & Programming...
- Page 93 917 Remote Input Select - Allows the Remote to command the Preamp to switch to the next input (Stereo A, Stereo B, Mono C, CD Player) if this feature is on. Hold RESET and press 9 to toggle ON or OFF.
- Page 94 Table 2-5B. CD-100K Command Index Function Album free - on/off maximum tracks in a row Select - on/off Amplifier (4-channel preamp only) autoplay/bgm volume bgm delay time bgm volume maximum equalizer settings input select for each mode input volume preset levels...
- Page 95 CD-100K Phonograph Table 2-5B. CD-100K Command Index Function Autoplay autoplay/bgm volume autoplay days of the week enable autoplay only discs autoplay start time autoplay status on/off autoplay stop time cancel autoplay select early on/off clear programmed Autoplay enhanced categories enhanced schedules...
- Page 96 Table 2-5B. CD-100K Command Index Function Credit autoplay clear credits display or change credits free play - on/off keep credit after power failure on/off levels multiplier “my song first” remaining selections remaining values Daylight saving time settings date and time change...
- Page 97 CD-100K Phonograph Table 2-5B. CD-100K Command Index Function Factory loads factory load all - automatic factory load amplifier settings factory load pricing factory load test code Free play album on days start time status on/off stop time timed on/off Initialize...
- Page 98 Table 2-5B. CD-100K Command Index Function Modem answer off time answer on time connect delay # of post/page retries # of rings to answer on page (send errors to a pager) on/off page to post (send errors to a PC) on/off...
- Page 99 CD-100K Phonograph Table 2-5B. CD-100K Command Index Function Popularity clear disc pop clear sel pop disk least popular discs most popular discs most popular selections report Pricing bill values buy an album - on/off coin switch values multiplier “my song first”...
- Page 100 Table 2-5B. CD-100K Command Index Function Reports all audit baud rate cancel carriage return delay cash disc conditions eliminate/retain spaces in report error history non resettables play popular set up Security change level 2 change level 3 enter security code...
- Page 101 CD-100K Phonograph Table 2-5B. CD-100K Command Index Function Software level “Thank You” message on/off Time and date change Tracks in a row Versions PROGRAMMING AUTOPLAY, PREMIUMS, PRIORITIES, LOCKOUTS, AND PAIRS Each of these seven options will allow programming specific selection or disc numbers into memory. The procedure is the same for all seven options.
-
Page 102: Autoplay Programming Modes
For Priorities Programming Type Display Shows *OPTIONS* PRIORITY 00 ---- For Premiums Programming Type Display Shows *OPTIONS* PREMIUMS 00 ---- For Pairs Programming Type Display Shows *MORE OPTIONS 2* PAIRS SEL 00 ---- If a selection is not programmed for the displayed sequence number, four dashes will appear. When first received from the factory, none of these options will have any selections programmed. -
Page 103: Lockout And Timed Lockout Modes
CD-100K Phonograph LOCKOUT AND TIMED LOCKOUT MODES To lockout a disc, enter the two-digit disc number followed by two zeros. To lockout a selection, enter the four- digit selection number. If you are at Security Level 3 and have one of the four programming options on the display, you will notice the 1’s digit of the sequence number will be blinking. - Page 104 See Table 2-5A for Commands 54, 55, and 58. If FREE PLAY STATUS is ON, the phonograph will be on Free Play. If FREE PLAY STATUS is OFF, the phonograph will not be on FREE PLAY. Free Play status will always be turned OFF when a STOP time and day matches the time and day on the “Real-Time Clock”...
- Page 105 CD-100K Phonograph 2. Plan the Schedule Scheduling Freeplay is simple, just remember these rules: SCHEDULING RULES The schedule must have one ON time and a corresponding OFF time for each scheduled time. These times must follow these simple restrictions: Examples:...
-
Page 106: Rowe Phonograph Message Center
ROWE PHONOGRAPH MESSAGE CENTER The Rowe Message Center allows you to program messages to play for any desired date and time. Up to eight different messages may be used, with three programmable ON/OFF times for each day of the week. -
Page 107: Inserting Or Changing Messages
CD-100K Phonograph Selecting Characters The following is a list of available characters in order of appearance in the message programming menu. Note that the cursor begins at a “space” and can be moved either left (by pushing key 0) to the number 9, or right (by pushing the 1 key) to the letter A. - Page 108 Example for programming a new message When this example is complete, the display will read HELLO TOM as message number three. A. Follow step AA to obtain MSG 1 EDT DEL VU. B. Push key 3 to edit message three. Push POPULAR. C.
- Page 109 CD-100K Phonograph Example for correcting or editing an existing message When the example is complete, the display will read TOPS IN MUSICLAND for message 6. Previously, this message displayed TOYS FOR TOTS. Note - all editing keys will be used to show their effect on the message.
- Page 110 21822666 Table 2-7. Example Message Edit Display Section 2: Installation & Programming 2-85...
-
Page 111: Setting The Daily Message Display Time(S)
CD-100K Phonograph BB. Setting the daily message display time(s): Push 0 (see NOTE #1 on Page 2-56) When you initially program a message, you must activate the daily message display timer for that message. This section discusses how to program messages to play at any given time of day for the week. - Page 112 Example for setting up the message daily timer When this example is completed, message 4 will display every day from 12:00 (00:00) midnight until 11:59 (23:59) PM (see Table 2-8 for Display Example). A. Follow step BB to obtain display MSG SCH SMTWTFS. B.
-
Page 113: Setting The Master On/Off Date
CD-100K Phonograph Setting the Master ON/OFF Date: Push 1 (see Note #1 on Page 2-56) Messages 1-8 can play every day unless they are changed in the MASTER ON/OFF DATE menu. By scheduling messages to play on specific dates, you may tailor messages (such as “HAPPY BIRTHDAY JOE”) to play on special dates. -
Page 114: Setting Up Enhanced Autoplay
SETTING UP ENHANCED AUTOPLAY 1. Set COMMAND 40, AUTOPLAY IS, to: ENH (COMMAND 41, DELAY, is not used in Enhanced Autoplay). 2. Set COMMAND 42, START TIME, to: 00:00 (this is the factory setting). 3. Set COMMAND 43, STOP TIME, to: 23:59 (this is the factory setting). 4. - Page 115 Country & Western disc would be assigned to Urban as well). You can enter the categories as you look at the title pages on a CD-100K Phonograph. Photocopy the Disc Category List at the back of this section and use the copy for a work sheet.
- Page 116 Make the Category Entries KEY FUNCTIONS Some key combinations have slightly different meanings in the Autoplay menus. Table 2-9 shows what these key combinations do in the Schedule (display shows: SCHEDULE SMTWTFS) and in the Set Time (SU 01 TIME) modes. Use the DISC mode to enter a disc number.
-
Page 117: Using Reset + 9 In The Category Menu
CD-100K Phonograph USING RESET + 9 IN THE CATEGORY MENU RESET + 9 toggles between DISC mode and CATEGORY mode. DISC MODE DISC mode (the = sign is ahead of the disc number) only allows you to change the disc number that is displayed. -
Page 118: Day Of The Week
Section 2: Installation & Programming 3. Plan the Schedule The schedule determines on which day and at what time of day that Autoplay categories are allowed to play (this is called an event). If the phonograph has the optional volume control module installed, the schedule can adjust the phonograph’s volume at the beginning of each event. -
Page 119: Working Example Of Enhanced Autoplay
CD-100K Phonograph PAUL’S AUTOPLAY SCHEDULE Paul wants his Rowe Jukebox to automatically play music at certain times of the day. Paul wants to have the music played every day in the following format: • Easy Listening, at a reduced volume level, for breakfast from 6:30 to 7:30 AM with a one-minute delay between Autoplay selections. - Page 120 Date ____9-13-02_____ Name each of the eight categories and then assign the discs to each category. Category # Category Name ___All Discs______________________ ___Pop Music - Top 40_____________ ___Easy Listening_________________ ___Specials - Certain Top 40________ Place an X on the category that you wish to assign to each disc. (All discs are assigned to category 1 from the factory.) Figure 2-12.
- Page 121 CD-100K Phonograph 3. Paul then enters the information shown in Figure 2-12 in the following sequence: A. Paul enters the SERVICE mode. The list that follows shows what keys he presses and displays what he sees after he presses the keys.
- Page 122 Location: Paul’s Restaurant Fill in the Autoplay event times, delay times, categories, and volume changes before you make the actual scheduling changes. Day: SMTWTFS Event Time 6 : 30 7 : 30 14 : 00 16 : 00 19 : 00 21 : 00 D.
- Page 123 CD-100K Phonograph Step # Keystroke Press Keys 0, 7, POPULAR, 3, 0, POPULAR Press RESET + 9 Press RESET + 9 Press RESET + 9 Press RESET + 9 Press RESET + 9 Press RESET + 3 Press Keys 1, 4, POPULAR, POPULAR...
- Page 124 Step # Keystroke Press RESET + 9 Press Keys 3, POPULAR Press RESET + 9 Press Keys 3, POPULAR Press RESET + 9 Press RESET + 3 Press Keys 2, 1, POPULAR, POPULAR Press RESET + 9 Press RESET + 9 Press RESET + 9 Press RESET + 9 Press RESET + 9...
- Page 125 CD-100K Phonograph This page intentionally left blank. 2-100 21822666...
- Page 126 Worksheet Masters - - - - - - - - On the following pages you will find blank worksheet masters for Multiple Free Play On/Off Times, the Disc Category List, and the Autoplay Schedule. Carefully remove these masters from this manual and copy them freely for your use.
- Page 128 Date _______________ Name each of the eight categories and then assign the discs to each category. Category # Category Name _________________________________ _________________________________ _________________________________ _________________________________ Place an X on the category that you wish to assign to each disc. (All discs are assigned to category 1 from the factory.) Figure 2-12.
- Page 130 Fill in the START times, STOP times, and the COMMENTS before you make the actual scheduling changes. Sunday ___:___ ___:___ ___:___ Monday ___:___ ___:___ ___:___ Tuesday ___:___ ___:___ ___:___ Wednesday ___:___ ___:___ ___:___ Thursday ___:___ ___:___ ___:___ Friday ___:___ ___:___ ___:___ Saturday ___:___...
- Page 132 Day:_______________ Fill in the Autoplay event times, delay times, categories, and volume changes before you make the actual scheduling changes. Day:_______________ Event Time Categories _____:_____ ________________ _____:_____ ________________ _____:_____ ________________ _____:_____ ________________ _____:_____ ________________ _____:_____ ________________ _____:_____ ________________ _____:_____ ________________ _____:_____ ________________ _____:_____...
- Page 134 SLED RESET PIEZO TIME PLAY DELAY * MESSAGE CENTER* MSG DAILY SCHEDULER MSG DATE SCHEDULER MSG EDITOR 4 HOUR CLEAR (ON/OFF) VIDEO CD’s (OFF/JUK/ON) LOCATION___________________ ROWE CD PHONO OPERATOR’S SETUP SHEET FACTORY SETTINGS 0000 ___________________________ 0000 ___________________________ 0000 ___________________________ ___________________________...
- Page 136 MENU MENU COMMAND NAME * INITIALIZE * CONDITION LOG SKIP CANCEL TIME CANCEL TIME DATE * AUTO PLAY * AUTO PLAY IS (STD/ENH/CDT/OFF) DELAY TIME (# MINUTES) START TIME (TIME OF DAY) STOP TIME (TIME OF DAY) ON DAYS PROGRAM APLAY STATUS (ON/OFF) (ENH APLAY) SCHEDULE...
- Page 138 MENU MENU COMMAND NAME * OPTIONS * LOCKOUTS (50 MAX) PRIORITY (100 MAX) PREMIUMS (100 MAX) KEEP CREDIT (ON/OFF) KEEP MONEY (ON/OFF) ALBUM SELECT (ON/OFF) PRIORITY PLY (ON/OFF) TRKS IN A ROW KARAOKE (100 MAX) * MORE OPTIONS 1* PAID PLAY (FIFO/RAND) FREE PLAY (RAND/FIFO) CLEAR TIME LOCKOUT COUNT...
- Page 140 MENU MENU COMMAND NAME * REPORTS * BAUD RATE (600/1200/2400/4800/9600) CR MS DELAY SPEC REPORT * DEVICE SETUP * MAIN DISP LINE BGM DELAY TIME LEAD SINGER (LEFT/RIGHT) AP VOLUME (OFF/SEPART/LOCKED) OFF VOLUME OPTION VOLUME STEP * AMPLIFIER * CH1 MIC OVERR CH2 MIC OVERR CH3 MIC OVERR CH4 MIC OVERR...
- Page 142 MENU MENU COMMAND NAME * MORE AMP 3 * 909990 SBY MUT 909991 BGM MUT 909992 MIC MUT 909993 PLY AU MOD 1/2 909994 PLY AU MOD 3/4 909995 PLY KA MOD 1/2 909996 PLY KA MOD 3/4 909997 PLY VI MOD 1/2 909998 PLY VI MOD 3/4 * MORE AMP 4 *...
-
Page 144: Optional Studio Sound System
OPTIONAL STUDIO SOUND SYSTEM Introduction The Studio Sound system can use one or two digital power amplifiers. Each 2-channel digital power amplifier is rated 1000 (500 x2) watts RMS @ 2 ohm load. The 4-channel Audio/Video Controller replaces the 2-channel preamplifier;... -
Page 145: Audio/Video Controller
AUTOPLAY and external BGM. Karaoke Controls This phonograph has the audio components for Karaoke. Just add microphones, and install a Rowe CDG or CDV decoder kit compatible with the new electronics, for a complete Karaoke solution. The kit instructions tell how to setup and use the controls. -
Page 146: Amplifier Factory Load
3 microphones can be connected and used simultaneously • ¼-inch jacks for balanced and unbalanced microphones, and headers for Rowe microphones • Each microphone can be routed to any or all 6 outputs (AUX L, AUX R, CH1, CH2, CH3, CH4) •... - Page 147 CD-100K Phonograph • RCA jacks for surround sound • Jacks marked: • CH1 - CH2 SIGNAL OUTPUT, CH1 + CH2 SIGNAL OUTPUT • CH3 - CH4 SIGNAL OUTPUT, CH3 + CH4 SIGNAL OUTPUT • RCA jacks for back end signal outputs •...
- Page 148 Section 2: Installation & Programming This page intentionally left blank. 21822666 2-105...
- Page 149 CD-100K Phonograph CD/STEREO MECHANISM INPUT (J41) CD/STEREO MECHANISM INPUT (J42) L CHAN STEREO A (BGM) INPUT AUTOMATIC VOLUME (J40) FRONT CONTROL (AVC) STEREO A PROGRAM (BGM) SELECTOR MUTING INPUT MUTING (J43) R CHAN STEREO B INPUT (J39) STEREO B INPUT...
-
Page 150: Power Amplifier
OUTPUT CH. 1 & 2 PROGRAM SELECTOR, A-Stereo VOLUME CONTROL and MUTING A-Stereo CHAN. 1 OUTPUT A---STEREO (J19) B OR D B---AUX. IN (J15) C---MONO (CH. 1 + CH. 2) D---AUX. IN (J15) E---MONO (CH. 1 + CH. 2) C OR D CHAN. - Page 151 CD-100K Phonograph 90993 Front-end Program Selected in Standby Mode CD (J41, J42), Stereo A (BGM) (J40, J43), Stereo B (J39, J44), The Standby Mode is Mono C (BGM) (J38) active between plays, Factory setting is CD (J41, J42) and after all sections...
- Page 152 Playing Audio Mode 90990 Front-end Program Selected in Playing Audio Mode CD (J41, J42), Stereo A (BGM) (J40, J43), Stereo B (J39, J44), Mono C (BGM) (J38) Factory setting is CD (J41, J42) 909993 Output Ch.1, and 2 Program Selected in Playing Audio Mode mono(CH1 + CH2) / mono(CH1 + CH2) aux(J15) / aux(J16)
- Page 153 CD-100K Phonograph How to remote the Volume Control Unit using existing 3-wire cable (Mount by VCU) SYSTEM RESET MUTE NOT ROWELINK B ROWELINK A Volume +9 VDC Control +9 COM Unit 6-wire Modular Cable 9 VDC @ 100 ma Wall Plug-in Power...
-
Page 154: Section 3: Routine Service
POPULAR three times. This will take you back to the main menu. At this point you can begin performing the audits. Refer to the CD-100K Service Mode Map (Figure 2-10) for a diagram of the audit menus and commands. Described here also are the procedures for clearing the audit values. -
Page 155: Cash Audits
CD-100K Phonograph Cash Audits 1. Type 100. This displays the CURRENT CASH value. Record the CURRENT CASH figure in your usual way and go to the next step. 2. Press and hold RESET, and then press 1. This will move you down to the next display. Record the CASH VALUE in the usual way. -
Page 156: Most Popular Selection
The following steps describe how to perform each of the three CLEAR commands as a separate activity. If you wish to use the “short cut” method, follow the Using the CD-100K Commands instructions in Section 2. Each of these commands may be executed from SECURITY LEVEL 2 or 3. -
Page 157: Changing Cd's And Titles
CD-100K Phonograph CHANGING CD’S AND TITLES NOTE: Do not attempt to turn the CD title pages by hand. If the title page assembly is un- plugged or not operating electronically, use the handwheel on the back of the assem- bly (see Figure 1-2). - Page 158 NOTE: When loading the magazine, be sure the disc rests in the same numbered slot in both the front and rear of the magazine. Be sure to keep the magazine disc load approxi- mately balanced. If the magazine is partially loaded with all discs on one side, the sprag wheel may lock and the magazine will not turn.
-
Page 159: Complete Audit Command List
CD-100K Phonograph COMPLETE AUDIT COMMAND LIST Table 3-1 is a complete list of the Audit commands with an explanation of what each command does. Command 1 AUDITS - Are the functions and menus that allow you to display and reset the various accumulated figures for money, popularity, number of plays, and credits. - Page 160 Command 19 Display the Most Popular Selection - Displays the most popular selection number (Disc 00-99 followed by Selection 00-99, a total of four digits) followed by the number of plays (9999 maximum) that selection had. To display the next Most Popular selection, press and hold RESET and then press 3. Press and hold RESET and then press 3 to display each successive most popular selection.
- Page 161 CD-100K Phonograph Command 11 PLAY AUDITS - Allows you to display, but not change, credits, autoplays, mechanism plays, and album plays. 110 Free Credits - Displays the number of free credits given since the last time the CLEAR PLAYS command (Selection 5 in the AUDITS menu) was used.
- Page 162 Command 122 Coin - Displays total coin cash received by the coin acceptor. 123 Wallbox - Displays total cash received by all Wallboxes. 124 Free - Displays total free credits. 125 Paid - Displays total paid for credits. 126 Most Popular - Displays the total number of Most Popular selections made with the POPULAR button. 127 Mechanism - Displays the total number of mechanism cycles.
-
Page 163: Collecting Money
CD-100K Phonograph COLLECTING MONEY 1. Open the top door and unlock the bill acceptor bill box by reaching in behind the bill acceptor. 2. Remove the currency, then close and lock the bill box. 3. Close the top door. PREVENTIVE MAINTENANCE Preventive maintenance should be performed at the regular intervals specified, while adjustments should be made only when necessary. -
Page 164: Cd Player Laser Lens
2. Remove any remaining dirt by placing one to three drops of Kodak Lens Cleaner (Kodak Catalog Number 176 7136, available from photographic supply stores or Rowe 21966601) on a lint-free “Q”-Tip and very gently wiping dust and smoke deposits from the lens. Wipe in the direction of the arrows shown in Figure 3-3. -
Page 165: Coin Acceptors (Optional)
CD-100K Phonograph COIN ACCEPTORS (Optional) COIN MECH (Optional) The phonograph is equipped to physically mount a 3.5 inch wide (80mm) coin acceptor, mechanical or electronic version, with an accepted coin diameter from .7 (18mm) to 1.2818 (31mm). Mechanical A valid coin is determined by the actuation of the microswitch (Figure 3-4), which when tripped will give a credit of 25 cents (unless the software default is changed).
Need help?
Do you have a question about the CD-100K LASERSTAR STARGLO and is the answer not in the manual?
Questions and answers