Table of Contents
Advertisement
Quick Links
Advertisement
Table of Contents

Summary of Contents for Tedsen Teletaster IRP
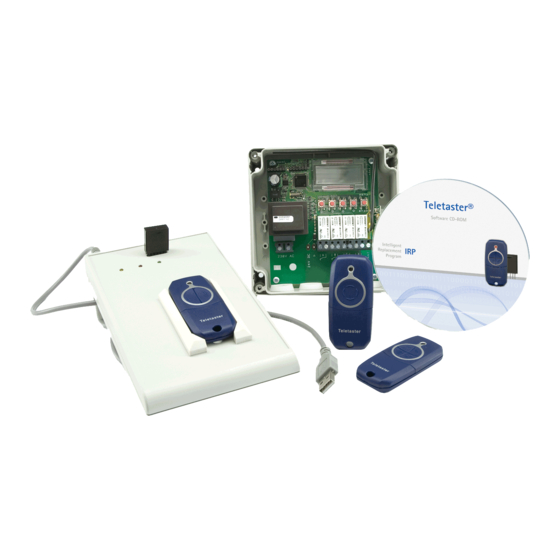
- Page 1 Tedsen ® Teletaster User manual...
-
Page 2: Table Of Contents
Contents Welcome 3 Software installation Quick guide Software overview Customers and properties Creating receivers Creating readers Transmitters and Transponders Transmission of transmitter data to a memory module Quick navigation Site keys 36 Holidays Appointments Technicians Single user / multi user Setting up the multi user version Database backups Password protection... -
Page 3: Welcome
US/download/details.aspx?id=53344. ® Install Teletaster IRP: Please execute the installer TeletasterIRP-EN.x.y.z.exe, where x.y.z. is a placeholder for the current version number. Starting Teletaster IRP To start Teletaster IRP, please press „Start“, choose “All programs” and select the folder called “Tedsen”. -
Page 4: Quick Guide
Quick guide Customers, properties, receivers, reader, transmitters and transponders To get started, create one or more customers. Once a customer is created, you can add properties to the customer. Find out more about the creation of customers and properties on page 10 in section “Customers and properties”. - Page 5 Site keys It is strongly recommended that you get familiar with the concept of “site keys”. Site keys are unique to a site. If you choose to use a site key for a site, this site key will be used for all receivers / readers in the site. The site key is required to generate replacement transmitters.
-
Page 6: Software Overview
Password protection If you decide to protect your data with a password you will be prompted for the password on every start of ® Teletaster IRP. Also, the database will be encrypted using the password. Read more on page 45 in section “ Password protection”. - Page 7 The “Receivers / Readers” tab The right-hand side of the main window displays information related to the currently selected site or address. You can click on any of the tabs named “Receivers / Readers”, “Transmitters / Transponders” or “Appointments”. This will display information related to the currently selected site or address: If you click on “Receivers / Readers”, all receivers and readers of the current site or address will be displayed:...
- Page 8 The “Transmitters / Transponders” tab If you select the “Transmitters / Transponders” tab, all transmitters and transponders associated to any receiver or reader of the current site / address will be displayed: If you chose one of the transmitters or transponders from Hint: the list, additional information related to the selected receiver or reader will be displayed in the right-hand...
- Page 9 The “Appointments” tab If you select the “Appointments” tab, all appointments associated with the current site / address will be displayed.
-
Page 10: Customers And Properties
How to filter entries You will find textboxes on top of most lists. If you need to find entries matching a certain text, simply enter the Hint: beginning of that text into the filter box located above the Your entries will be list. - Page 11 You may also press Ctrl+K to create a new customer. A dialog will open, prompting for the name of the customer to be created. You may add an address for your convenience. The address will be displayed when you rest the mouse pointer over the customer in the list.
- Page 12 If you have added an address and / or contacts to a customer you can quickly look at this information by resting the mouse pointer for a little moment over the customer: You can only delete a customer if no properties are associated to the customer.
- Page 13 representing special skills required of a technician working on a site. Tags are separated by spaces. This means that every single word you write is interpreted as one tag. If you want to use tags that consist of multiple words, think of joining the words with a dash (“-“) You can use the same tags when you create a technician.
-
Page 14: Creating Receivers
Select “Create address” to add the address to the current site. Deleting addresses You may only delete addresses if no receiver has been added to the address. To delete an address, chose the address from the list and press the “Del” key. Creating receivers Choose a site in the left area of the window. - Page 15 You will also want to select functions for each relay. This allows you to specify what will happen when a transmitter addresses this relay by pressing a button. Please choose “pulse”, “on or off”, “toggle” or “timer”. Functions of a Choose “Pulse”...
- Page 16 to the memory module of the receiver upon data transmission. Please be aware that the “site key” setting of the site / address the receiver belongs to will be used for the receiver. You will find more information in section “Site keys”...
- Page 17 Parameter Default setting IP-Adresse 169.254.0.80 Subnet-Mask 255.255.255.0 Port 8151 255.255.255.0 is usually the right value for the subnet mask. If your company is running a large intranet, you may need to modify this value. 255.255.0.0 is common for large networks. If in doubt, please ask your network administrator.
-
Page 18: Creating Readers
preservation of evidence is required to log “who opened that door yesterday at midnight.” Password encryption Press “Set Password” to set an individual password to be Secure connections used to encrypt the communication with the receiver. Communication with Changing the default password is recommended, as an the EKR(4)IRPTR is attacker knowing the default password might be able to protected by AES-... -
Page 19: Transmitters And Transponders
Transmitters and Transponders Adding new transmitters or transponders You can add one or more transmitters to a receiver and one or more transponders to a reader. Both transmitters and transponders are identified by a serial number. Initially, this serial number is identical to the “original serial number”... - Page 20 Adding number ranges In the upper left part of the window you can enter a range of serial numbers. You can do this by entering the first serial number of the range in the field labelled “Serial number from”, and either entering the amount of serial numbers you want to add in the field “Quantity”...
- Page 21 If you click “Add to list”, transmitters / transponders with Help: the chosen serial numbers will be added into the list on the right-hand side of the window. If transmitters or The names in the list transponders already exist in the system, their names will do not match the be fetched and displayed in the list.
- Page 22 transferred. Only later, as the need arises, you will write one of the virtual serial numbers already known by the receiver or reader to a transmitter or transponder. This saves you from having to touch the receiver or transponder every time you want to allow another transmitter / transponder to operate the receiver / reader.
- Page 23 “add to list”. All transmitters / transponders of the selected technicians will be added to the list. If you want to add all technicians from the list, please click on “Add all technicians”. Adding numbers of existing Receivers / Readers You will often want to add the same set of transmitters / transponders to multiple receivers / readers.
- Page 24 function “On or off”, you may need to decide if a key switches the relay on or off. Press “Ok” once you have chosen all switch functions. The chosen transmitters will now be added to the list of transmitters allowed to operate the receiver. Selecting relays for transponders If you are adding transponders to a reader, you can choose which relays of the reader are to be triggered by...
- Page 25 non-feasible time periods. A log entry is written anyway.
- Page 26 Examples for time settings Example 1: CEO without restriction during holidays The CEO has access at all times: Please note that “ignore holiday” has been checked. We Ignore holidays: want to make sure that the CEO gets access even during If set, access is holidays.
- Page 27 Example 2: Cleaning worker He/she is granted access in the early morning before anybody else starts and in the evening after most people have gone home: Example 3: Gym teacher He/she is granted access to the gym hall on Mondays and Tuesdays.
- Page 28 Example 4: Construction work Since work should be carried out without interfering the regular schedule, access is granted during weekends between 6am and 9:30 pm: Example 5: Hotel guest Access is granted from January 15 , 2:00pm until January 19 , 12:00 noon.
- Page 29 Example 6: Employee Access is granted on weekdays between 7am and 6pm: Example 7: Ski holidays The ski lift can be used between March 3 and March between 7:00 and 8:00 am and between 2:00 and 6:00 pm:...
- Page 30 Removing transmitters or transponders You can remove transmitters or transponders from the list of transmitters allowed to control a receiver. To do so, please select one or more transmitters from the list and Note: press the “Delete” button. When you delete This will only delete the association between the receiver transmitters or and the transmitter.
- Page 31 receivers / readers that could be controlled by the lost transmitter / transponder provided that the site key is not set for any of the receivers / readers or is the same for all receivers / readers. Please refer to section “Site keys” on page 36.
- Page 32 receiver and the “original serial number”. The original serial number will never change. The same is true for transponders: There is one serial number that is being sent to readers and the original serial number which never changes. Bi-Technology transmitters have three serial numbers: The original serial number and one number for each radio and RFID.
-
Page 33: Transmission Of Transmitter Data To A Memory Module
that was overwritten by accident. Please refer to the preceding section to learn how to do this. Find a transmitter / transponder by serial number If you know the serial number of a transmitter or transponder and want all data to be displayed, please proceed as follows: Select “Search for serial number...”... - Page 34 receiver / reader and attach it to the programming device into the socket next to the LEDs. The socket has an inverse-polarity protection so the memory module can only be attached in one direction. Please keep this in mind when plugging memory modules to the programming device.
-
Page 35: Quick Navigation
Hint: You can copy data from the tables to another application using copy and paste. Quick navigation Switching to the details of a transmitter / transponder When the “Receivers / Readers” tab is active you find a list of transmitters / transponders associated to the receiver / reader in the right-most column. -
Page 36: Site Keys
Switching from the transmitters / transponders view to the receivers / readers view To switch back to a receiver / reader from the detailed view of a receiver / reader, double-click the receiver / reader in the lower right-hand part of the window: Receivers / readers controlled by a transmitter / transponder Switch to the “Receivers / Readers”... - Page 37 been signed with the site key. Since a transmitter can only be created using one site key, it can only be used for receivers using that same site When should I use a key. This can cause problems: site key? If you use receivers with detachable memory modules as Use a site key if all well as receivers with fixed memory modules, you will find...
-
Page 38: Holidays
Note: Please make a choice about using site keys before you add any receivers to a site! Holidays Switch to the tab „Holidays“ to specify holidays. Think of a “holiday” as a time period were regular people cannot access the building. You may specify both a start time and date and an end time and date. -
Page 39: Appointments
Appointments You can create appointments for a site or an address. This is how you can create an appointment: Make sure you have created technicians. If you are using tags for a site or an address, please make sure that you have at least one technician in the list with all the tags of the site. -
Page 40: Technicians
After selecting a site, please switch to the “Appointments” tab. Choose a date from the calendar. Enter the description of the appointment and optional notes. Choose a technician from the list and press “Create appointment”. The appointment you created will be displayed in the list of appointments. -
Page 41: Single User / Multi User
Right below the tags you will find a list of transmitters assigned to the technician. To create a new transmitter for a technician press the “New” button and enter a serial number. You can decide whether the new transmitter is radio only, RFID only or both, by checking boxes. - Page 42 You’ll need to edit a config file located in the Teletaster IRP installation folder. On most computers this is something like C:\Programs\Tedsen\TeletasterIRP. Please open the file “Tedsen.TVSPro.Main.exe.config” in a texteditor such as Notepad. Microsoft Word is not suited for this task. Change <setting name="sqlServer"...
- Page 43 Configuring the SQL Server database In order to connect the software with a SQL Server database, please provide the following parameters: Server: The server connection string. The value is shown in the open dialogue of the Microsoft SQL Server Management Console. Database: Please enter the name of the database.
-
Page 44: Database Backups
Please back up your database regularly! You will find the database in this directory: c:\Documents and Settings\[USERNAME] \Application data\Tedsen\Teletaster IRP\ Please substitute [USERNAME] with the name of the window user you are logged in with. If you cannot find the directory, please check if it may be a hidden directory that is only displayed if you instruct Explorer to do so. -
Page 45: Password Protection
® Make sure Teletaster IRP is installed on the system. Copy the backup of the database to the original location c:\Documents and Settings\[USERNAME] \Application data\Tedsen\Teletaster IRP\ ® Start Teletaster IRP as usual. ® Please beware that Teletaster IRP checks if a database exists in the above mentioned location. - Page 46 If you want to remove the password protection, please leave the “New password” and “Repeat password” fields empty.
-
Page 47: Troubleshooting
Troubleshooting The software does not start Please check that you have installed the DotNet Framework 4.6. You can download it here: https://www.microsoft.com/en- US/download/details.aspx?id=53344 Problems with the programming device In rare cases the programming device may report problems related to reading and/or writing data. If this is the case, please ®...
Need help?
Do you have a question about the Teletaster IRP and is the answer not in the manual?
Questions and answers