Table of Contents
Advertisement
Quick Links
Advertisement
Table of Contents

Summary of Contents for AZZURRO ZCS 3-6-ZSS-HP
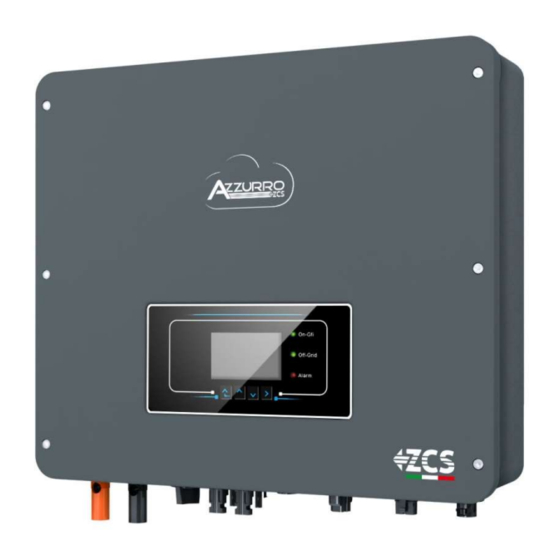
- Page 1 QUICK INSTALLATION GUIDE HYBRID INVERTER 3-6-ZSS-HP Rev. 1.0 – 23/05/2022...
- Page 2 1. INSTALLATION AND DISTANCES Always wear protective General notice - Always consult the clothing and/or personal Important Safety manual protective equipment Instructions Maximum height from ground permitted: 180 cm 1. INSTALLATION Distances for installations of multiple inverters Correct installation in Maximum inclination vertical position permitted: 15°...
-
Page 3: Lights And Buttons
3. LIGHTS AND BUTTONS Charge On Grid Off-Grid Alarm Status of the HYD-ES Menu/Back System status inverter Green light Green light Red light PV production On-grid Down 10. Grid power Standby (On-Grid) Intermittent Enter/Forward 11. Home Off-Grid Discharge status consumption Charge status 12. - Page 4 5. QUICK INFO ON SYSTEM STATUS Press the “↓” key once from the main menu to access the instantaneous information on the battery and AC grid. Press the “↑” key once from the main menu to access the instantaneous information on the DC side of the inverter. 6.
-
Page 5: Battery Connection
3.1 Connessione Batteria If the system has to be switched off, make sure to disconnect the AC voltage first by opening the dedicated switch. NEVER turn off the batteries before disconnecting the AC voltage, therefore with the storage system connected to the AC grid. 7. - Page 6 8.2 PYLONTECH BATTERIES IN PARALLEL Note: To connect multiple batteries in parallel, use the appropriate cables (power and connection) contained in the kit. 3.1 Connessione Batteria Master Slave 1 Slave n Note: The DIP switch positions must be set according to the factory settings When connecting multiple batteries in parallel, connect the communication cable between the inverter's CAN port and the CAN port of one of the batteries.
- Page 7 Note: Turn off the batteries each time the position of the DIP switches changes. In case of multiple batteries connected in parallel or when adding new batteries to a system with batteries already installed and working, make sure that the difference between the voltages of all the batteries is less than 1.5 Volt. Each battery must be measured individually, therefore make sure the batteries are not connected to each other.
- Page 8 Connecting 2 batteries MASTER SLAVE 1 Connecting 3 batteries MASTER SLAVE 1 SLAVE 2 Connecting 4 batteries SLAVE 1 SLAVE 3 MASTER SLAVE 2 Connecting 5 batteries MASTER SLAVE 1 SLAVE 3 SLAVE 2 SLAVE 4...
- Page 9 8.5 BATTERIA 4K4PRO WECO SINGOLA Inverter COM connector Note: Maximum DoD programmable 90% Note: The communication cables are in the kit that is contained in the WeCo battery box Note: Turn off the batteries each time the position of the DIP switches is changed. presente nella scatola dell’inverter.
- Page 10 Connecting 2 batteries MASTER SLAVE 1 Connecting 3 batteries SLAVE 1 MASTER SLAVE 2 Connecting 4 batteries MASTER SLAVE 1 SLAVE 3 SLAVE 2 Connecting 5 batteries MASTER SLAVE 1 SLAVE 3 SLAVE 2 SLAVE 4...
- Page 11 8.7 SINGLE 5k3 WECO BATTERY 8.7 SINGLE 5k3 WECO BATTERY Inverter COM connector Note: Maximum DoD programmable 90% Note: The communication and power cables must be ordered separately Note: Turn off the batteries each time of the DIP switches is position changed. In case of multiple batteries connected in parallel or when adding new batteries to a system with batteries already installed and operating, make sure that the...
- Page 12 CORRECT CONNECTION INCORRECT CONNECTION Connecting 2 batteries MASTER SLAVE 1 Connecting 3 batteries MASTER SLAVE 1 SLAVE 2 Connecting 4 batteries SLAVE 3 SLAVE 2 SLAVE 1 MASTER Connecting 5 batteries SLAVE 4 SLAVE 3 SLAVE 2 SLAVE 1 MASTER...
- Page 13 8.7 SINGLE 5k3 WECO BATTERY 8.9 SINGLE 5k3XP WECO BATTERY Inverter COM connector Note: Maximum DoD programmable 90% Note: The communication and power cables must be ordered separately Note: Turn off the batteries each time of the DIP switches is position changed. In case of multiple batteries connected in parallel or when adding new batteries to a system with batteries already installed and operating, make sure that the...
- Page 14 CORRECT CONNECTION INCORRECT CONNECTION Connecting 2 batteries MASTER SLAVE 1 Connecting 3 batteries MASTER SLAVE 1 SLAVE 2 Connecting 4 batteries SLAVE 3 SLAVE 2 SLAVE 1 MASTER Connecting 5 batteries SLAVE 4 SLAVE 3 SLAVE 2 SLAVE 1 MASTER...
- Page 15 8.11 5K3XP BATTERIES AND 5K3 BATTERIES IN PARALLEL Connecting 3 batteries: Master 5K3XP MASTER SLAVE 1 SLAVE 2 Slave 1 5K3 Slave 2 5K3 Connecting 4 batteries: SLAVE 3 SLAVE 2 SLAVE 1 MASTER Master 5K3XP Slave 1 5K3 Slave 2 5K3 Slave 3 5K3 Connecting 5 batteries:...
- Page 16 Negative power cable Ground cable (PE) 8.13 AZZURRO 5000 BATTERIES IN PARALLEL In the event of MULTIPLE BATTERIES, connect the communication cable from the CAN port of the inverter to the CAN port of the MASTER battery. The MASTER battery must be connected to the communication cable found inside the battery box starting from the LINK OUT port and arriving at the LINK IN communication port of the Slave 1 battery.
- Page 17 9.1 MEASUREMENT OF THE EXCHANGE THROUGH CURRENT SENSOR Fase 2 Fase 3 + + + + + 10 11 + + + + + + + + + + 13 14 15 16 definition only for distances between Inverter and CT below 50m Connect the sensor negative wire in input 13 of the COM connector Connect the sensor positive wire in input 14 of the COM connector...
- Page 18 Inverter Exchange PV Panels Breaker meter Battery The sensor must include all phase cables entering or leaving the meter 9.2 MEASUREMENT OF THE EXCHANGE POWER THROUGH METER INVERTER PIN METER PIN Nota Exchange meter communication PV Panels Grid Meter Exchange meter Load Battery...
- Page 19 Connessioni Meter 1. Connect Meter and inverter trough the RS485 port.On the Meter this port is identified by PIN 24 e 25. 24 25 On the inverter this port is identified by PIN 16 e 15 on the COM conector Meter for 15 16 exchange...
- Page 20 9.4 MEASUREMENT OF EXTERNAL PRODUCTION THROUGH METER PV Panels Rete Inverter Exchange Meter for Meter external prioduction PIN INVERTER PIN METER Nota Communication between inverter and production meter Loads Battery Connessioni Meter 1. Connect Meter and inverter trough the RS485 port.On the Meter this port is identified by PIN 24 e 25.
-
Page 21: Meters Configuration
9.5 SETTING METER FOR EXTERNAL PRODUCTION 1. Verify, using the push button That the Meter is 002. In the Meter display are visible also: Current; Voltage; Power Factor ; Power. Indirizzo Tensione Power factor Corrente Potenza 1.2 Address setting on the production Meter: Press for 5 seconds The display will... -
Page 22: Grid Connection
9. 7 METER READING VERIFICATION In order to verify the correct reading on the exchange meter in required to turn off the PV production, turn on some loads and using the arrow verify that the Power is consistent with the expected power consumption and the value is Negative (-). - Page 23 Make sure that all the DC string parameters are acceptable to the inverter in accordance with the technical specifications given in the datasheet and in the Azzurro ZCS configurator. In addition, check that the polarities of the photovoltaic cables are correct. Insert the positive and negative connectors of the HYD-ES inverter until you hear a “click.”...
-
Page 24: Start-Up Procedure
> 200W Loads Turn on the batteries: To turn on the In case of WeCo or Azzurro batteries, press the Press the red SW button of POWER button of each battery for 1 second, the Pylontech batteries: a single battery for one... -
Page 25: First Configuration
1. Language OSD The default language is English 2. Date and time setting The safety parameters need to be downloaded from the Azzurro webpage *3. Safety parameters setting and upload in the inverter using a USB memory. *4Battery paramenters setting 5. -
Page 26: Checking For Correct Operation
14. CHECKING FOR CORRECT OPERATION 1) Turn the PV circuit breaker to the OFF position and disconnect the inverter from the grid Hyd HP Grid Battery 2) Restore AC voltage by flicking the dedicated switch upwards: Hyd HP Grid Battery 3) Check that the power value taken from the grid display is approximately equal to the power consumption shown on the meter, or to the value obtained by using a current meter to measure under the import/export meter. - Page 27 •PV=Load Battery is in stanby Battery Note: When using WeCo or Azzurro batteries at the first power on the Battery will charge from the grid until ridge 100% Nota: If the above condition are not verified check the correct position and setting...
- Page 28 EPS : Disabled 15.2 CHECKING BATTERY’S SETTING To check if the battery’s parameters are correctly , enter the display menu under “Battery Info” and check the data, especially those highlighted Azzurro ZSX5000 Pylontech Weco 5K3 Weco 4K4 / 4K4PRO Batterie-Info (1)
- Page 29 16. ZERO IMMISSION MODE 2. Advanced setting Enter 0001 2. Anti-reflux enable User can enable the " anti-reflux control " in order to limit the power that can be exported to the grid. The setted 1. Anti- reflux control → disable value for Reflux power is the max power that can be exported to the Grid.
- Page 30 CHANGE-OVER SWITCH Is recommended to install a change-over switch in order to be able to disconnect the load from power during maintenance operation or to connect the load to the grid in case of inverter failure. GRID GRID Position 1→ Priority loads connected and LOAD powered by the inverter's LOAD line Position 0→...
- Page 31 In case of a power outage the inverter will activate the internal switch and supply a 230 VAC to the output Load assuming that the battery are sufficient charged. 0.00V 230V NOTE: with this configuration, the system becomes an IT system during a blackout. Note: During operation in EPS mode, if the batteries are sufficiently charged, the system will be able to deliver a maximum alternating current equal to: •...
-
Page 32: Off Grid Mode
19.1 OFF GRID MODE The Inverter HYD-ES can be used in Stand Alone system .The energy provided by the Solar panel can be stored in the batteries and provided to the load connected to the AC load Inverter. EPS function need to be enabled (Emergency Power Supply). - Page 33 20.1 PARALLEL INVERTER MODE- CONFIGURATION Al primo ed all’ultimo inverter devono essere connesse le resistenze di terminazione (fornite in dotazione ) Cavo connessione parallelo fornito in dotazione di lunghezza 2,5m 1.The inverters need to be connected using the cable provided in the inverter box as described below: •Link port 0 Master inverter→...
-
Page 34: Firmware Update
5. Software upgrade 6. Energy statistics In order to upgrade the firmware download in a USB memory the firmware from the link https://www.zcsazzurro.com/it/documentazione/azzurro-hybrid-storage-inverter-single-phase-ep5kw Make sure to decompress the file and leave it in a folder named firmware. 22. AUTOTEST Before running the self-test make sure the correct country...
Need help?
Do you have a question about the ZCS 3-6-ZSS-HP and is the answer not in the manual?
Questions and answers